
2022 Volvo XC40 Your Volvo Settings
Resetting user data for the change of ownership
The settings in the car can be reset at different levels. Restore all user data and system settings to the original factory settings in the event of a change of ownership. In the event of a change of ownership, it is also important to change the owner of the Volvo On Call service.
Other settings in the center display’s top view
Open the top view by pressing on the tab at the top or by dragging/swiping from the top downwards across the screen.
Press Settings to open the settings menu.
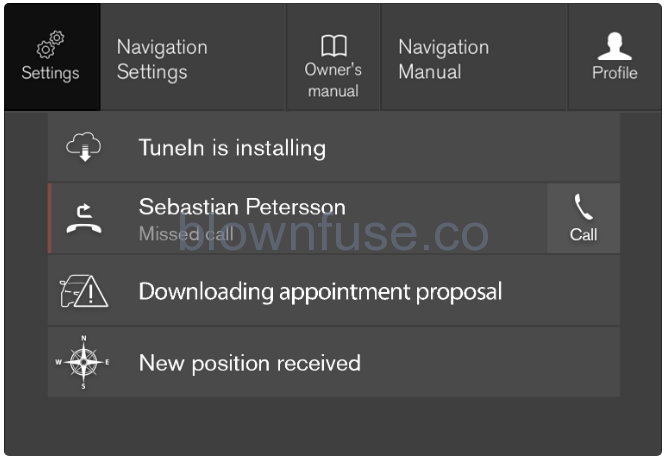 Top view with a button for .
- Press on one of the categories and the subcategories to navigate to the required setting.
- Change one or more settings. Different types of settings are changed in different ways.
- The changes are saved immediately.
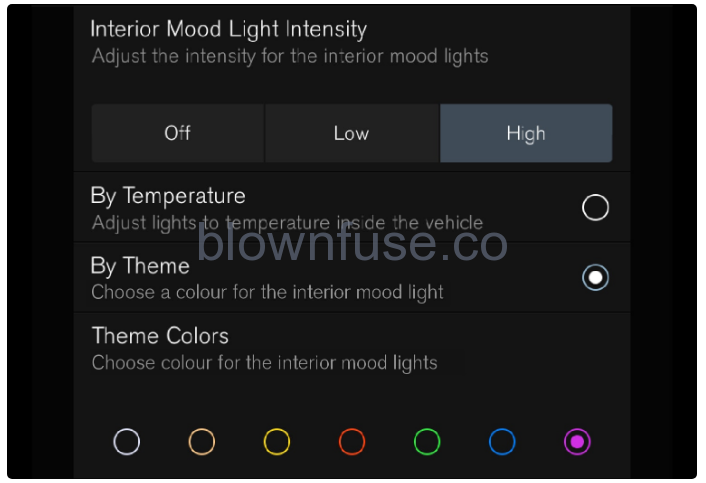 A subcategory in the settings menu with different types of settings (here, a multi-selector button and radio buttons).
Resetting settings in the center display
Two types of reset
There are two different types of restore operations in the settings menu:
- Factory reset – clears all data and files and resets all settings to their default values.
- Reset Personal Settings – clears personal data and resets personal settings to their default values.
Resetting settings
Follow these instructions to reset your settings.
Note
- Factory reset is only possible when the car is stationary.
- Tap on Settings in the center display’s top view.
- Continue to .
- Select the required reset type.
- A pop-up window is shown.
- Press OK to confirm the reset.
- For Reset Personal Settings, the reset must be confirmed by pressing Reset for the active profile or Reset for all profiles.
- Selected settings are reset.
Open contextual set up in the center display
 Top view with a button for contextual setting.
- A contextual setting is a shortcut for accessing a specific setting relating to the active function shown on the screen.
- The apps installed in the car from the beginning, e.g. FM radio and USB, are a part of Sensus and are part of the car’s embedded functions.
- The settings for these apps can be changed directly via contextual settings in the top view.
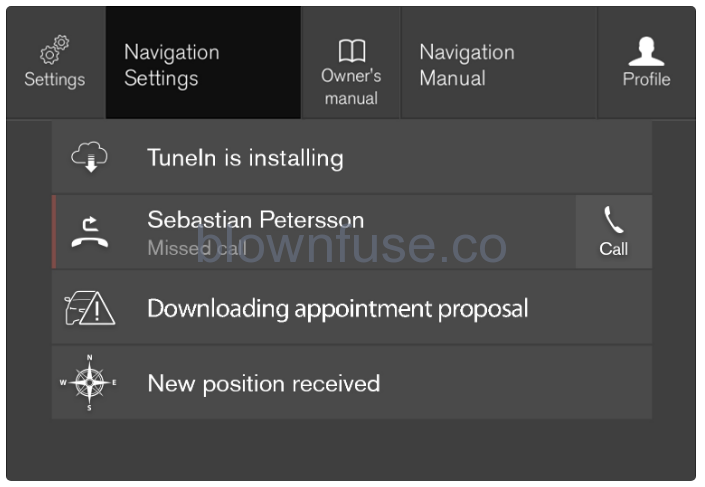
- When contextual setup is available:
- Drag down the top view when an app is in expanded mode, e.g. Navigation.
- Press Navigation Settings.
- A navigation settings page opens.
- Change settings as desired and confirm the selections.
- Press Close or the physical home button beneath the center display to close the setup view.
- Most of the car’s basic apps have this contextual setting option, but not all.
Third-party apps
Third-party apps are not included in the car’s system from the beginning but are the type that can be downloaded e.g. Volvo ID. Here the settings are always made inside the app and not from the top view.
Changing system units
- Unit settings are defined in the center display’s Settings menu.
- Press Settings in the top view in the center display.
- Continue to .
- Select a unit standard:
- Metric – kilometers, liters, and degrees Celsius.
- Imperial – miles, gallons, and degrees Celsius.
- US – miles, gallons, and degrees Fahrenheit.
- The units in the driver display and center display are changed.
Switching off and changing system sound volume in the center display
- The center display can be used to change the volume of the system sound or switch off the system sound altogether.
- Press Settings in the top view in the center display.
- Press .
- Under Touch Sounds, drag the control to change the volume/switch off screen touch sounds. Drag the control to the desired volume.
Changing system language
Note
- Changing the language in the center display may mean that some owners’ information is not compliant with national or local laws and regulations. Do not switch to a language that is difficult to understand as this may make it difficult to find your way back through the screen structure.
- Press Settings in the top view in the center display.
- Continue to .
- Select System Language.
- Languages that support voice control have a voice control symbol.
- The language in the driver display and center display is changed.
Changing appearance in the center display
- The appearance of the screen in the center display can be changed by selecting a theme.
- Press Settings in the top view.
- Press .
- Then select a theme, e.g. Minimalistic or Chrome Rings.
- As a supplement to these appearances, it is possible to choose between Normal and Bright.
- With Normal, the screen background is dark and the text is light.
- This alternative is the default for all themes. A light variant can also be selected, in which the background is light and the text is dark. This alternative can be useful in e.g. strong daylight.
- This alternative is always available for the user and is not affected by the surrounding lighting.
Show trip data in the driver display
The values are saved in a trip computer app. Via the app menu, you can choose which information is shown on the driver display.
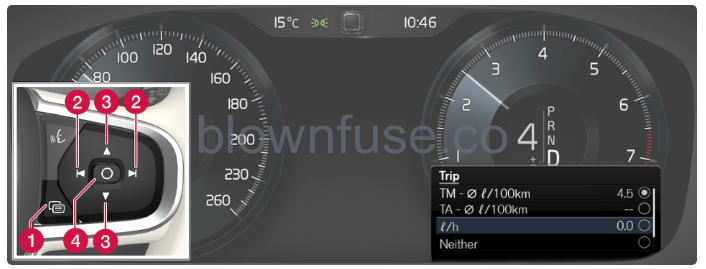 Open and navigate in the app menu using the right-hand steering wheel keypad.
- App menu
- Left/right
- Up/down
- Confirm
- Open the app menu in the driver display by pressing (1).
- (It is not possible to open the app menu when there is an unacknowledged message in the driver display. The message first has to be confirmed by pressing the O button (4) before the app menu can be opened.)
- Navigate to the trip computer app to the left or right with (2).
- The top four menu rows show measured values for trip meter TM. The next four menu rows show measured values for trip meter TA. Scroll up or down in the list with (3).
- Scroll down to the option buttons to select which information to show in the driver display:
- Odometer
- Distance to empty tank
- Tourist (alternative speedometer)
- Mileage for trip meter TM, TA, or no display of mileage
- Instantaneous fuel consumption, average consumption for TM or TA, alternatively, no display of fuel consumption
- Select or deselect an option with the O button (4). The change is made immediately.
Settings for trip statistics

Press Preferences to
- change the graph scale. Select resolution 1, 10, or 100 km/miles for the bar.
- reset data after every trip. Performed when the car has been stationary for more than 4 hours.
- reset data for the current trip.
- Trip statistics, calculated average consumption, and total driving time are always reset simultaneously.
- Units for distance, speed, etc. can be changed via system settings in the center display.
Driver display settings
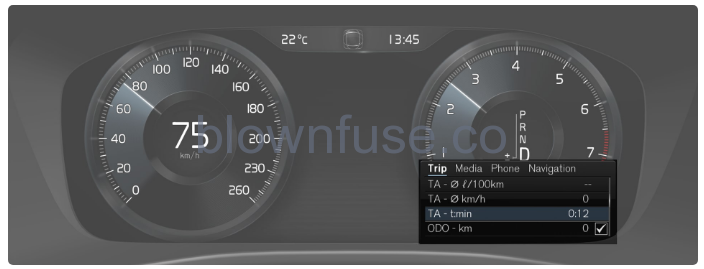 The figure is schematic – parts may vary depending on the car model.
The app menu is opened and controlled using the right-hand keypad on the steering wheel.
In the app menu, you can choose which information is shown on the driver display from:
- trip computer
- media player
- phone
- navigation system.
Settings via the center display
Selecting information type
- Tap on Settings in the center display’s top view.
- Press .
- Select what should be shown in the background:
- Show no information in the background
- Show information for current playing media
- Show navigation even if no route is set
Selecting theme
- Tap on Settings in the center display’s top view.
- Tap on .
- Select a theme (appearance) for the driver display:
- Glass
- Minimalistic
- Performance
- Chrome Rings
Selecting language
- Tap on Settings in the center display’s top view.
- Tap on to select language.
- A change will affect the language in all displays.
- These settings are personal and are saved automatically to the active driver profile.
Date and time
Clock location
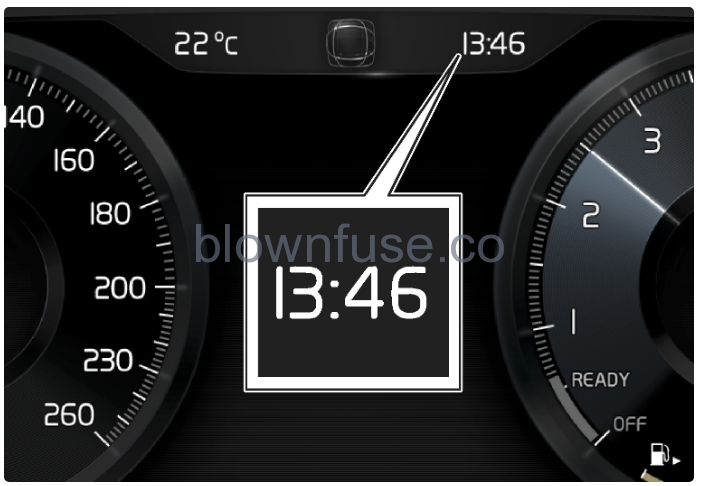
In certain situations, messages and information may cover the clock in the driver’s display.
In the center display, the clock is located at the top right of the status bar.
Date and time settings
Select in the center display’s top view to change settings for time and date format.
Adjust the date and time by pressing the up or down arrow on the touch screen.
Automatic time for cars with GPS
When the car is equipped with a navigation system, Auto Time can be selected. The time zone is then adjusted automatically based on the location of the car. For certain types of navigation systems, the current location (country) must also be set to obtain the right time zone. If Auto Time is not selected, time and date are adjusted with an arrow up or arrow down on the touch screen.
Summertime
In certain countries, it is possible to select the Auto Daylight Saving Time setting for the automatic setting of summertime. For other countries, the Daylight Saving Time setting can be selected manually.
If the battery has been disconnected
If the clock has been reset following the disconnection of the car’s battery after a visit to a service workshop, for example, you may need to reset the time on the clock. If the clock is not set, this may affect the car’s Internet connection.
User terms and conditions and data sharing
The purpose is to inform about Volvo’s user terms and conditions and policy for data sharing. By accepting data sharing, the user accepts that certain information is sent from the car. This is required so that certain services and apps can have full functionality.
The data sharing function for online services and apps is deactivated as default. Data sharing needs to be activated so that certain online services and apps in the car can be used. Data sharing can be set from the center display’s settings menu or in connection with the services or apps being started in the center display.
Privacy and data sharing
With the software update made available in November 2017, privacy and data sharing settings were introduced for online services and downloaded apps. The settings can be found under Privacy and data in the settings menu in the car’s center display. There you can select the online services which are allowed to share data. Data sharing for downloaded apps can also be deactivated there. Note that services and apps cannot be used as intended if data sharing is deactivated. After a factory reset or e.g. a workshop visit or software update, the data sharing settings may have been reset to their default settings. In this case, reactivate data sharing for online services and for downloaded apps.
Privacy and data sharing settings are unique for every driver profile.
Activating and deactivating data sharing
- Data sharing for services and apps required can be set in the center display’s settings menu.
- Tap on Settings in the center display’s top view.
- Press .
- Select activation or deactivation of data sharing for individual services and all apps.
- If data sharing has not been activated for an online service or downloaded apps, this can be done when they are started in the center display. If this is the first time a service is started, or e.g. after a factory reset or certain software updates, Volvo’s terms and conditions for online services need to be approved. Note that data sharing will then also be activated for other services or apps for which sharing has already been approved.
After a visit to a Volvo workshop, you may need to reactivate data sharing so that the online services and apps shall work again.
Settings for unlocking
- You can change the setting for unlocking using the button on the key. Either all doors are unlocked with one press of the button, or only the driver’s door is unlocked with one press of the button and the
- remaining doors with two presses of the button.
- The settings made here also affect central unlocking via opening handles from the inside.
- Tap on Settings in the center display’s top view.
- Press .
Select option:
- All Doors – unlocks all doors simultaneously.
- Single Door – unlocks the driver’s door. Unlocking all of the doors requires two presses on the key’s unlock button.
Settings for Care Key
Setting options
The following limitations are available to be set:
- Speed interval: 50-180 km/h (30-112 mph)
- Increments: 1 km/h (1 mph)
Setting
- Unlock the car using a key other than a Care Key.
- Tap on Settings in the center display’s top view.
- Press .
- Tick the box for activating the limitation and set the required limitation.
Lock indication setting
Different types of lock response
- Tap on Settings in the center display’s top view.
- Press .
- Press Visible Locking Feedback to select when the car is to give a visible response:
- Lock
- Unlock
- Both
Or switch off the function by selecting Off.
Automatic retraction of rearview mirrors when locking
- Tap on Settings in the center display’s top view.
- Press .
- Select Fold Mirror When Locked to activate or deactivate the function.
Settings for Keyless entry
- You can choose which doors are unlocked when using the keyless unlocking function.
- To change the setting:
- Tap on Settings in the center display’s top view.
- Tap on .
- Select option:
- All Doors – unlocks all doors simultaneously.
- Single Door – unlocks the selected door.
Automatic parking brake activation setting
- Choose whether the parking brake is to be activated automatically when the car is switched off.
- To change the setting:
- Tap on Settings in the center display’s top view.
- Press to select or deselect the function Auto Activate Parking Brake.