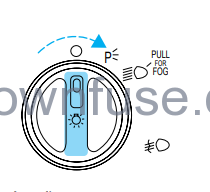
HEADLAMP CONTROL
Rotate the headlamp control to the
first position to turn on the parking
lamps. Rotate to the second position
to also turn on the headlamps.
Daytime running lamps (DRL) (if equipped
Turns the headlamps on with a reduced output. To activate:
• the engine must be running and
• the headlamp control is in the OFF or Parking lamp position.
Always remember to turn on your headlamps at dusk or during
inclement weather. The Daytime Running Light (DRL) System
does not activate your tail lamps and generally may not provide
adequate lighting during these conditions. Failure to activate your
headlamps under these conditions may result in a collision.
Foglamp control (if equipped)
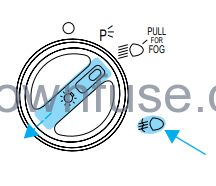
The headlamp control also operates
the foglamps. The fog lamps can be
turned on only when the headlamp
control is in the position and
the high beams are not turned on.
Pull headlamp control towards you
to turn foglamps on. The foglamp
indicator light will illuminate.
PANEL DIMMER CONTROL
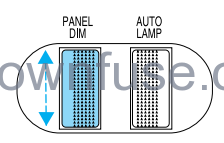
Use to adjust the brightness of the
instrument panel during headlamp
and park lamp operation.
• Rotate up to brighten.
• Rotate down to dim.
• Rotate to the full down position to
turn off.
AUTOLAMP CONTROL (IF EQUIPPED)
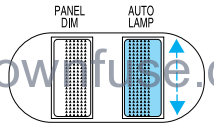
The auto lamp system provides light
sensitive automatic on-off control of
the exterior lights normally
controlled by the headlamp control.
The auto lamp system also keeps the
lights on for a preselected period of
time after the ignition switch is
turned to OFF.
• To turn auto lamps on, rotate the
control up. The preselected time-lapse is adjustable up to
approximately three minutes by continuing to rotate the control
upward.
• To turn auto lamps off, rotate the control down until it clicks.
• Foglamps are not controlled by the auto lamps. In order to turn on the
foglamps, you must turn the lamp switch to the position and pull
toward you for fog.
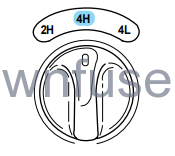
4WD CONTROL (IF EQUIPPED)
This control operates the 4WD.
Refer to the Driving chapter for
more information.
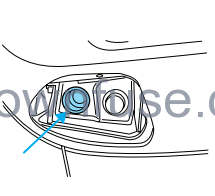
AUXILIARY POWER POINT
The auxiliary power point is located
on the instrument panel.
Do not plug optional electrical
accessories into the cigarette lighter.
Use the PowerPoint.
USING YOUR AUDIO SYSTEM
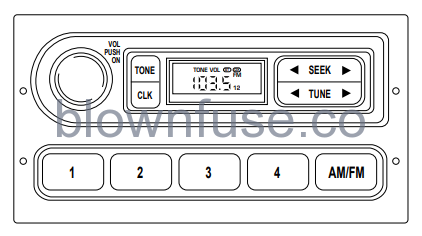
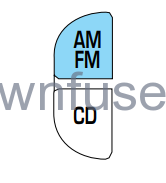
AM/FM Stereo
AM/FM Stereo
Your vehicle is equipped with a delayed accessory feature. This feature
enables the audio playing media to continue playing up to 10 minutes
after the ignition has been turned off, or until a door is opened.
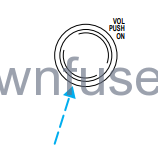
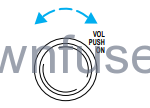
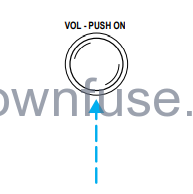
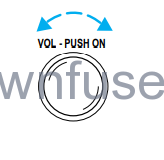
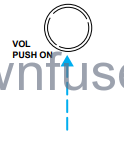
Volume/power control
Press the control to turn the audio
system on or off.
Turn the control to raise or lower
volume.
AM/FM select

If the volume is set above a certain level and the ignition is turned off,
the volume will come back on at a “nominal” listening level when the
ignition switch is turned back on.
The AM/FM select control works in
radio mode.
AM/FM select in radio mode
This control allows you to select AM or FM, frequency bands. Press the
control to switch between AM, FM1, or FM2 memory preset stations.
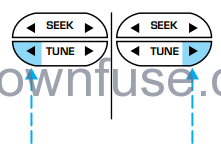
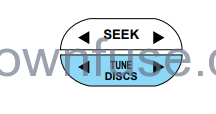
Tune adjust
The tune control works in radio mode.
Tune adjust in radio mode
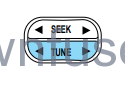
• Press to move to the next
frequency down the band
(whether or not a listenable
the station is located there). Hold the
control to move through the
frequencies quickly.
• Press to move to the next frequency up the band (whether or not
a listenable station is located there). Hold for quick movement.
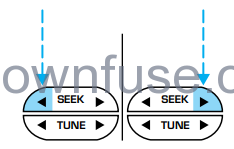
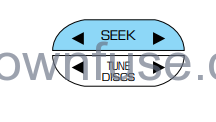
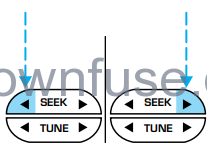
Seek function
The seek function control works in radio mode.
Seek function in radio mode
• Press to find the next
listenable station down the
frequency band.
• Press to find the next
listenable station up the
frequency band.
Radio station memory preset
The radio is equipped with four station memory preset controls. These
controls can be used to select up to four preset AM stations and eight
FM stations (four in FM1 and four in FM2).
Setting memory preset stations
- Select the frequency band with the AM/FM select control.
- Select a station. Refer to Tune adjust or Seek function for more
information on selecting a station. - Press and hold a memory preset control until the sound returns,
indicating the station is held in memory on the control you selected.

Bass adjust
The bass adjust control allows you
to increase or decrease the audio
system’s bass output.
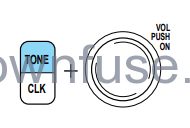
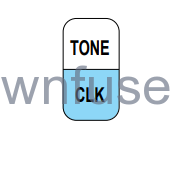
With the electronic AM/FM stereo,
press the TONE control once, then
use the volume knob to adjust the
level.
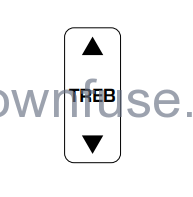
Treble adjust

The treble adjust control allows you
to increase or decrease the audio
system’s treble output.
With the electronic AM/FM stereo,
press the TONE control twice, then
use the volume knob to adjust the
level.
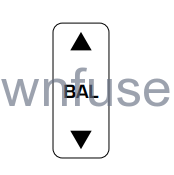
Speaker balance adjust
Speaker sound distribution can be
adjusted between the right and left
speakers.
With the electronic AM/FM stereo,
press the TONE control three times,
then use the volume knob to adjust
the level.
Speaker fade adjust (if equipped)
Speaker sound can be adjusted
between the front and rear
speakers.
With the electronic AM/FM stereo,
press the TONE control four times,
then use the volume knob to adjust
the level.
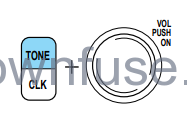
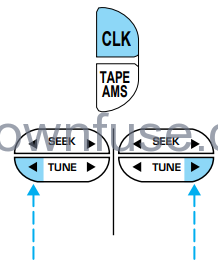
Setting the clock
Press CLK to toggle between
listening frequencies and clock
mode.
To set the hour, press and hold the
CLK control and press:
 to decrease hours and
 to increase hours.
To set the minute, press and hold
the CLK control and press:
- to decrease minutes and
- to increase minutes.
The CLK control will allow you to
switch between media display mode
(radio station, stereo information,
etc.) and clock display mode (time).
When in clock mode, the media
information will display for ten
seconds, when the radio is turned
on, and then revert to clock
information. Anytime that the media is changed, (new radio station,
etc.), the media information will again display for ten seconds before
reverting back to the clock. In media mode, the media information will
always be displayed.
Your vehicle is equipped with a delayed accessory feature. This feature
enables the audio playing media to continue playing up to 10 minutes
after the ignition has been turned off, or until a door is opened.
Volume/power control
Press the control to turn the audio
system on or off.
If the volume is set above a certain level and the ignition is turned off,
the volume will come back on at a “nominal” listening level when the
the ignition switch is turned back on.
AM/FM select
The AM/FM select control works in
radio, tape, and CD changer modes
(if equipped).
AM/FM select in radio mode
This control allows you to select AM or FM, frequency bands. Press the
control to switch between AM, FM1, or FM2 memory preset stations.
AM/FM select in tape mode
Press this control to stop tape play and begin radio play.
AM/FM select in CD changer mode (if equipped)
Press this control to stop CD play and begin radio play.
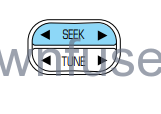
Tune adjust
The tune control works in radio and CD changer modes (if equipped)
Tune adjust in radio mode
• Press![]() to move to the next
to move to the next
frequency down the band
(whether or not a listenable
the station is located there). Hold the
control to move through the
frequencies quickly.
• Press![]() to move to the next frequency up the band (whether or not
to move to the next frequency up the band (whether or not
a listenable station is located there). Hold for quick movement.
Tune adjust for CD changer (if equipped)

• Press ![]() to select the previous
to select the previous
disc in the CD changer. (Play will
begin on the first track of the
disc unless the CD changer is in
shuffle mode. Refer to the Shuffle
feature for more information. Hold the control to continue reversing
through the disc.
• Press![]() to select the next disc in the CD changer. Hold the control
to select the next disc in the CD changer. Hold the control
to fast-forward through the remaining discs.
Seek function
The seek function control works in radio or CD changer mode.
Seek function in radio mode
• Press ![]() to find the next
to find the next
listenable station down the
frequency band.
Seek function for CD changer (if equipped)

• Press![]() to seek to the previous
to seek to the previous
track of the current disc. If a
the selection has been playing for
three seconds or more and you
press![]() , the CD changer will
, the CD changer will
replay that selection from the beginning.
• Press ![]() to seek forward to the next track of the current disc. After
to seek forward to the next track of the current disc. After
the last track has been completed, the first track of the current disc
will automatically replay.

Scan function
The scan function works in radio or
CD changer mode (if equipped).
Scan function in radio mode
Press the SCAN control to hear a brief sampling of all listenable stations
on the frequency band. Press the SCAN control again to stop the scan
mode.
Scan function in CD changer mode (if equipped)
Press the SCAN control to hear a brief sampling of all selections on the
CD. (The CD scans in a forward direction, wrapping back to the first
track at the end of the CD.) To stop on a particular selection, press the
SCAN control again.
Radio station memory preset
The radio is equipped with six station memory preset controls. These
controls can be used to select up to six preset AM stations and twelve
FM stations ( six in FM1 and six in FM2).
Setting memory preset stations
- Select the frequency band with the AM/FM select control.
- Select a station. Refer to Tune adjust or Seek function for more
information on selecting a station. - Press and hold a memory preset control until the sound returns,
indicating the station is held in memory on the control you selected.


Bass adjust
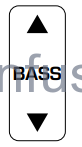
The bass adjust control allows you
to increase or decrease the audio
system’s bass output.
Treble adjust
The treble adjust control allows you
to increase or decrease the audio
system’s treble output.
Speaker balance adjust
Speaker sound distribution can be
adjusted between the right and left
speakers.
Speaker fade adjust

Speaker sound can be adjusted
between the front and rear
speakers.

Tape select
• To enter tape mode while in radio
or CD changer mode, press the
TAPE control.
• If no tape is found, NO TAPE
appears in the display
Automatic Music Search
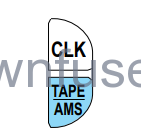
The Automatic Music Search feature
allows you to quickly locate the
beginning of the tape selection
being played or to skip to the next
selection.
To activate the feature, momentarily
depress the TAPE AMS button.
Then, press either REW (for the beginning of the current selection) or
FF (to advance to the next selection). The tape deck stops and returns
to play mode when the AMS circuit senses a blank section on the tape.
In order to ensure proper operation of the AMS feature, the tape MUST
have a blank section of at least 4 seconds duration between programs.
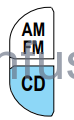
CD changer select (if equipped)
• To enter CD changer mode while
in radio or tape mode, press the
CD control.
Rewind
The rewind control works in tape and CD changer (if equipped) modes.
To rewind in tape mode, press the
SIDE/REW control.

Press the 1–2/FF control to stop
rewinding the tape.

To rewind in CD changer mode,
press the CD control (preset 1).
Press the control again to deactivate
rewind mode.

Fast forward
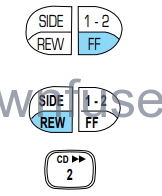
The fast forward control works in tape and CD changer modes.
To fast forward in tape mode, press
the 1–2/FF control.
Tape direction will automatically
reverse when the end of the tape is
reached.
Press the SIDE/REW control to stop
the fast forward of the tape.
To fast forward in CD changer mode,
press the CD control (preset 2).
Press the control again to deactivate
fast forward mode.

Compression feature (if equipped)
Compression adjust brings soft and
loud CD passages together for a
more consistent listening level.
Press the COMP control to activate
and deactivate compression adjust.

Shuffle feature (if equipped)
The shuffle feature operates in CD
changer mode and plays all tracks
on the current disc in random order.
The shuffle feature continues to the
next disc after all tracks are played.
Press the SHUFFLE control to start this feature. Random order play will
continue until the SHUFFLE control is pressed again.

Tape direction select
Press SIDE and 1–2 at the same
time to play the alternate side of a
tape.
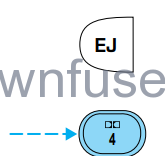
Eject function
Press the control to stop and eject a
tape.
Dolby noise reduction
Dolby noise reduction operates
only in tape mode. Dolby reduces
the amount of hiss and static during
tape playback.
Press the ![]() control to activate (and deactivate) Dolby noise reduction.
control to activate (and deactivate) Dolby noise reduction.
The noise reduction system is manufactured under license from Dolby
Laboratories Licensing Corporation.

Setting the clock
Press CLK to toggle between
listening frequencies and clock
mode while in radio mode.
To set the hour, press and hold the
CLK control and press:
- to decrease hours and,
- to increase hours.
To set the minute, press and hold
the CLK control and press:
- to decrease minutes and
- to increase minutes.
The CLK control will allow you to switch between media display mode
(radio station, stereo information, etc.) and clock display mode (time).
When in clock mode, the media information will display for ten seconds,
when the radio is turned on, and then revert to clock information.
Anytime that the media is changed, (new radio station, etc.), the media
information will again display for ten seconds before reverting back to
the clock. In media mode, the media information will always be
displayed.
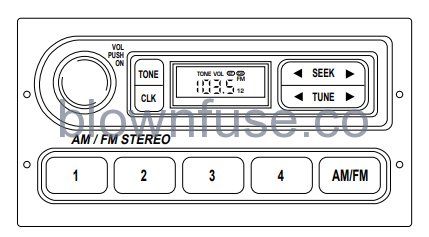
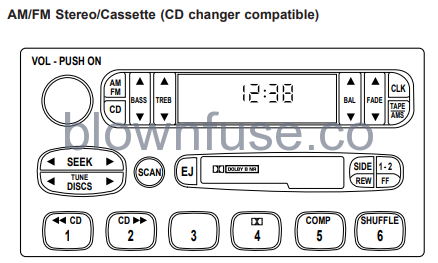
Premium AM/FM Stereo/Cassette/Premium Sound
(CD Changer Compatible)
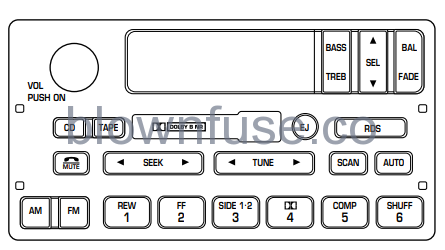
Your audio system is equipped with selective lighting, a unique lighting
strategy. This lighting feature is operable when the headlamps are
illuminated. During the operation of any selected mode, lighting for the
individual function controls will either illuminate or turn off. Those
controls which have a function for the specific mode of operation
selected will be lit, while the controls which have no function for that
mode will be turned off.
Your vehicle is equipped with a delayed accessory feature. This feature
enables the audio playing media to continue playing up to 10 minutes
after the ignition has been turned off, or until a door is opened.
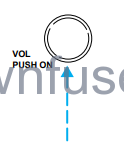
Volume/power control
Press the control to turn the audio
system on or off.
Turn the control to raise or lower
volume.

If the volume is set above a certain level and the ignition is turned off,
the volume will come back on at a “nominal” listening level when the
the ignition switch is turned back on.
Speed sensitive volume (if equipped)
With this feature, radio volume changes automatically and slightly with
vehicle speed to compensate for road and wind noise.
The recommended level for speed-sensitive volume is from level 1
through level 3. Level 0 turns the speed-sensitive volume off and level 7
is the maximum setting.
With the radio on, press and hold
the volume control for five seconds,
until the display reads SPEED
VOL#, then press:

•![]() to increase the volume
to increase the volume
compensation
• ![]() to decrease or shut off the
to decrease or shut off the
volume compensation
AM/FM select

The AM/FM select control works in
radio, tape, and CD modes (if
equipped).
AM/FM select in radio mode
This control allows you to select AM or FM frequency bands. Press the
control to switch between AM, FM1 or FM2 memory preset stations.
AM/FM select in tape mode
Press this control to stop tape play and begin radio play.
AM/FM select in CD mode
Press this control to stop CD play and begin radio play.
Tune adjust
The tune control works in radio or CD mode (if equipped).

Tune adjust in radio mode
• Press![]() to move to the next
to move to the next
frequency down the band
(whether or not a listenable
the station is located there). Hold the
control to move through the frequencies quickly.
• Press![]() to move to the next frequency up the band (whether or not
to move to the next frequency up the band (whether or not
a listenable station is located there). Hold for quick movement.

Tune adjust for CD changer
• Press![]() to select the previous
to select the previous
disc in the CD changer. (Play will
begin on the first track of the
disc unless the CD changer is in
shuffle mode.) Refer to the Shuffle feature for more information. Hold the
control to continue reversing through the discs.
• Press![]() to select the next disc in the CD changer. Hold the control
to select the next disc in the CD changer. Hold the control
to fast-forward through the remaining discs.
Scan function

The scan function works in radio,
tape or CD mode (if equipped).
Scan function in radio mode
Press the SCAN control to hear a brief sampling of all listenable stations
on the frequency band. Press the SCAN control again to stop the scan
mode.
Scan function in tape mode
Press the SCAN control to hear a short sampling of all selections on the
tape. (The tape scans in a forward direction. At the end of the tape’s
first side, direction automatically reverses to the opposite side of the
tape.) To stop on a particular selection, press the control again.
Scan function in CD mode
Press the SCAN control to hear a short sampling of all selections on the
CD. (The CD scans in a forward direction, wrapping back to the first
track at the end of the CD.) To stop on a particular selection, press the
control again.
Radio station memory preset
The radio is equipped with six station memory preset controls. These
controls can be used to select up to six preset AM stations and twelve
FM stations (six in FM1 and six in FM2).
Setting memory preset stations
- Select the frequency band with the AM/FM select control.
- Select a station. Refer to Tune adjust or Seek function for more
information on selecting a station. - Press and hold a memory preset control until the sound returns,
indicating the station is held in memory on the control you selected.

Auto set memory preset
Autoset allows you to set strong radio stations without losing your
original manually set preset stations. This feature is helpful on trips
when you travel between cities with different radio stations.
Starting auto set memory preset

- Select a frequency using the AM/FM select controls.
- Press the AUTO control.
- When the first six strong stations
are filled, the station stored in
memory preset control 1 will start
playing.
If there are less than six strong stations available on the frequency band,
the remaining memory preset controls will all store the last strong
station available.
To deactivate auto set and return to your audio system’s manually set
memory stations press the control again.
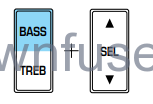
Bass adjust
The bass adjust control allows you
to increase or decrease the audio
system’s bass output.
Press the BASS control. Use the
SEL control to increase or decrease
the amount of bass.
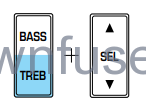
Treble adjust
The treble adjust control allows you
to increase or decrease the audio
system’s treble output.
Press the TREB control. Use the
SEL control to increase or decrease
the amount of treble.
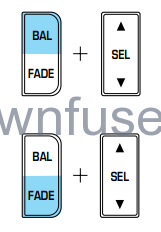
Speaker balance adjust
Speaker sound distribution can be
adjusted between the right and left
speakers.
Press the BAL control. Use the SEL
control to adjust the sound between
the speakers.
Speaker fade adjust
Speaker sound can be adjusted
between the front and rear
speakers.
Press the FADE control. Use the
SEL control to adjust the sound
between the front and rear
speakers.

Tape/CD select
• To begin tape play (with a tape
loaded into the audio system)
while in the radio or CD mode,
Press the TAPE control. Press the
button during rewind or fast forward to stop the rewind or fast
forward function.

• To begin CD play (if equipped
with CD DJ), ensure that the CDs
are loaded. Press the CD control.
The first track of the disc will
begin playing. After that, CD play will begin where it stopped last.
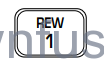
Rewind
The rewind control works in tape
and CD modes.
• In tape mode, radio play will
continue until rewind is stopped
(with the TAPE control) or the
beginning of the tape is reached.
• In CD mode, pressing the REW control for less than three seconds
results in slow rewind. Pressing the control for more than three
seconds results in fast rewind.

Fast forward
The fast forward control works in
tape and CD modes (if equipped).
• In the tape mode, tape direction
will automatically reverse when
the end of the tape is reached.
• In CD mode, pressing the control for less than three seconds results in
slow forward action. Pressing the control for more than three seconds
results in fast forward action.
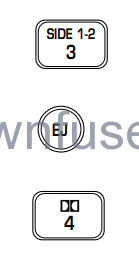
Tape direction select
Press SIDE 1–2 to play the alternate
side of a tape.
Eject function
Press the control to stop and eject a
tape.
Dolby noise reduction
Dolby noise reduction operates
only in tape mode. Dolby reduces
the amount of hiss and static during
tape playback.
Press the![]() control to activate
control to activate
(and deactivate) Dolby noise reduction.
The noise reduction system is manufactured under license from Dolby
Laboratories Licensing Corporation.
Compression feature
Compression adjust brings soft and
loud CD passages together for a
more consistent listening level.
Press the COMP control to activate
and deactivate compression adjust.
The effect of the feature varies with the music content.
Shuffle feature
The shuffle feature operates in CD
mode and plays all tracks on the
current disc in random order. If
equipped with the CD changer, the
shuffle feature continues to the next
disc after all tracks are played.
Press the SHUFFLE control to start this feature. Random order play will
continue until the SHUFFLE control is pressed again.
Radio data system (RDS) feature
This feature allows your audio
system to receive station
identification or program type from
RDS-equipped FM radio stations.
The Federal Communications Commission (FCC) and the Canadian Radio
and Telecommunications Commission (CRTC) recommend FM radio
broadcasters to use RDS technology to transmit information. FM radio
stations are independently operated and individually elect to use RDS
technology to transmit station ID and program type as desired.
Press and hold the control for five seconds to turn the feature on or off.
Press the control to scroll through the following selections:
Traffic
• Press the RDS control until
TRAFFIC is displayed.
• Use the SEL control to select ON
or OFF. With the feature on, use
the SEEK or SCAN control to
find a radio station broadcasting a
traffic report (if it is broadcasting
RDS data).
Program type
• Press the RDS control until the
FIND program type is displayed.
Use the SEL control to select the
program type. With the feature
on, use the SEEK or SCAN
control to find the desired
program type from the following
selections:
• Classic
• Country
• Info
• Jazz
• Oldies
• R&B
• Religious
• Rock
• Soft
• Top 40
Show
• With RDS activated, press the
RDS control until SHOW is
displayed.
• Use the SEL control to select
TYPE, NAME, or NONE.
RDS clock feature
Refer to Setting the clock for information.
Mute mode
Press the control to mute the
playing media. Press the control
again to return to the playing media.
Setting the clock with radio data system (RDS) feature
Press the RDS control until CLOCK
HOUR or CLOCK MINUTE is
displayed.
Use the SEL control to manually set
the time.
Press![]() to increase
to increase
hours/minutes.
• Press ![]() to decrease
to decrease
hours/minutes.