2021 Polestar 2 Changing a wheel

Changing wheels
- If a tire must be changed near passing traffic, make sure all passengers move to a safe location.
- Use a jack intended for the vehicle when changing a wheel. For any other job, use stands to support the vehicle.
- Never crawl under or allow any part of your body to be extended under a vehicle supported by a jack.
- Never let anyone remain in the vehicle when it is raised on a jack.
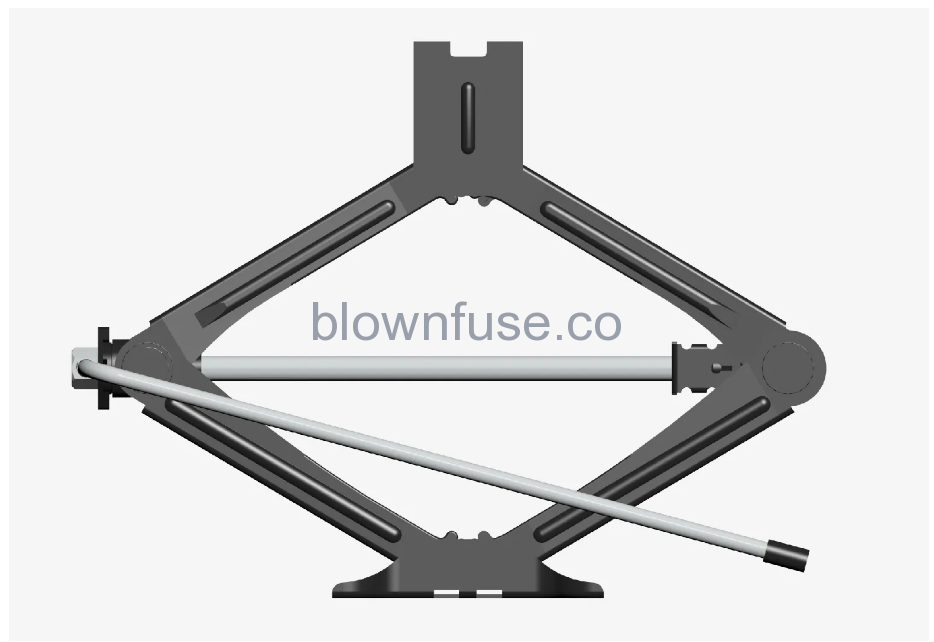
- Use a jack designed for the vehicle. If your vehicle is provided with a jack, or you have purchased one as a spare part, this jack is intended to be used only in temporary situations for short periods of time, such as when changing wheels in the event of a flat tire. If the vehicle needs to be lifted more frequently or for a prolonged period, using a garage jack or hoist is recommended. Always follow this device’s instructions for use.
- When the jack is not being used, it should be stowed in the foam block in the frunk. The jack needs to be cranked into the correct position in order to fit.
Removing a wheel
Read through the instructions below before you begin. Before raising the vehicle using a jack or lift, take out all the tools you will need. Use a tool designed for your vehicle model.
- Turn on the vehicle’s hazard warning flashers if a wheel change must be performed in an area with traffic.
- Make sure that the parking brake is activated.
- Place chocks in front of and behind the wheels that are still on the ground. For example, use heavy wooden blocks or large stones.
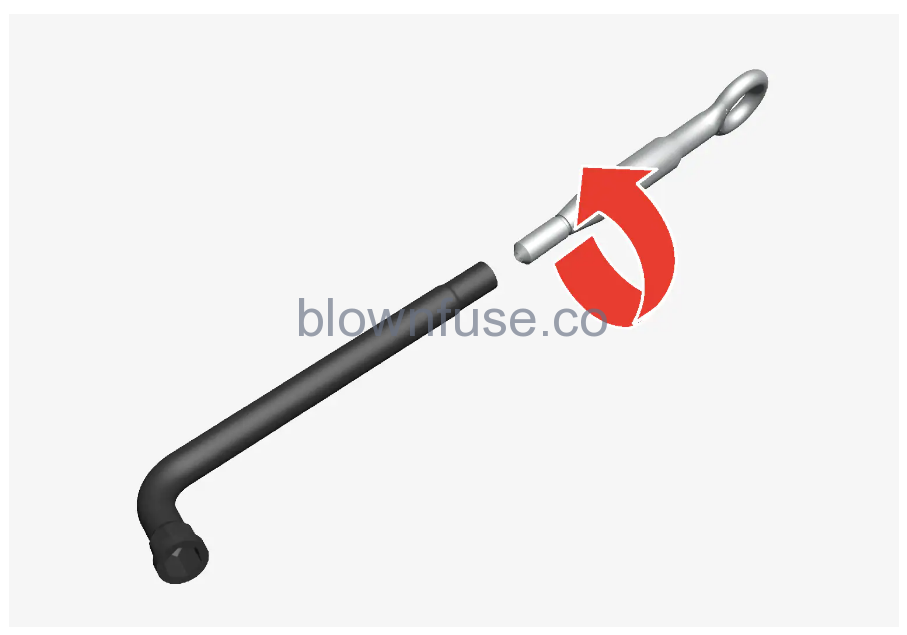
- Using the lug wrench, screw the towing eye into place as far as possible. The towing eye must be screwed in to its fully tightened position.
- Depending on rim equipment:
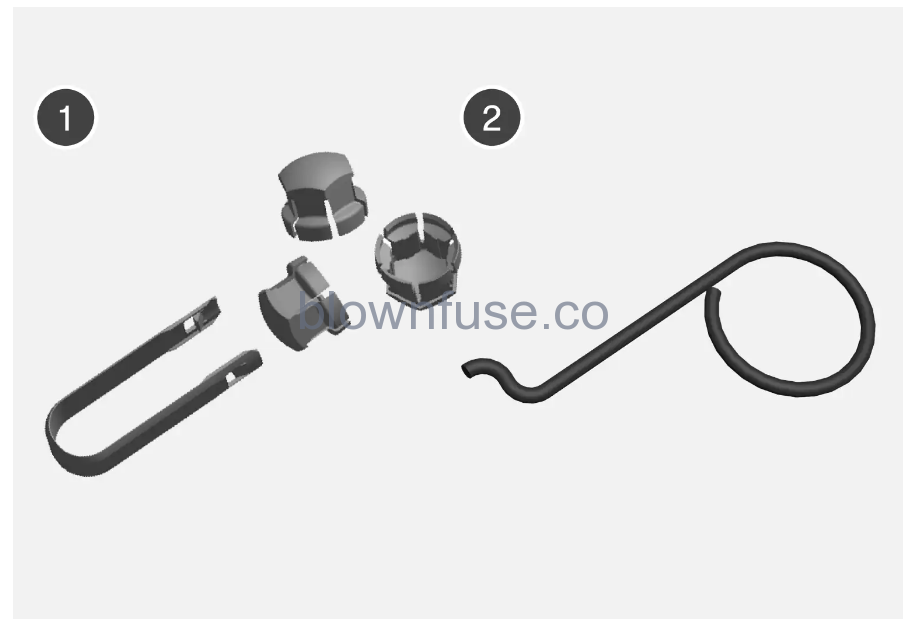 Tool for removing the plastic covers from the wheel bolts.Tools for removing the center wheel bolt cover. Put the tool into the hole in the middle of the wheel bolt cover and pull to remove the cover.
- With the vehicle still on the ground, use the lug wrench/towing eye to loosen the wheel bolts ½-1 turn by pressing downward (counterclockwise).
- Follow these instructions for safe lifting of the vehicle using a jack.
- Raise the vehicle until the wheel to be changed can move freely. Unscrew the wheel bolts and lift off the wheel.
Mounting wheels
The vehicle must be raised high enough so that the wheel you are removing can turn freely.
- Clean the contact surfaces between the wheel and the wheel hub.
- Lift the wheel into place. Tighten the wheel bolts securely.
Do not grease the wheel bolt threads.
- Lower the vehicle so that the wheel cannot rotate.
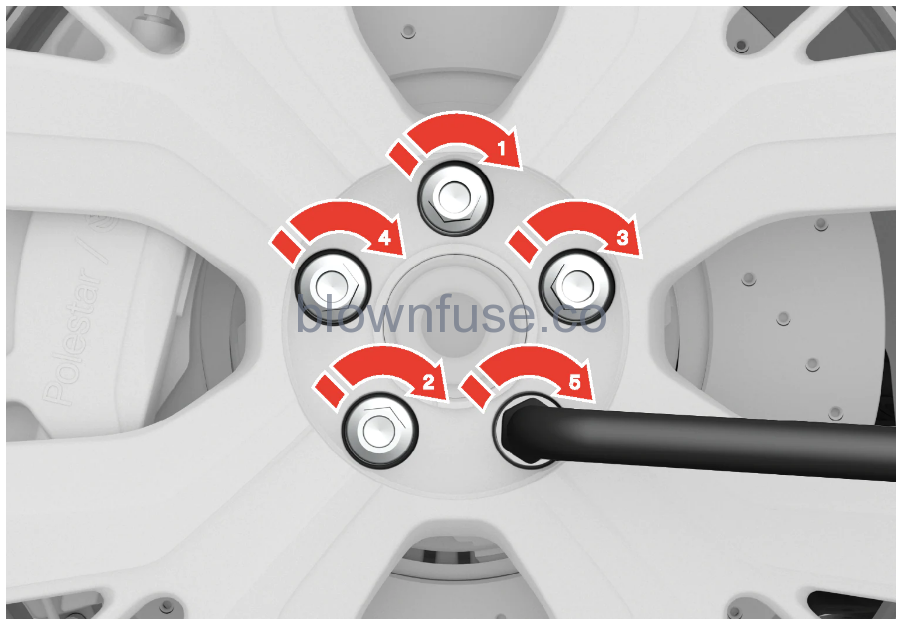
- Tighten the wheel bolts in a crisscross pattern (as shown in illustration). It is important that the wheel bolts are securely tightened. Tighten to 140 Nm (103 ft. lbs.). Use a torque wrench to check torque.
-
Depending on tire equipment:
- Replace the wheel bolt cover over the wheel bolts by aligning it with the guide marks and then pressing it into place.
- Press the plastic covers over the wheel bolts.
- Check the tire inflation pressure and store the new inflation pressure in the tire pressure monitoring system*.
The wheel bolts may need to be tightened again several days after a wheel change. Temperature fluctuations and vibrations can cause them to loosen slightly.
- After inflating a tire, always replace the valve cap to help prevent valve damage caused by gravel, dirt, etc.
- Only use plastic valve caps or original Polestar valve caps.
Flat tire
Move the vehicle out of traffic if this can be done safely. Call road assistance if necessary.
If possible, exit the vehicle on the side with the least traffic.
Handling a flat tire
Your vehicle is equipped with a tire sealing system for temporarily sealing a tire. Read the instructions before use.
Jack*
- Use a jack designed for the vehicle. If your vehicle is provided with a jack, or you have purchased one as a spare part, this jack is intended to be used only in temporary situations for short periods of time, such as when changing wheels in the event of a flat tire. If the vehicle needs to be lifted more frequently or for a prolonged period, using a garage jack or hoist is recommended. Always follow this device’s instructions for use.
- When the jack is not being used, it should be stowed in the foam block in the frunk. The jack needs to be cranked into the correct position in order to fit.
Snow chains
Polestar recommends that snow chains are not used on wheel dimensions larger than 20 inches.
Snow chains must only be used on the front wheels (also applies to all-wheel drive cars).
Use Polestar genuine snow chains or equivalent snow chains that are suitable for the vehicle model and the tire and wheel sizes. Only one-sided snow chains are permitted.
Contact Polestar Customer Support if you have any questions regarding the use of snow chains. Use of the wrong snow chains could cause serious damage to the vehicle and result in an accident.
Using snow chains could result in malfunction of the system for monitoring of tire inflation pressures* .
Snow chains can be used on the vehicle, with the following restrictions:
- Always follow the manufacturer’s installation instructions carefully. Install chains as tightly as possible and retighten periodically.
- If accessory, aftermarket or “custom” tires and wheels with different dimensions than the original tires and wheels are used, snow chains in some cases may NOT be used. Sufficient distance between the chains and brakes, suspension and body components must be maintained.
- Check local regulations regarding the use of snow chains before installing.
- Never exceed the snow chain manufacturer’s specified maximum speed limit. Under no circumstances should you exceed 50 km/h (30 mph).
- Avoid bumps, holes or sharp turns when driving with snow chains.
- Avoid driving on surfaces without snow as this wears out both the snow chains and the tires.
- The handling of the vehicle can be adversely affected when driving with chains. Avoid fast or sharp turns as well as locked wheel braking.
- Some types of strap-on chains affect brake components and therefore must NOT be used.
For more information about snow chains, contact Polestar Customer Support.
Snow tires
Polestar recommends snow tires with specific dimensions. The tire dimensions vary depending on the electric motor selected. When driving with snow tires, the correct type of tires must be mounted on all four wheels.
Contact Polestar Customer Support for assistance determining the most suitable rims and tires.
Tips for changing snow tires
When switching between regular tires and snow tires, mark the tires according to which side they were mounted on, e.g. L for left and R for right.
Studded tires
Studded tires should be broken in by driving 500–1000 km(300–600 miles) slowly and gently to help the studs settle properly in the tires. This gives the tire, and especially the studs, a longer service life.
Legislation concerning the use of studded tires may vary. Always follow local laws and regulations.
Tread depth
Road conditions with ice, slush and low temperatures place considerably higher demands on tires than summer conditions. Polestar therefore recommends not driving on snow tires that have a tread depth of less than 4 mm (0.15 in.).
Tool kit
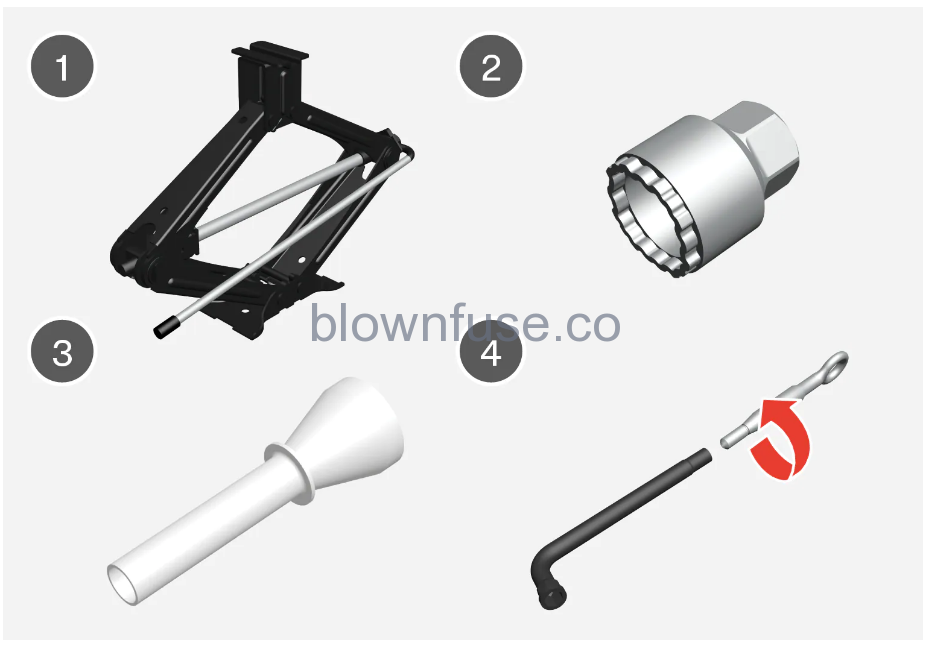
Examples of tools that may be provided with the vehicle
- Jack
- Tool for locking wheel bolts
- Funnel for refilling fluids
- Wheel bolt key and towing eye
Wheel bolts
The wheel bolts should be tightened to 140 Nm (103 ft. lbs.). Over-tightening or under-tightening could damage the threaded joints.
Locking wheel bolts*
To loosen or tighten the locking wheel bolts, turn the wrench in the locking bolt until it fully engages in the code grooves. When removing a wheel, always start with the locking wheel bolts. When installing a wheel, attach using the locking wheel bolt.
Make sure you have a solid connection between bolt and wheel bolt key when loosening/tightening the wheel bolts. Applying force at an angle could damage the key groove in the wheel bolt and the wheel bolt key and make it impossible to install or remove the wheel.
Use a lug wrench designed for the vehicle. If you have a lug wrench, it should be stowed in its designated spot in the storage space under the frunk when not in use.