
2022 Kawasaki Z650 Meter Instruments

Meter Instruments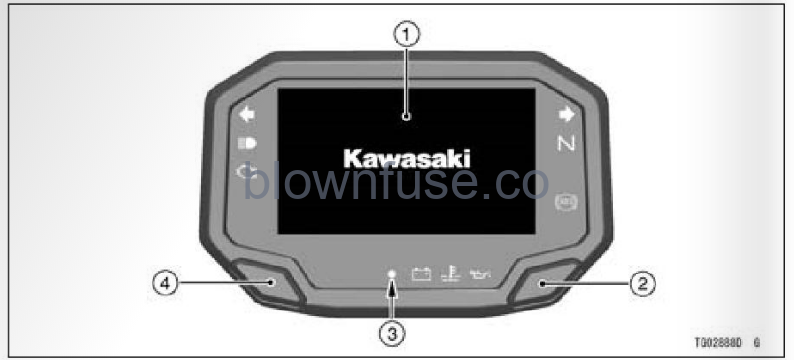
- Display Screen
- Right Meter Button
- Ambient Brightness Sensor
- Left Meter Button
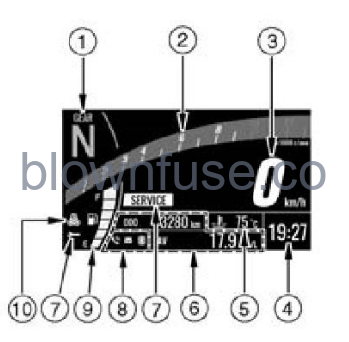
- Gear Position Indicator
- Tachometer
- Speedometer
- Clock
- Coolant Temperature Meter
- Multifunction Display
- Odometer
- Trip Meter A/B
- Current Mileage
- Average Mileage
- Cruising Range
- Average Speed
- Total Time
- Battery Voltage
- Service Indicator
- Bluetooth@ Connection Indicator
- Fuel Gauge
- Economical Riding Indicator
Background Color Change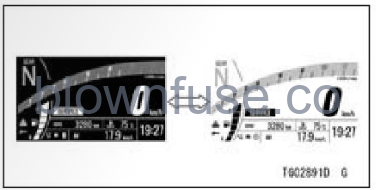
- When the current mileage, cruising range or battery voltage is displayed on the multifunction display, pushing and hold the right meter button to invert the background color of the display screen.
- Flow when pushing and holding the right meter button
NOTE
When the average mileage, average speed or total time is displayed on a multifunction display, pushing and holding right meter button resets item and the background color of the display screen does not invert.
Ambient Brightness Sensor
The brightness of the meter instrument is controlled automatically de- pending on the ambient brightness.
NOTE
Be careful not to cover the ambient brightness sensor on the meter instrument while riding the motorcycle.
Meter Instrument Brightness Setting
The brightness of the metering instrument can be adjusted manually in three levels. Refer to Brightness in the Menu Mode section.
Indicators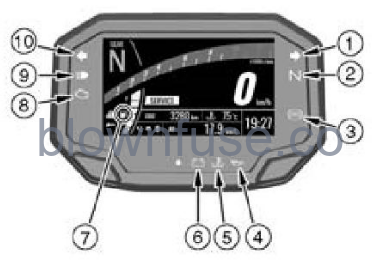
![]()
- Right Turn Signal Indicator (Green)
- Neutral Indicator (Green)
- ABS Indicator (Yellow)
- Oil Pressure Warning Indicator (Red)
- Coolant Temperature Warning Indicator
- Battery Warning Indicator (Red)
- Fuel Level Warning Indicator
- Engine Warning Indicator (Yellow)
- High Beam Indicator (Blue)
- Left Turn Signal Indicator (Green)
Indicator Initial Operation
When the ignition switch is turned on, all indicators go on/off as shown in the table. If any indicator does not operate as shown, have it checked by an authorized Kawasaki dealer.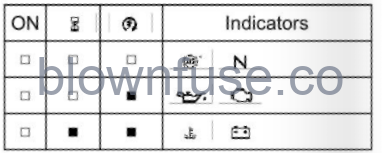
- When the ignition switch is turned on.
- After a few seconds
- When the engine starts.
- Goes on.
- Goes off.
- goes off shortly after the motorcycle starts moving.
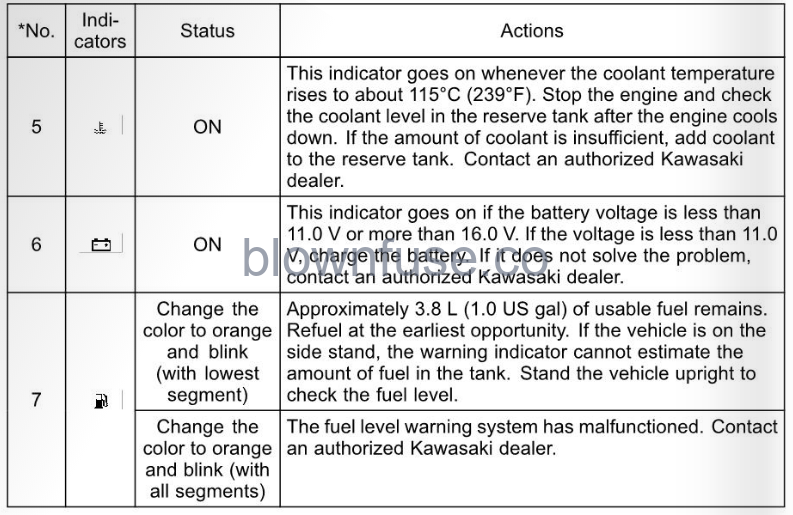
When Warning Indicators Go On or Blink
When warning indicators appear, there could be a problem with a vehicle function. Follow actions in the table after stopping the vehicle in a safe place. The numbers in this column correspond to reference numbers on page 47.

- After continuous riding on a rough road.
- When the engine is started with the stand raised and the transmission engaged, and the rear wheel turns.
- When accelerating so abruptly that the front wheel leaves the ground.
- When the ABS has been subjected to strong electrical interference.
- When tire pressure is abnormal. Adjust tire pressure.
- When a tire different in size from the standard size is being used. Replace with a standard size.
- When the wheel is deformed. Replace the wheel.
Other Indicators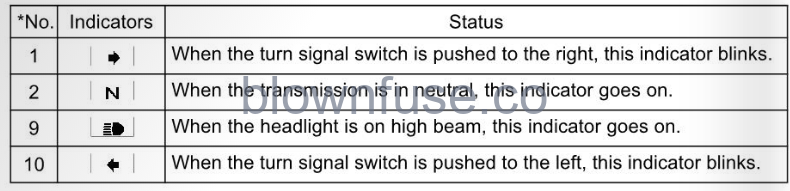
Speedometer/Tachometer
A. Speedometer
B. Tachometer
C. Red Zone
Speedometer
The speedometer is digital and can be set for km/h or mph. The unit setting can be changed according to local regulations. Make sure the unit setting (km/h or mph) is correctly displayed before riding. Refer to the Menu Mode section.
Tachometer
The tachometer shows the engine speed in revolutions per minute (r/min, rpm).
NOTICE
Engine speed should not be allowed to enter the red zone; operation in the red zone will over-stress the engine and may cause serious engine damage. The tachometer also serves as the shift-up indicator.
Features
Gear Position Indicator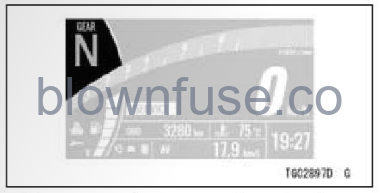
The current gear position is shown. When the transmission is in neutral, “N” appears.
NOTE
If the transmission gears are not engaged properly, the gear position indicator disappears.
The gear position indicator also serves as the shift-up indicator function.
Shift-up Indicator Function
The shift-up indicator function indicates the timing for the next upshift. From 500 r/min (rpm) before reaching the set engine speed, the gear position indicator changes color to orange, the tachometer and the gear position indicator starts blinking slowly. When the engine speed reaches the set value, the tachometer also changes color to orange, and the gear position indicator and the tachometer blink rapidly.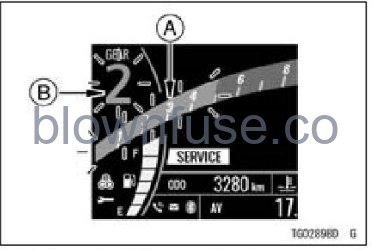
A. Tachometer (Change color to orange and blink)
B. Gear Position Indicator (Change color to orange and blink)
The shift-up indicator function can be selected on or off, and the set value can be adjusted.
Shift-up Indicator Function Setting
Refer to Vehicle Settings in the Menu Mode section.
Fuel Gauge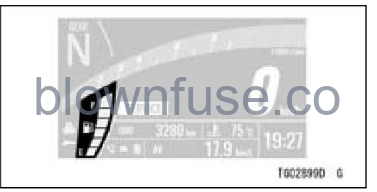
The fuel level in the fuel tank is shown by the number of segments displayed between E (empty) and F (full).
NOTE
When the fuel level warning indicator and segment(s) blink, refer to When Warning Indicators Go On or Blink in the Indicators section.
Coolant Temperature MeterThis meter shows the engine coolant temperature. If the coolant temperature is below 400C (1040F), “- – -” is dis- played. If the coolant temperature rises to above 1150C (2390F), the meter starts blinking and the warning indicator goes on. If the coolant temperature rises to1200C (2480F) or more, “Hi” appears and starts blinking, the coolant temperature warning indicator continues to appear. This warns the operator that the coolant temperature is high.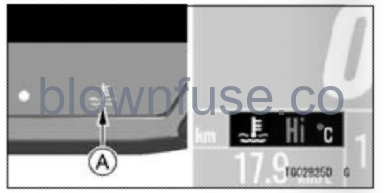
A. Coolant Temperature Warning Indicator
NOTICE
Stop the engine if the coolant temperature shows “Hi.” Prolonged engine operation will result in severe engine damage from overheating.
Economical Riding Indicator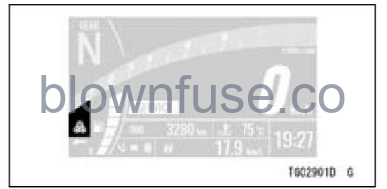 When riding the motorcycle efficiently, the economical riding indicator appears on the LCD to indicate favorable fuel consumption. Monitoring the economical riding indicator can help the rider maximize fuel efficiency.
WARNING
Failing to properly observe the road ahead increases the chance of an accident resulting in severe injury or death. Do not concentrate on the economical riding indicator by taking your eyes off the road; observe using peripheral vision.
Bluetooth@ Connection Indicator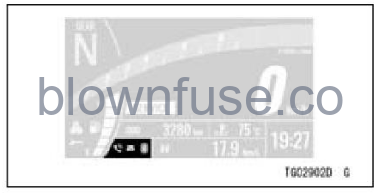
The Bluetooth icon appears when your smart device is connected to the vehicle. The telephone icon appears when a phone call is received by your smart device. The mail icon appears when an email or text message is received.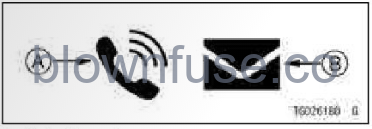
A. Telephone Icon
B. Mail Icon
How to Setup Bluetooth Connection
Refer to Bluetooth in the Menu Mode section.
Bluetooth Connectivity
This motorcycle can connect to the smart device via built-in Bluetooth wireless technology. Using the application “IDEOLOGY THE APP,” several data of your vehicle can be accessed, and several setting items can be adjusted. Refer to the application for details.
WARNING
For safety, do not use a smart device while riding the motorcycle.
NOTE
- Some smart devices may not be compatible even if Bluetooth technology is available.
- The Bluetooth@ word mark and logos are registered trademarks owned by Bluetooth SIG, Inc.

Service Indicator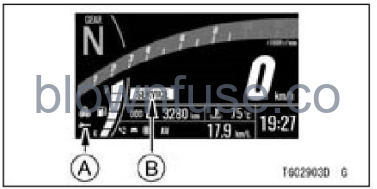
A. Service Indicator
B. “SERVICE” Message
This motorcycle has three types of maintenance reminders; the standard Kawasaki maintenance schedule, user-defined interval for oil, and user de- fined interval for regular maintenance to assist you with maintenance on your Kawasaki. When the date or distance reaches to the set value, the service indicator and message appear on the display screen every time the ignition switch is turned on. Only the “SERVICE” message disappears after 30 seconds.
Maintenance Reminder Setting
Refer to Service in the Menu Mode section.
Control Buttons
The left and right button on the meter are used to operate the various functions of the display screen.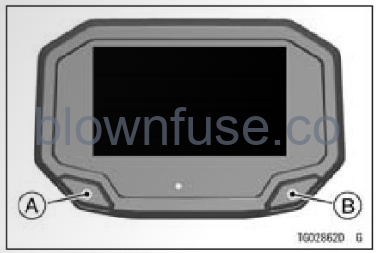
A. Left Meter Button
B. Right Meter Button
Multifunction Display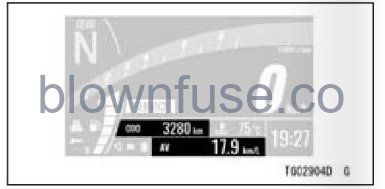
- Push the left and right meter buttons to select the item. The display items are switched in the following order.
[Item switched by the left meter button]
- Odometer
- Trip Meter A
- Trip Meter B
[Item switched by the right meter button]
- Current Mileage
- Average Mileage
- Cruising Range
- Average Speed
- Total Time
- Battery Voltage
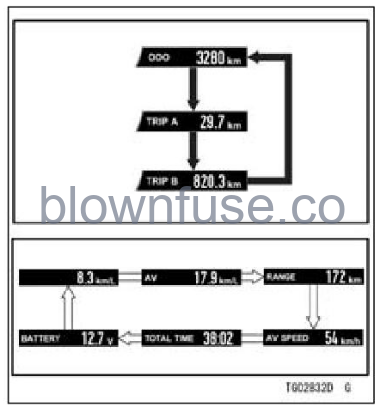
Flow when pushing the left meter button
Flow when pushing the right meter button
Odometer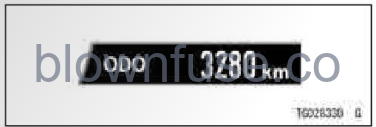
The odometer shows the total distance. This meter cannot be reset.
NOTE
When the figures come to 999999, the display is stopped and locked.
Trip Meter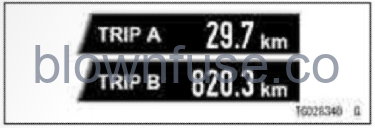
The trip meter shows the distance traveled since it was reset.
NOTE
When the trip meter reaches 9999.9 while riding, the meter resets to 0.0 and continues counting.
How to Reset
Refer to the Multifunction Display Resetting section.
Current Mileage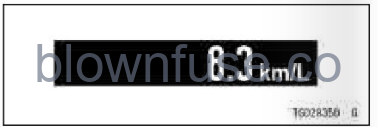
This shows the instantaneous rate of fuel consumption. It is renewed every 4 seconds.
NOTE
When the ignition switch is turned on, the numerical value shows “— —.—.” After a few seconds of riding the numerical value is displayed.
Average Mileage
This shows the average rate of fuel consumption since it was reset. It is renewed every 5 seconds.
How to Reset
Refer to the Multifunction Display Re-setting section.
Cruising Range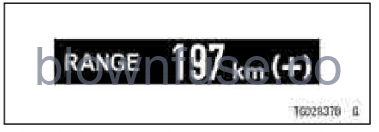
This indicates the cruising range from the remaining fuel in the fuel tank. It is renewed every 20 seconds.
NOTE
- When there is sufficient fuel, “(+)” appears next to the cruising range value.
- The cruising range value is no longer shown if the fuel level gets too low after the fuel level warning indicator starts blinking.
- To recover the cruising range display, add fuel to at least the level needed for the fuel level warning indicator to stop blinking. The cruising range value may still be displayed with a
low fuel level, but it will not be accurate until enough fuel is added to stop the fuel level warning indicator from blinking.
Average Speed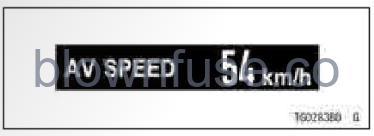
This shows the average vehicle speed since it was reset.
How to Reset
Refer to the Multifunction Display Re-setting section.
Total Time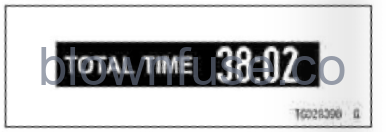 This shows the amount of time that has elapsed while the ignition switch is turned on.
NOTE
When the figures come to 99:59, the display is stopped and locked.
How to Reset
Refer to the Multifunction Display Resetting section.
Battery Voltage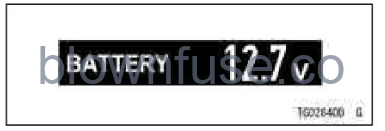 This shows the current battery voltage.
NOTE
- The battery voltage is displayed in the 9.0 16.0 V range. If the display range is exceeded, the indication is fixed at the maximum or minimum value.
- The battery voltage shown in this display may differ from the numerical value measured by a volt meter.
Multifunction Display Resetting
The following multifunction display items can be reset.
- Trip Meter A/B
- Average Mileage
- Average Speed
- Total Time
- Push the left or right meter button to display the items that can be reset.
- Push the left or right meter button and hold it until resetting is done.
- Flow when pushing and holding the left meter button
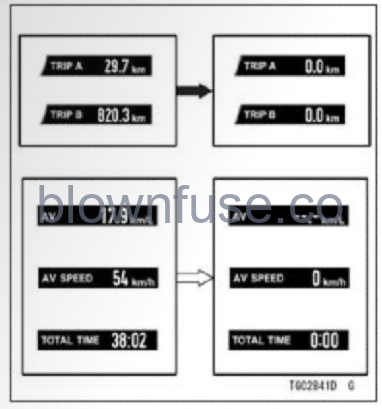
- Flow when pushing and holding the right meter button
- Flow when pushing and holding the left meter button
Menu Mode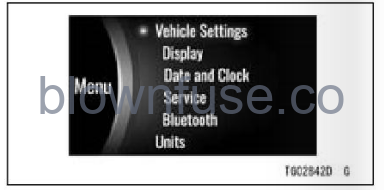
The menu mode can set various functions of the vehicle.
NOTE
When the vehicle speed exceeds 5 km/h (3 mph), the menu mode can- not be displayed.
How to Enter/Exit Menu Mode
- Push and hold the left and right meter button to enter or exit.
- Flow when pushing and holding the left and right meter button
- Flow when pushing and holding the left and right meter button
Basic Operations in Menu Mode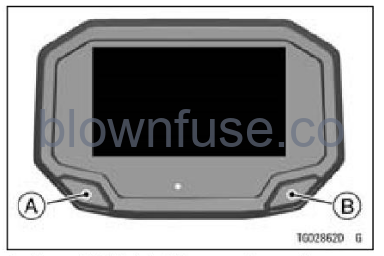
A. Move highlighted item or choose item
B. Shift to next screen (set) or go back to previous screen (cancel)
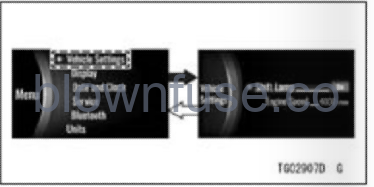
Vehicle Settings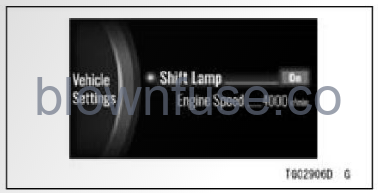
Shift Lamp: Turn the shift-up indicator function on or off
- Enter the menu mode.
- Highlight “Vehicle Settings” using the left-meter button.
- Push the right meter button to shift to the next screen.
- Flow when pushing the right meter button
- Flow when pushing and holding the right meter button
- Flow when pushing the right meter button
Shift Lamp
This switches the shift-up indicator function on or off.
- Highlight “Shift Lamp” using the left-meter button.
- Push the right meter button to shift to the next screen.
- Choose on or off using the left meter button.
- Push the right meter button.
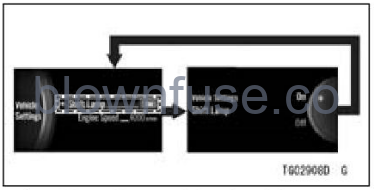
- Flow when pushing the right meter button
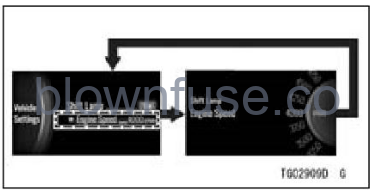
Engine Speed
This adjusts the timing at which the shift-up indicator function works.
NOTE
When “Shift Lamp” setting is off, this item is grayed out.
- Highlight “Engine Speed” using the left meter button.
- Push the right meter button to shift to the next screen.
- Set the desired engine speed using the left meter button.
- Push the right meter button.
- Flow when pushing the right meter button
- Flow when pushing the right meter button
Display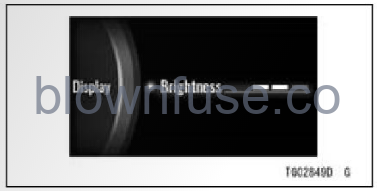
Brightness: Adjust the backlight of LCD
Brightness
This adjusts the backlight brightness of the screen in three levels.
- Enter the menu mode.
- Highlight “Display” using the left meter button.
- Push the right meter button to shift to the next screen.
- Adjust the setting using the left meter button.
- Push the right meter button.
- Flow when pushing the right meter button
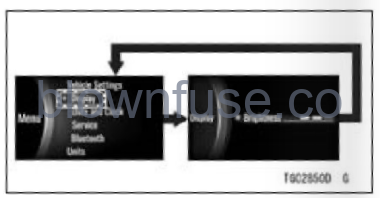
- Flow when pushing the right meter button
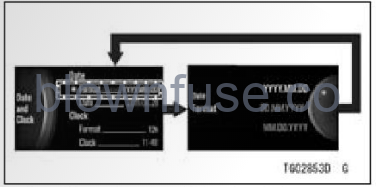
Date and Clock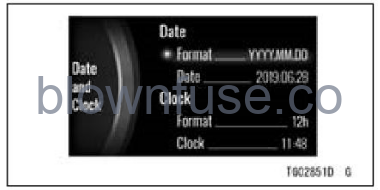
Date: Adjust date
Clock: Adjust clock
Format: Choose date and time notation
- Enter the menu mode.
- Highlight “Date and Clock” using the left meter button.
- Push the right meter button to shift to the next screen.
- Flow when pushing the right meter button
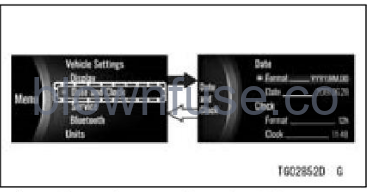
- Flow when pushing and holding the right meter button
- Flow when pushing the right meter button
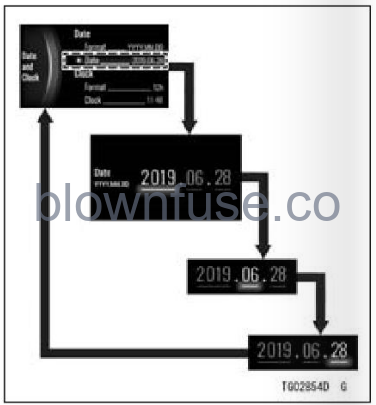
Format (Date)
This switches the date format.
- Highlight “Format” under “Date” using the left meter button.
- Push the right meter button to shift to the next screen.
- Choose the date format using the left meter button.
- push the right meter button
- Flow when pushing the right meter button
- Flow when pushing the right meter button
Date
- Highlight “Date” using the left meter button.
- Push the right meter button to shift to the next screen.
- Adjust the date using the left meter button.
- Push the right meter button.
- Flow when pushing the right meter button
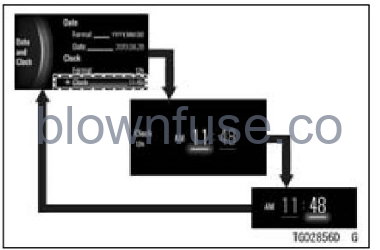
Format (Clock)
This switches the time display.
- Highlight “Format” under “Clock” using the left meter button.
- Push the right meter button to shift to the next screen.
- Choose the 12-hour clock or 24-hour clock using the left-meter button.
- push the right meter button.
- Flow when pushing the right meter button
Clock
- Highlight “Clock” using the left meter button.
- Push the right meter button to shift to the next screen.
- Adjust the clock using the left meter button.
- Push the right meter button.Flow when pushing the right meter button
- Flow when pushing the right meter button
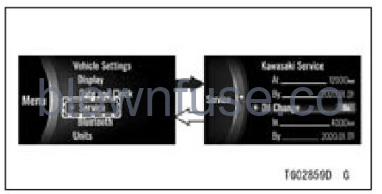
Service
Screen I of 2
Kawasaki Service: Dealer-defined interval for periodic maintenance (can be activated or deactivated by authorized Kawasaki dealer)
Oil Change: User-defined interval for engine oil change (user can set distance and end date maintenance reminder)
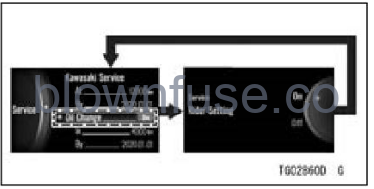
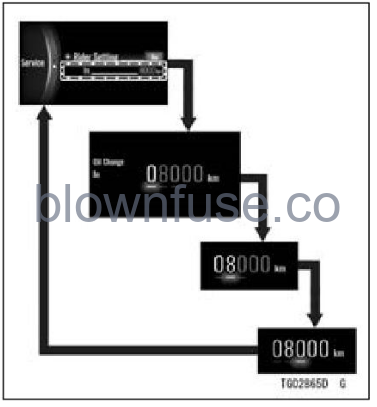
Screen 2 of 2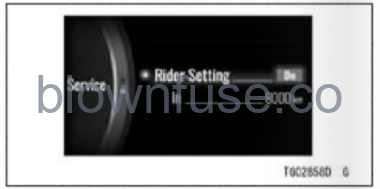
Rider Setting: User-defined interval for maintenance (user can set distance maintenance reminder)
NOTE
- The disabled item is grayed out.
- The distance shown on the meter indicates the remaining distance to the maintenance reminder and will decrease as the vehicle is operated.
- The service item changes to orange when the scheduled date or distance is reached.
- Enter the menu mode.
- Highlight “Service” using the left meter button.
- Push the right meter button to shift to the next screen.
- Flow when pushing the right meter button
- Flow when pushing and holding the right meter button
- Flow when pushing the right meter button
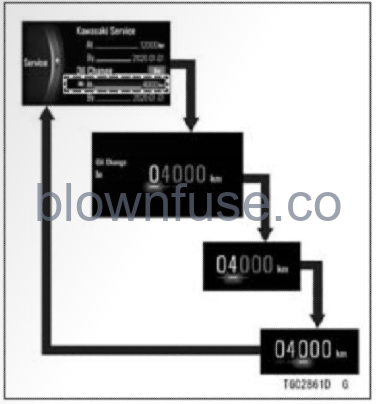
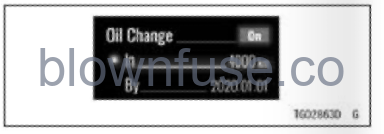
Oil Change
This switches the maintenance schedule notification on or off. The setting distance also can be adjusted.
- Highlight “Oil Change” using the left meter button,
- Push the right meter button to shift to the next screen.
- Choose on or off using the left meter button.
- Push the right meter button.
- Flow when pushing the right meter button
- Highlight “In” under “Oil Change” using the left meter button.
- Push the right meter button to shift to the next screen.
- Set the desired distance using the left meter button.
- Push the right meter button.
- Flow when pushing the right meter button
NOTE
- The settable distance is up to 12 000 km (7 500 mile).
- The setting date cannot be changed manually. It sets to one year later automatically when turning on this function or changing the distance. When the current date is “2019.01.01,” it sets to “2020.01.01.”
Rider Setting
This allows the rider to set the distance for certain maintenance items.
- Highlight “Rider Setting” using the left meter button.
- Push the right meter button to shift to the next screen.
- Choose on or off using the left meter button.
- push the right meter button.

- Flow when pushing the right meter button
- Highlight “In” under “Rider Setting” using the left meter button.
- Push the right meter button to shift to the next screen.
- Set the desired distance using the left meter button.
- Push the right meter button.
- Flow when pushing the right meter button
NOTE
The settable distance is up to 12 000 km (7 500 mile).
Bluetooth
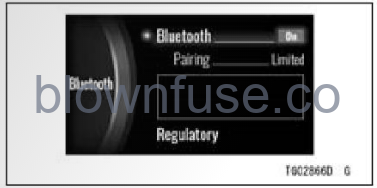
Bluetooth. Turn Bluetooth wireless technology on or off
Regulatory: Display the acquired certification mark
NOTE
- To use the Bluetooth function, “IDEOLOGY THE APP’ is necessary.
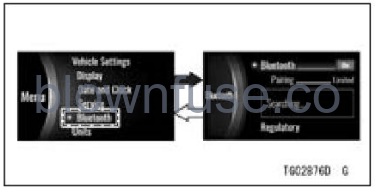
- Enter the menu mode.
- Highlight “Bluetooth” using the left-meter button.
- Push the right meter button to shift to the next screen.
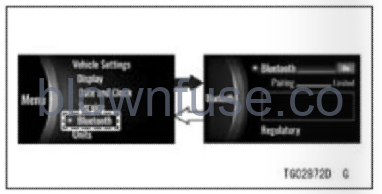
- Flow when pushing the right meter button
- Flow when pushing and holding the right meter button
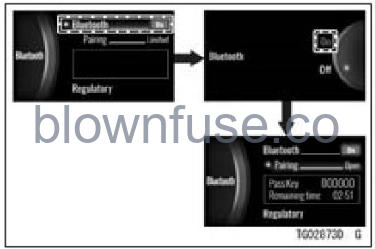
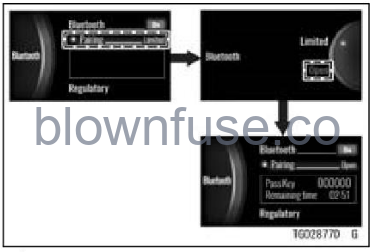
- Push the right meter button to shift to the next screen.
- Choose on or off using the left meter button.
- Push the right meter button. When selecting “On,” the motorcycle starts searching for the smart device.
- Turn on the Bluetooth function of the smart device and launch the app.
- Flow when pushing the right meter button
NOTE
If the motorcycle detects the paired device, they connect automatically.
A. Connected Device Name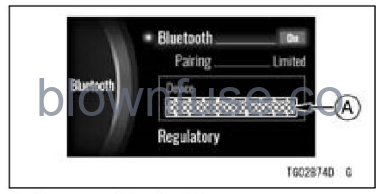
- In the pairing setting menu of the app, select “Z650/Ninja” and tap the connect button. The motorcycle dis- plays the passkey (PIN) on the dis-play screen.
- Enter the passkey (PIN) into the un-paired device.
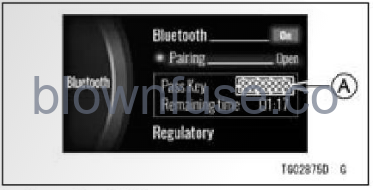 A. Pass Key (PIN)
NOTE
- If the motorcycle does not detect the device, bring the device closer to the meter instruments.
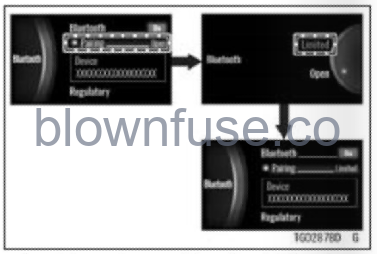
- Highlight “Pairing” using the left meter button.
- Push the right meter button to shift to the next screen.
- Choose the “Limited” using the left meter button.
- Push the right meter button.
 Flow when pushing the right meter button
NOTE
Set “Pairing” item to “Limited” except when pairing smart device.
To pair with other smart devices
- Enter the menu mode.
- Highlight “Bluetooth” using the left meter button.
- Push the right meter button to shift to the next screen.
 Flow when pushing the right meter button
- Flow when pushing and holding the right meter button
- Highlight “Pairing” using the left meter button.
- Push the right meter button to shift to the next screen.
- Choose the “Open” using the left meter button.
- Push the right meter button. The motorcycle start searching for the smart device.
- Turn the Bluetooth function of the smart device and launch the app.
 Flow when pushing the right meter button
- When the remaining time appears, in the pairing setting menu of the app, select “Z650/Ninja” and tap the connect button. The motorcycle displays the passkey (PIN) on the display screen.
- Enter the passkey (PIN) into the un-paired device.
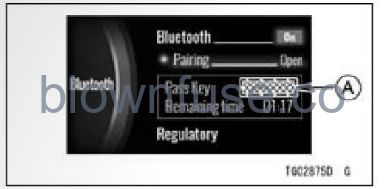 A. Pass Key (PIN)
When the connection is completed, the name of the connected device is displayed.
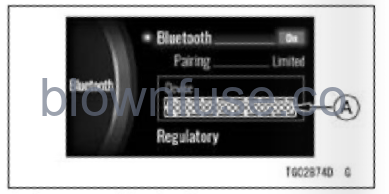 A. Connected Device Name
NOTE
- When pairing is done, using right and left meter button return to the “Pairing” item to “Limited”.
 Flow when pushing the right meter button
Regulatory
- Highlight “Regulatory” using the left meter button.
- Push the right meter button to shift to the next screen.
- Push the right meter button.
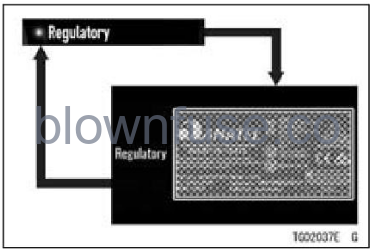 Flow when pushing right meter button
Units
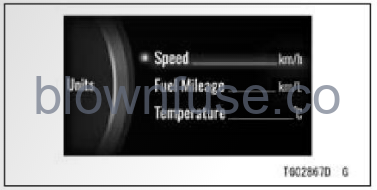
Speed: Switch unit of speed between kph and mph
Fuel Mileage: Switch unit of fuel consumption
Temperature: Switch unit of temperature between on and OF
- Enter the menu mode.
- Highlight “Units” using the left meter button.
- Push the right meter button to shift to the next screen.
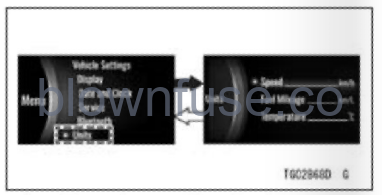 Flow when pushing the right meter button
- Flow when pushing and holding the right meter button
Speed
This switches the unit of speed.
- Highlight “Speed” using the left meter button.
- Push the right meter button to shift to the next screen.
- Choose “km/h” or “mph” using the left meter button.
- push the right meter button.
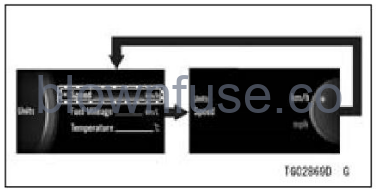 Flow when pushing the right meter button
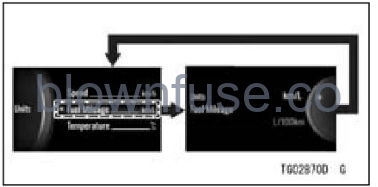
Fuel Mileage
This switches the unit of fuel consumption.
- Highlight “Fuel Mileage” using the left meter button.
- Push the right meter button to shift to the next screen.
- Choose the unit using the left meter button.
- push the right meter button.
 Flow when pushing the right meter button
NOTE
The choices will change according to the unit set by “Speed.”
Temperature
This switches the unit of temperature.
- Highlight “Temperature” using the left meter button.
- Push the right meter button to shift to the next screen.
- Choose “ON” or “OF” using the left meter button.
- push the right meter button.
- Flow when pushing the right meter button