2022 Kawasaki KLX110R L Tightening Torques of Nuts and Bolts
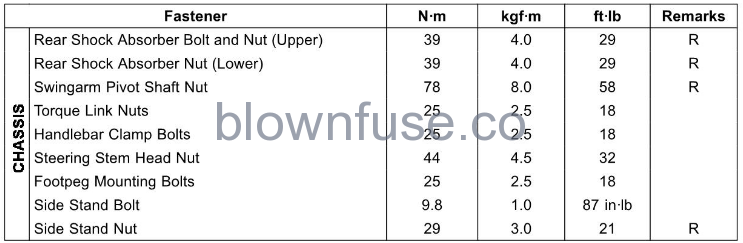
Tightening Torques of Nuts and Bots
Location of nuts and bolts
Before the first ride of each day of operation, check the tightness of the nuts and bolts shown below. Check also that al cotter pins are in place and in good condition.

- Front Fork Clamp Bolts
- Handlebar Clamp Bolts
- Rear Shock Absorber Bolt and Nut (Upper)
- Front Axle Nut
- Cylinder Head Nuts
- Oil Filter Cap Bolts
- Engine Oil Drain Bolt
- Shift Pedal Bolt
- Side Stand Bolt and Nut
- Swingarm Pivot Shaft Nut
- Rear Sprocket Nuts
- Rear Shock Absorber Nut
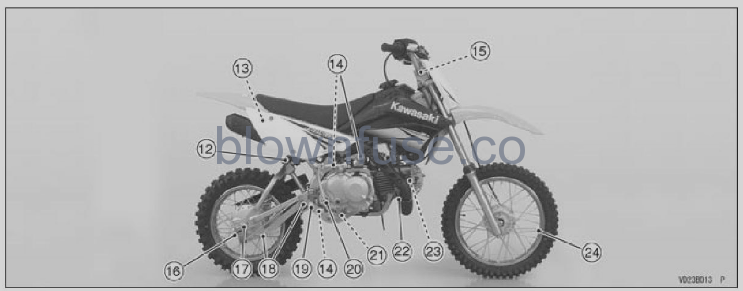
- Ower
- Muffler Body Mounting Bolt
- Steering Stem Head Nut
- Brake Cam Lever Bolt
- Rear Axle Nut
- Kick Pedal Bolt < footpeg Mounting Bolts
- Exhaust Pipe Holder Nuts ke Nipples
- Spoke Nipples
- Engine Mounting Nuts
- rake Pedal Bolt
Torque Table
Tighten all nuts and bolts to the proper torque using an accurate torque wrench. An insufficiently tightened nut or bolt may become damaged or tall Out, possibly resulting in damage to the motorcycle and injury to the rider. An overtightened nut or bolt may become damaged, broken, or fall out.
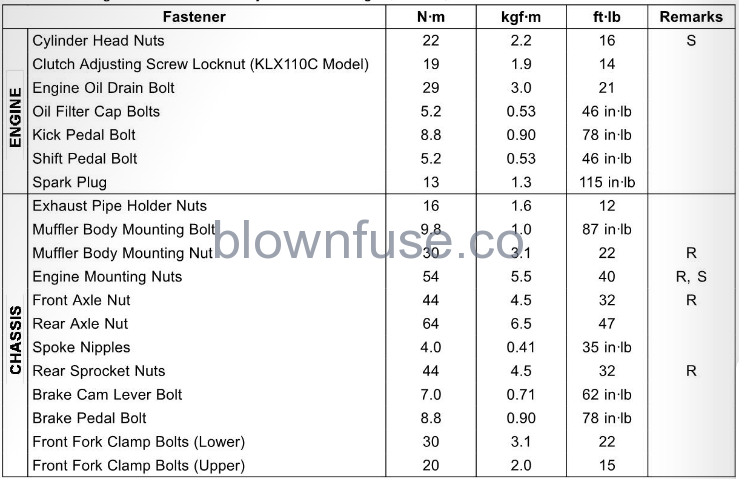
- Replacement Parts
- Follow the specified tightening sequence.