2022 Kawasaki KLR650 ABS Air Cleaner

Air Cleaner
Air Cleaner Element Removal
- Remove the bolt and washer.
- Remove the bolts and collars.
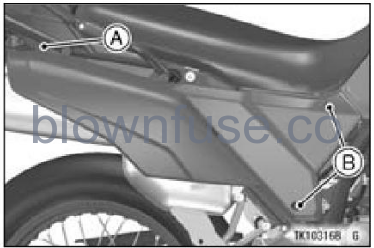
- A. Bolt and Washer
- B. Bolts and Collars
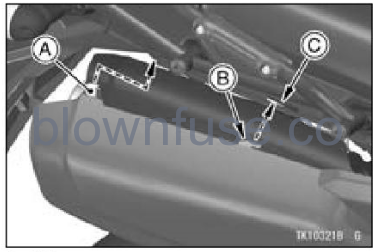
- Clear the tab and hook of the right side cover from the seat cover.
NOTE
Be careful that the side cover does not touch the saddlebag stay. - Remove the right side cover.
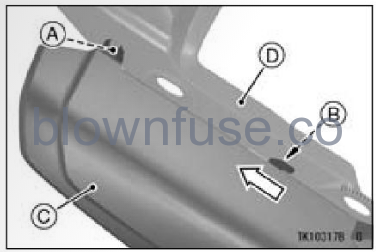
- A. Tab
- B. Hook
- C. Right Side Cover
- D. Seat Cover
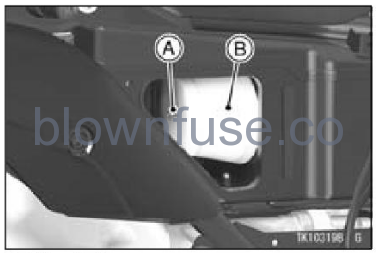
- Remove the air cleaner cap screw and air cleaner cap.
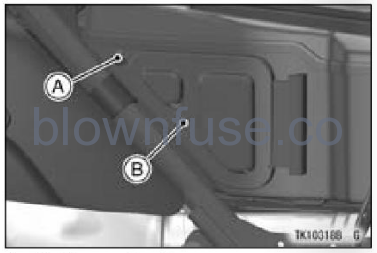
- A. Air Cleaner Cap Screw
- B. Air Cleaner Cap
- Remove the wing bolt.
- Remove the air cleaner element from the air cleaner housing.
- A. Wing Bolt
- B. Air Cleaner Element
- Remove the air cleaner element from the element frame.
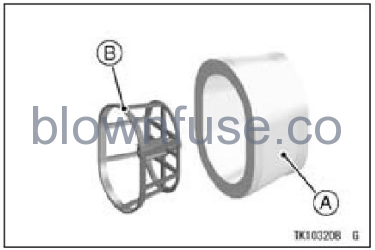
- A. Air Cleaner Element
- B. Element Framee
- Put a clean, lint-free towel into the air cleaner housing to keep dirt or other foreign material from entering.
- Inspect the element material for damage. If any part of the element is damaged, the element must be re- placed.
WARNING
If dirt or dust is allowed to pass through into the throttle body assembly, the throttle may become stuck, possibly causing an accident. Be sure to keep the dust from entering during cleaning.
NOTICE
If dirt gets through into the engine, excessive engine wear and possibly engine damage will occur.
Air Cleaner Element Cleaning
- Clean the element in a bath of a high flash-point solvent.
- Squeeze it dry in a clean towel. Do not wring the element or blow it dry; the element can be damaged.
- Check the element for visible damage.
- If the element is damaged, replace it. After cleaning, saturate the element with high-quality foam-air-filter oil, squeeze out the excess oil, then wrap it in a clean towel and squeeze it as dry as possible. Be careful not to tear the element.
WARNING
Gasoline and low flash-point solvents are extremely flammable and may explode, causing severe burns. Do not use gasoline or a low flash-point solvent to clean the element. Clean the element in a well-ventilated area. Be sure there are no sparks or flames in the work area, including any appliance with a pilot light.
Air Cleaner Element Installation
- Install the air cleaner element to the element frame.
- Install the air cleaner element to the air cleaner housing.
- Tighten the wing bolt.
- Install the air cleaner cap.
- Tighten the air cleaner cap screw to the specified torque.
Tightening Torque
- Air Cleaner Cap Screw:
2.5 N m (0.25 kgf m, 22 in-lb)
NOTE
If a torque wrench is not available, this item should be serviced by an authorized Kawasaki dealer.
- Insert the tab between the seat cover and rear fender.
- Insert the hook into the slot.
- A. Tab
- B. Hook
- C. Slot
- Tighten the bolts with collars.
- Tighten the bolt with washer.
Oil Draining
- Inspect the transparent drain hose located the left lower end of the air cleaner housing to see if any oil has run down.

- A. Transparent Drain Hose
- If there is any oil in the drain hose, remove the plug from the lower end of the drain hose, and drain the oil.
WARNING
oil on tires will make them slippery and can cause an accident and injury. Be sure to install the plug in the drain hose after draining.