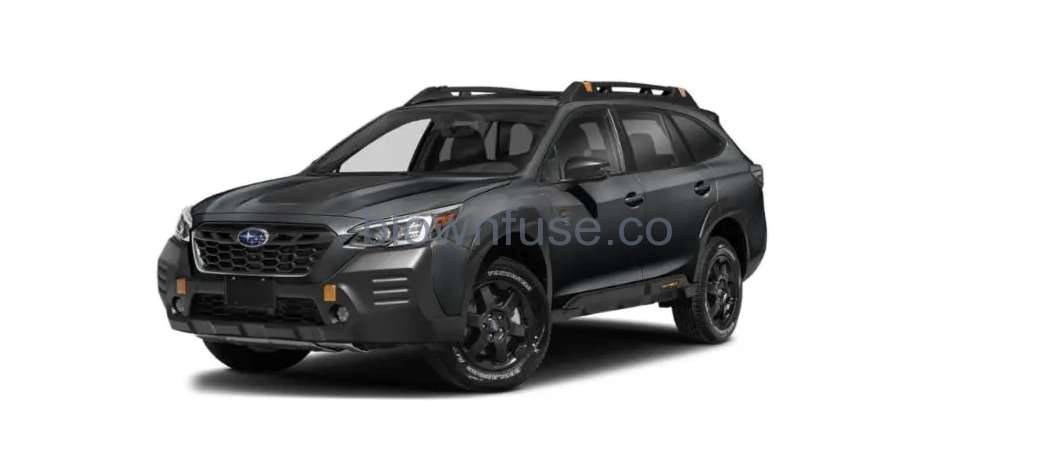
2022 Subaru Outback Center Information Display (CID)
WARNING
Always pay attention to safe driving when operating the center information display while the vehicle is in motion. When operation of the center information display is disturbing your awareness and ability to concentrate on driving, stop the vehicle in a safe place before performing operations on the display. Also, do not concentrate on the display while driving. Doing so could result in an accident.
Features
All information is displayed on the center information display, including vehicle settings, vehicle status, navigation system (if equipped) operation, audio operation, and air conditioning operation.
|
Items |
Page for 11.6-inch display models | Page for dual 7.0- inch display models |
| Interruption screen | 212 | |
| Vehicle status and maintenance in- formation | ||
| Vehicle settings | 219 | 237/240 |
| Climate control operations | 219 | 237 |
| Front View Moni- tor (if equipped)/ Rear view camera |
351/383 |
|
| Navigation system | Refer to the navigation/ audio Owner’s Manual. | |
| Audio/telephone | Refer to the navigation/ audio Owner’s Manual. | |
|
EyeSight |
Refer to the Owner’s Manual supplement for the EyeSight system. | |
The center information display can also be used to set and initialize the center information display itself.
NOTE
- When the vehicle is in motion, certain functions and selections may not be available.
- The language and units for both the center information display and the combination meter display (color LCD) can be changed. For details about language settings, refer to “General settings” P219 (11.6- inch display models) or “General settings” P237 (dual 7.0-inch display models). For details about unit settings, refer to “Car settings” P223 (11.6-inch display models) or “Vehicle setting icons” P242 (dual 7.0-inch display models).
- The images displayed in this Owner’s Manual are sample images. The actual image may vary depending on the region and vehicle specifications.
Welcome Screen
Welcome screen and Good-bye screen are motion graphic displayed on the combination meter display and center information display upon entering and exiting the vehicle.
When the driver’s door is opened and closed, the welcome screen will appear for a short time.
NOTE
- The welcome screen will disappear when the ignition switch is turned to the “ON” position while the welcome screen is shown.
- The welcome screen can be turned on or off. For details, refer to “General settings” P219 (11.6-inch display models) or “General settings” P237 (dual 7.0-inch display models).
- For a certain period of time after the welcome screen has once appeared, it may not appear again even when the driver’s door is opened and closed. This does not indicate a malfunction.
Good-Bye Screen
The good-bye screen will be displayed under the following conditions.
- The driver’s door is opened after the ignition switch is put in the “OFF” position. . 3 minutes have passed after the ignition switch is put in the “OFF” position with the driver’s door closed.
- 10 minutes have passed when the hands-free phone is used after the ignition switch is put in the “OFF” position.
- The battery voltage is low when the ignition switch is put in the “OFF” position.
Interruption Screen
Useful messages, such as reminders, weather information (if equipped) and traffic information (if equipped) may interrupt the current screen and appear on the display accompanied by a beep. Take the proper action according to the message.
Touch Screen Operations
The center information display has a touch screen. Operations are performed by touching the touch screen directly.
Touch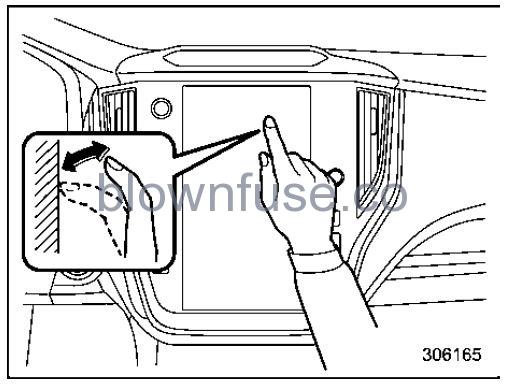 Quickly touch and release once.
Drag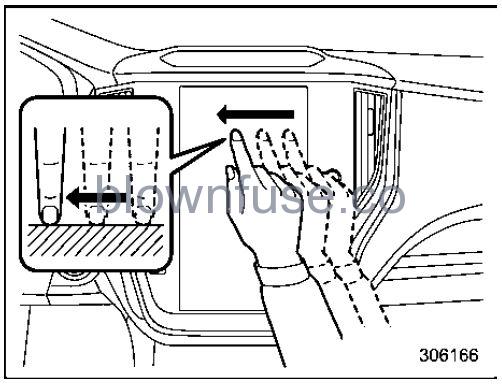 Touch the screen and move the screen to the desired position.
Swipe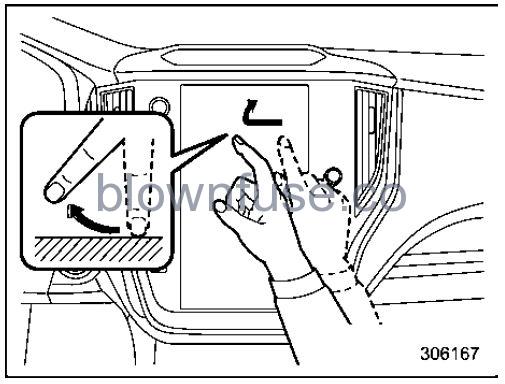 Quickly move the screen by swiping with your finger.
NOTE
Swipe operations may not be performed smoothly in high altitudes.
11.6-Inch Display Models (If Equipped)
NOTE
For dual 7.0-inch display models, refer to “Dual 7.0-Inch Display Models”P235.
Touch screen
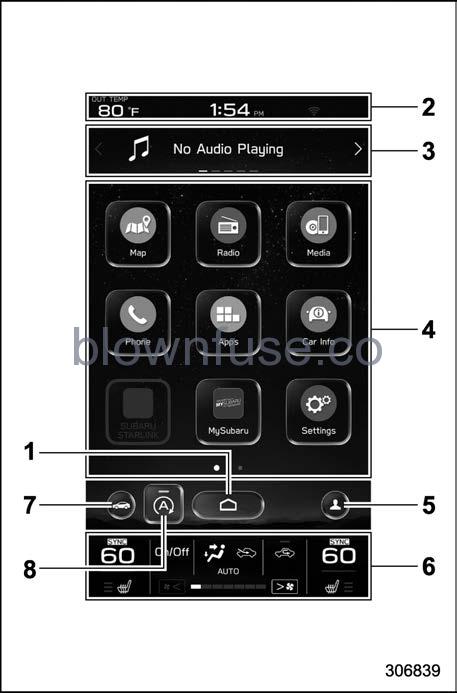
- HOME icon (Refer to “HOME icon” P219.)
- Status bar (Refer to “Status bar” P214.)
- Information bar (Refer to “Information bar” P214.)
- Main screen (Refer to “Main screen” P219.)
- Driver profiles icon (Refer to “Driver profiles icon” P219.)
- Climate control screen (Refer to “Climate control screen” P219.)
- Car settings icon (Refer to “Car settings icon” P217.)
- Auto Start Stop ON/OFF icon (Refer to “Auto Start Stop ON/OFF icon” P216.)
While the ignition switch is in the “ACC” or “ON” position, the touch panel will activate.
Status bar
The outside temperature and clock are displayed on the status bar.
NOTE
- The outside temperature indicator shows the temperature around the sensor. However, the temperature may not be indicated correctly or the update may be delayed in the following conditions.
- While parking or driving at low speeds
- When the outside temperature changes suddenly (example: when going in and out of an underground parking area or when passing through a tunnel)
- When starting the engine after being parked for a certain period of time
- The temperature unit cannot be changed.
- The clock can be displayed in either 12- hour display or 24-hour display. For details, refer to “Clock” P248.
Touch the clock on the status bar to display the clock setting screen. Refer to “Clock” P248. - For details about Bluetooth device information, refer to the navigation/audio Owner’s Manual.
Information bar
Swipe the information bar or touch or on the information bar to switch the item displayed.
Audio screen:
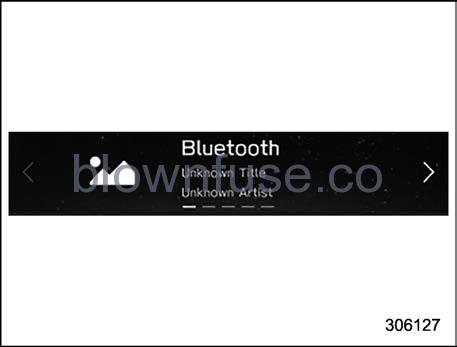 The screen of the currently selected audio source is displayed. For details about how to use the audio set, refer to the separate navigation/audio Owner’s Manual.
Navigation screen (models with navigation system):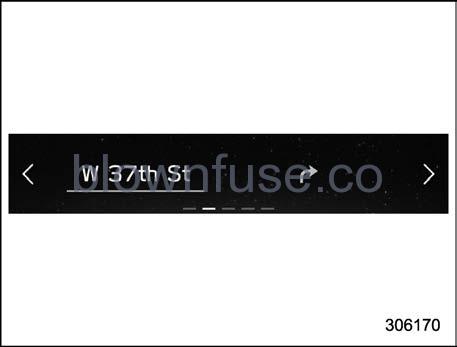 The directions to the destination are displayed on the screen.
NOTE
When a destination is not set in the navigation system, the compass orientation, street name and speed limit remain displayed on the screen.
Favorite screen: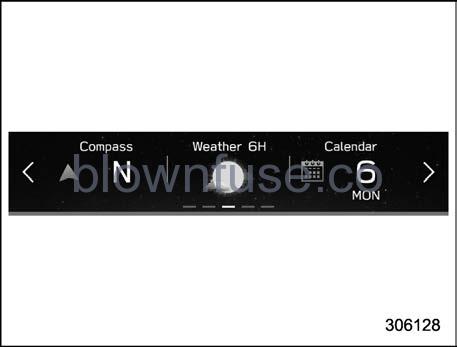 Favorite screen
This screen displays up to three optional pieces of information that can be selected from the following items.
| Item | Details |
 |
Engine coolant temperature |
 |
Engine oil temperature |
 |
Average vehicle speed |
 |
Accelerator opening ratio |
 |
Vehicle posture |
| Item | Details |
 |
Direction of the vehicle*1 |
 |
Weather information for the next three hours*2 |
 |
Weather information for the next six hours*2 |
 |
Posted speed limit of the road you are currently driv- ing on*1 |
 |
Calendar |
 |
Driver Monitoring System*1 information and the average fuel consumption of driver |
 |
Nothing is displayed. |
- If equipped
- Models with SiriusXM Satellite Radio
NOTE
Some items may not be shown depending on the model and specifications.
The items shown on the favorite screen can be changed. For details, refer to “Favorite Widgets” P229.
Weather information screen (if equipped):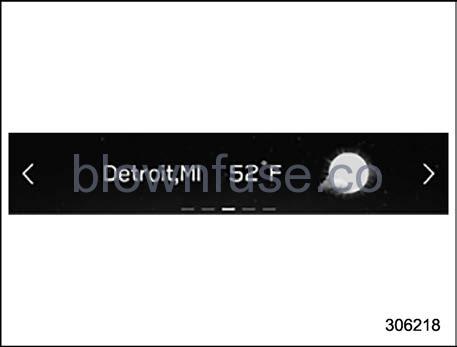 NOTE
NOTE
- When all of the following conditions are satisfied, weather information is displayed.
- The vehicle is equipped with an audio and navigation system for SiriusXM satellite radio.
- The SiriusXM satellite radio subscription is active.
- The weather forecast for the set destination remains displayed until a new destination is set or until the destination is reached.
- Depending on the reception timing of XM, the weather information may be delayed.
X-MODE screen (Outback/Subaru Outback Wilderness):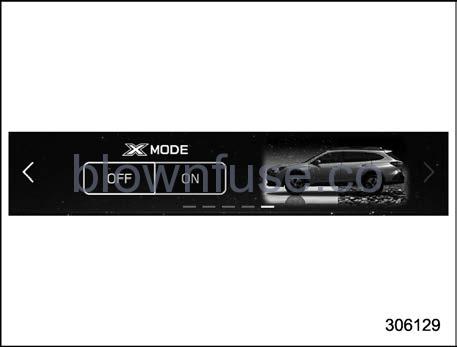 Models with 1 mode
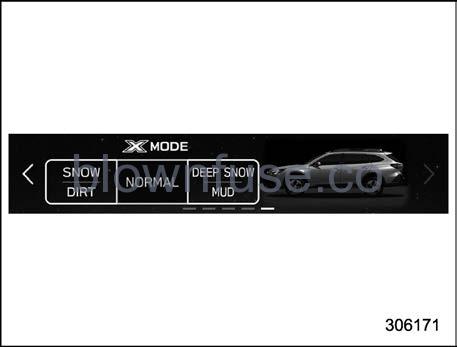 Models with 2 modes
X-MODE information is displayed on the screen.
Also, X-MODE can be switched to a different mode on the screen.
Main screen
For details about the following menu, refer to the separate navigation/audio Owner’s Manual.
- Radio
- Media
- Phone
- Map
- Apps
- My Subaru
- SUBARU STARLINK
- Add to Shortcut
Auto Start Stop ON/OFF icon
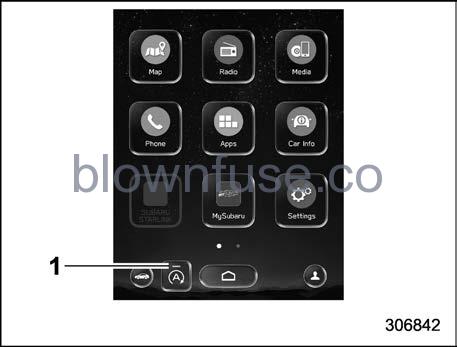
- Auto Start Stop indicator (green)
Touching “ 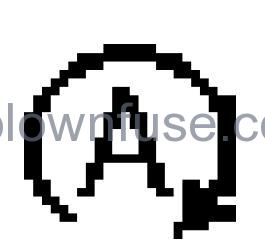 ” deactivates the Auto Start Stop system and turns off the Auto Start Stop indicator (green) on the screen. Touching “
 ” again activates the Auto Start Stop system and turns on the Auto Start Stop indicator (green).
Car settings icon
Touch to display the items that are changeable while driving.
| Item |
Available settings |
Page reference for the vehicle system operation | Page reference for the setting procedure | |
| 1st menu | 2nd menu | |||
|
Vehicle Control |
Vehicle Dynamics Control | ON/OFF | 363 | 228 |
|
X-MODE*1 |
Models with 1 mode: ON/OFF
Models with 2 modes: Normal, Deep Snow/Mud, Snow/ Dirt |
365 |
||
| Auto Vehicle Hold (AVH) | ON/OFF | 372 | 228 | |
| Steering Responsive Headlights (SRH) | ON/OFF | 258 | 228 | |
| Cruise Control Accel- eration Characteris- tics | Lv.1 (Eco)/Lv.2 (Comfort)/Lv.3 (Standard)/Lv.4 (Dy- namic) |
*2 |
— |
|
| Auto Start Stop | ON/OFF | 379 | 228 | |
|
Driving Assistance |
Pre-Collision Braking | Setting ON/Setting OFF |
*2 |
— |
| Lane Departure Pre- vention Function | All Functions/Lane Departure Prevention Function Only/Warning Buzzer Only/OFF | |||
| BSD/RCTA*1 | ON/OFF | 393 | 228 | |
|
Others |
Warning Volume | Min/Mid/Max | 392, 406 and *2 | — |
| Units | km, km/h, Liter/ Miles, MPH, Gallon | 175 and 203 | 228 | |
| Driver Monitoring System*1 | ON/OFF | 408 | 228 | |
- If equipped
- For details about the EyeSight system, refer to the Owner’s Manual supplement for the EyeSight system.
Driver profiles icon
Touch![]() (driver profiles icon) to confirm the driver’s information. For details, refer to the separate navigation/audio Owner’s Manual.
(driver profiles icon) to confirm the driver’s information. For details, refer to the separate navigation/audio Owner’s Manual.
HOME icon
Touch ![]() (HOME) to display the top menu.
(HOME) to display the top menu.
Climate control screen
The climate control status is shown on the screen.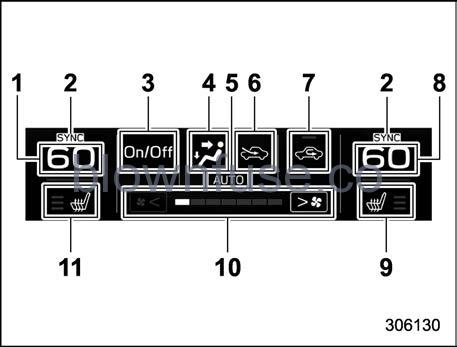
- Set temperature indicator (driver’s side)
- SYNC mode indicator
- Climate control ON/OFF button
- Airflow mode
- Climate control mode
- Air inlet selection
- Customizable icon
- Set temperature indicator (passenger’s side)
- Front passenger’s seat heater/ventilation indicator (if equipped)
- Fan speed indicator
- Driver’s seat heater/ventilation indicator (if equipped)
When operating the climate control sys-tem, the main screen switches to the climate control screen. For details, refer to “Climate Control Panel” P283.
Main screen
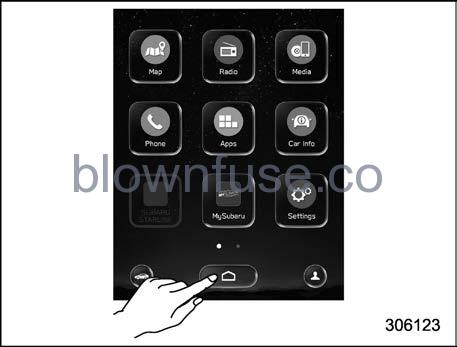
To display the main screen, touch ![]() (HOME).
(HOME).
In this Owner’s Manual, the following settings will be explained. For details about other items, refer to the separate navigation/audio Owner’s Manual.
- “Settings”
 “General”
 - “Settings”
 “Car”
“Car” - “Car Info”
General settings
Set the time and display general items.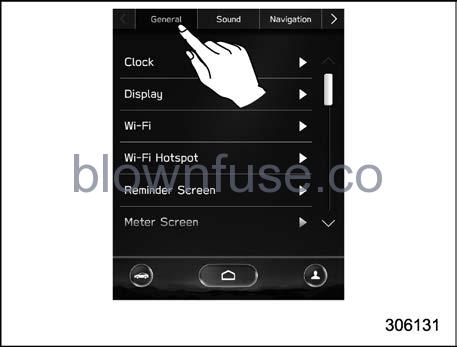
- Touch
 (HOME).
  (Settings)
- “General”
- Select the preferred menu.
The setting adjustments to the following items can be manually changed to meet your personal requirements.
| Item |
Available settings |
Page reference for the vehicle system operation | Page reference for the setting proce- dure | ||
| 1st menu | 2nd menu | 3rd menu | |||
|
General |
Clock |
Time Setting*1*2 | AUTO/Manual |
|
248 |
| Time Setting*3 | Sync With Phone/Manual | ||||
|
Time Zone*1 |
AUTO/Pacific/Mountain/Central/ Eastern/Atlantic/Newfoundland/ Hawaii/Alaska | ||||
| Daylight Saving Time*1 | AUTO/ON (+1 hour)/OFF | 228 | |||
| Clock Format | 12H/24H | 228 | |||
|
Display |
Display Off | Turn the screen off. | — | 228 | |
| Brightness Dial | ON/OFF | 177 | 228 | ||
| Brightness/Contrast | Set and adjust the brightness and contrast of the display. | 228 | 228 | ||
|
Wi-Fi |
Wi-Fi | ON/OFF |
*6 |
— |
|
| Connected to: | Select the registered devise. | ||||
| Available Wi-Fi Networks | Add | ||||
| Wi-Fi Protected Setup | PIN Setup/Push Button Setup | ||||
| Registered Wi-Fi Networks | — | ||||
| Wi-Fi Hotspot | — | ON/OFF | *7 | ||
| Item |
Available settings |
Page reference for the vehicle system operation | Page reference for the setting proce- dure | ||
| 1st menu | 2nd menu | 3rd menu | |||
|
General |
Reminder Screen |
Maintenance | ON/OFF | 228 | |
| Birthday | ON/OFF | 228 | |||
| Anniversary | ON/OFF | 228 | |||
|
Meter Screen |
Gauge Initial Movement | ON/OFF | 175 | 228 | |
| Meter Information Screen | Eco Gauge/OUT TEMP/Clock/ Compass*4/Gas Range | 205 | 228 | ||
| Turn by Turn Screen Interrup- tion*1 | ON/OFF | 208 | 228 | ||
| Camera | Rear Camera Delay Control | ON/OFF | 384 | 228 | |
| Steering Angle Lines | ON/OFF | 386 | 228 | ||
| Climate Control | Customize Climate Button | A/C/MAX A/C/AUTO/Recirculation | 292 | 228 | |
| Language | — | English/Français/Español | 203 and 211 | 228 | |
| Tire Pressure Units*5 | — | kPa/PSi | 208 | 228 | |
| Home Screen Short- cuts | — | ON/OFF | *6 | 228 | |
| Welcome Screen | — | ON/OFF | 205 | 228 | |
| Goodbye Screen | — | ON/OFF | 205 | 228 | |
| Favorite Widgets | — | Set a favorite widget from the list. | 214 | 229 | |
| Birthday List | — | Set a birthday. | 212 | 229 | |
| Anniversary List | — | Set an anniversary day. | 212 | 230 | |
| Item |
Available settings |
Page reference for the vehicle system operation | Page reference for the setting proce- dure | ||
| 1st menu | 2nd menu | 3rd menu | |||
|
General |
Periodic Rest Notifica- tion*1 | — | ON/OFF |
*6 |
— |
|
Software Update |
Update | Check if a new software update | |||
| Automatically Check for Up- dates | ON/OFF | ||||
| Automatically Download Up- dates | ON/OFF | ||||
| SUBARU STARLINK
Apps Recovery |
— | OK/Cancel | |||
| SUBARU STARLINK
Auto Connect |
— | ON/OFF | |||
| Factory Data Reset | — | Reset/Cancel | |||
| System Information | — | — | |||
| Free/Open Source Software Information | — | — | |||
- Models with navigation system
- Models with SUBARU STARLINK without navigation system
- Models without SUBARU STARLINK or navigation system
- Models without navigation system
- If equipped
- For details about the audio and navigation system, refer to the Owner’s Manual supplement for the audio and navigation system.
- For details, refer to the Owner’s Manual supplement for SUBARU STARLINK Safety and Security.
NOTE
Touch to display the explanation of the items.
Car settings
Perform the EyeSight system setting and vehicle setting.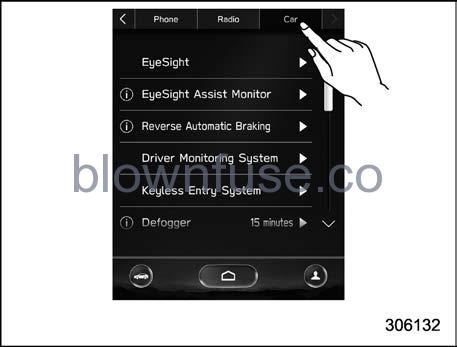
- Touch
 (HOME).
  (Settings)
- “Car”
- Select the preferred menu.
The setting adjustments to the following items can be manually changed to meet your personal requirements.
| Item |
Available settings |
Page reference for the vehicle system opera- tion | Page reference for the setting procedure | ||
| 1st menu | 2nd menu | 3rd menu | |||
|
Car |
EyeSight |
Pre-Collision Braking | Setting ON/Setting OFF |
*3 |
— |
| Lane Departure Prevention Function | All Functions/Lane Departure Prevention Function Only/ Warning Buzzer Only/OFF | ||||
| Cruise Control Acceleration Characteristics | Lv.1 (Eco)/Lv.2 (Comfort)/Lv.3 (Standard)/Lv.4 (Dynamic) | ||||
| Select Drive on Left/Drive on Right | Right Lane/Left Lane | ||||
| Lead Vehicle Acquisition Sound | ON/OFF | ||||
| Lead Vehicle Moving Monitor | ON/OFF | ||||
|
EyeSight Assist Monitor |
Red Indicator | ON/OFF | |||
| Yellow Indicator | ON/OFF | ||||
| Green Indicator | ON/OFF | ||||
| Reverse Automatic Braking*1 | Sonar Audible Alarm | ON/OFF | 397 | 228 | |
| Item |
Available settings |
Page reference for the vehicle system opera- tion | Page reference for the setting procedure | ||
| 1st menu | 2nd menu | 3rd menu | |||
|
Car |
Driver Monitoring System*1 |
Driver Monitoring System | ON/OFF |
408 |
228 |
| Repeat Facial Scan | Perform the user recognition. | 230 | |||
| User Recognition | ON/OFF | 228 | |||
| Automatically Retract Seat on Entry | ON/OFF | 228 | |||
| Register User | Register the user. | 230 | |||
| Update Seat and Mirror Posi- tion | Re-register the driver’s posi- tion. | 230 | |||
| Delete Driver Position | Delete the registered driver’s position. | 230 | |||
| Delete User | Delete the registered user. | 230 | |||
| Delete All Users | Delete all registered users. | 230 | |||
|
Keyless Entry System |
Audible Signal*1*2 | ON/OFF | 131 and 136 | 228 | |
| Hazard Warning Flasher | ON/OFF | 131 and 137 | 228 | ||
| Driver Door Unlock*1 | Driver Door Only/All | 124 | 228 | ||
| Rear Gate/Trunk Unlock*1 | Rear Gate/Trunk Only/All | 124 | 228 | ||
| Item |
Available settings |
Page reference for the vehicle system opera- tion | Page reference for the setting procedure | ||
| 1st menu | 2nd menu | 3rd menu | |||
|
Car |
Defogger | — | 15 minutes/Continuous | 265 | 228 |
| Interior Light | — | 10 seconds/20 seconds/30 seconds/OFF | 307 | 228 | |
| Auto Light Sensor | Light Sensitivity | Min/Low/Mid/Max | 251 | 228 | |
| Wiper Link | ON/OFF | 252 | 228 | ||
|
Welcome Lighting |
Approaching Time Set | 30 seconds/60 seconds/90 seconds/OFF |
252 |
228 | |
| Leaving Time Set | 30 seconds/60 seconds/90 seconds/OFF | 228 | |||
| One-Touch Lane Changer | — | ON/OFF | 261 | 228 | |
|
Auto Door Lock/Unlock |
Auto Door Lock | Vehicle Speed/Shift into or out of PARK*1/OFF |
141 |
228 | |
| Auto Door Unlock | Ignition OFF/Driver Door Open/ Shift into or out of PARK*1/OFF | 228 | |||
| Rear Seat Reminder | — | ON/OFF | 58 | 228 | |
| Door Mirror Setting*1 | Auto Electric Folding | ON/OFF | 278 | 228 | |
| Reverse Tilt | ON/OFF | 276 | 228 | ||
| Power Rear Gate*1 | Power Rear Gate Memory | ON/OFF | 158 | 228 | |
| Vehicle Dynamics Control | — | ON/OFF | 363 | 228 | |
| Auto Vehicle Hold (AVH) | — | ON/OFF | 372 | 228 | |
| Item |
Available settings |
Page reference for the vehicle system opera- tion | Page reference for the setting procedure | ||
| 1st menu | 2nd menu | 3rd menu | |||
|
Car |
Auto Start Stop | — | ON/OFF | 379 | 228 |
| BSD/RCTA*1 | — | ON/OFF | 393 | 228 | |
|
X-MODE*1 |
— |
Models with 1 mode: ON/OFF Models with 2 modes: Normal, Snow/Dirt, Deep Snow/Mud |
365 |
||
| Steering Responsive Head- lights (SRH) | — | ON/OFF | 258 | 228 | |
| Warning Volume | — | Min/Mid/Max | 392, 406 and *3 | 228 | |
| Units | — | km, km/h, Liter/ Miles, MPH, Gallon | 175 and 203 | 228 | |
- If equipped
- This setting also works as the On/Off setting of the power rear gate buzzer for starting operation. However, you cannot change the warning buzzer setting for a detecting jam, etc.
- For details about EyeSight system, refer to the Owner’s Manual supplement for the EyeSight system.
NOTE
Touch to display the explanation of the items.
How to select items on the screen
ON/OFF setting 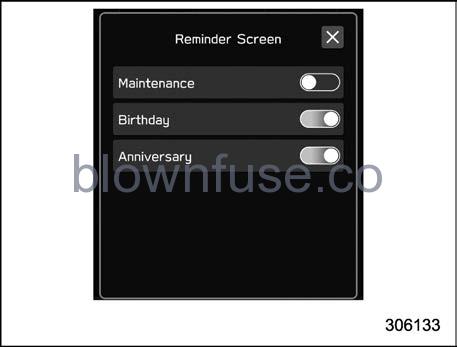 Example
Touch the changing menu and select ON![]() or OFF .
or OFF .![]()
Selecting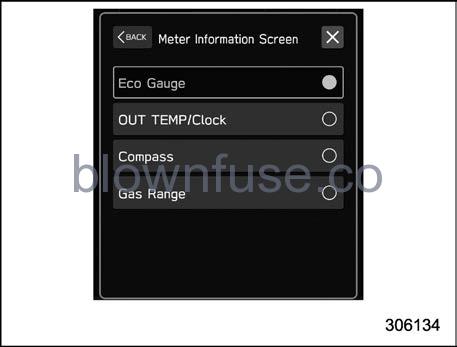 Example
Touch the preferred item.
How to set items on the screen
Brightness/Contrast
Set and adjust the brightness and contrast of the center information display.
NOTE
“Brightness” can only be adjusted when “Brightness Dial” is off. Refer to “General settings” P219.
- Touch
 (HOME).
  (Settings)
- “General”
- Display”
- “Brightness/Contrast”
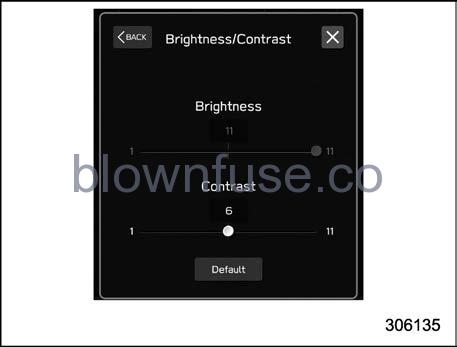
- Drag
 to adjust the brightness and contrast.
Touch “Default” to revert to the factory setting.
Favorite Widgets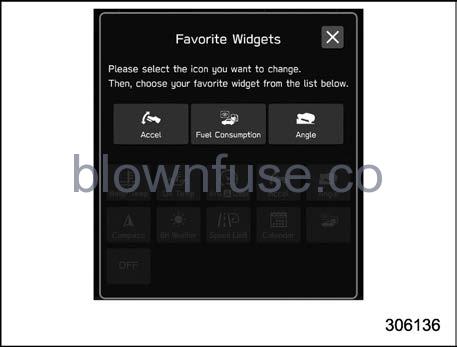
The menu on the favorite screen can be customized.
- Touch
 (HOME).
  (Settings)
- “General”
- “Favorite Widgets”
- Select the icon of the display position.
- Select the display item.
Birthday List
If a birthday or anniversary is approaching, a message will be shown when the ignition switch is turned to the “ON” position. This function can be set to on or off by “Reminder Screen”. For details, refer to “General settings” P219.
- Touch
 (HOME).
  (Settings)
- “General”
- “Birthday List”
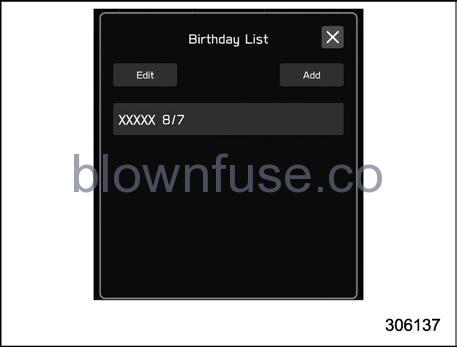
- “Add”
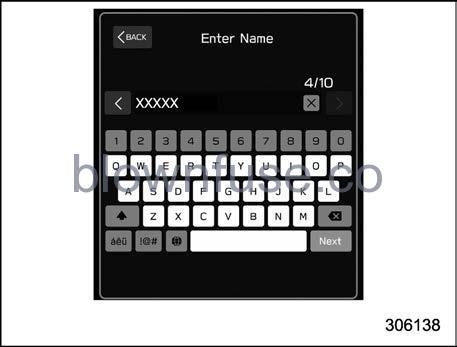
- Enter the name.
- “Next”.
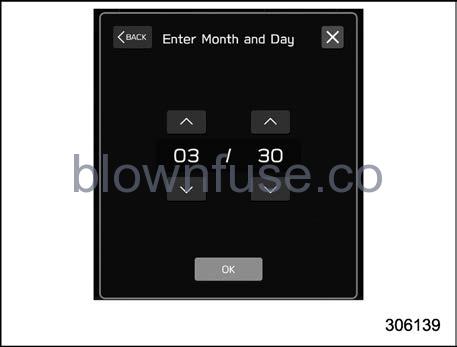
- Enter the date.
- “OK”
NOTE
A maximum of 5 birthdays can be stored.
Anniversary List
The procedure for setting an anniversary is the same as “Birthday List” P229, except that in step 4 “Anniversary List” is selected.
Driver Monitoring System (if equipped)
The Driver Monitoring System settings can be changed.
For setting method for the following menu on the Driver Monitoring System, refer to “ON/OFF setting” P228.
- Driver Monitoring System
- User Recognition
- Automatically Retract Seat on Entry
Repeat Facial Scan:
- Touch
 (HOME).
  (Settings)
- “Car”
- “Driver Monitoring System”
- “Repeat Facial Scan”
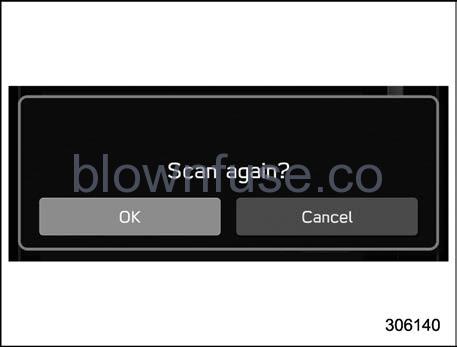
- “OK”
- While seated in the driver’s seat, face forward and wait for a few moments. When the scan is completed, the completion screen is displayed on the combination meter (color LCD).
Register User:
- Adjust the seat position, outside mirror angle, and reverse tilt-down outside mirror angle so that you are seated in the correct driving posture.
NOTE- Start the user registration after adjusting the seat position, outside mirror angle, and reverse tilt-down outside mirror angle. If they are adjusted during user registration, it may be disrupted. Refer to “Power Seat” FP32 or “Out-side Mirrors” FP275.
- If the ignition switch is turned to the “OFF” position before user registration is complete, the information of the adjusted seat position, outside mirror angles, and reverse tilt-down outside mirror angle will not be saved.
- Touch
 (HOME).
  (Settings)
- “Car”
- “Driver Monitoring System”
- “Register User”
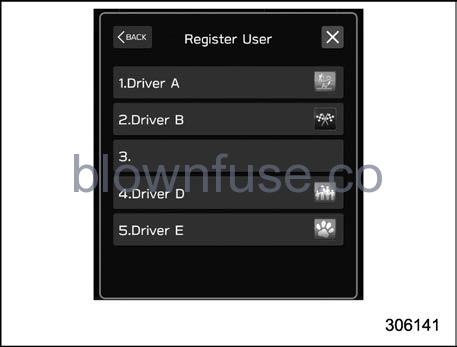
- Select the preferred user from the list.
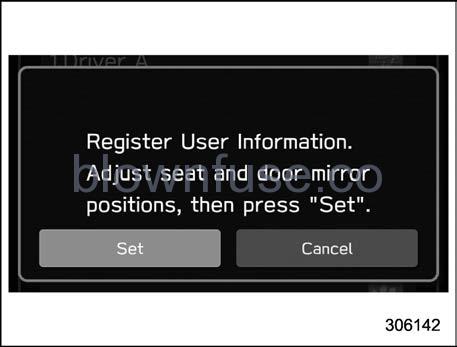
- “Set”
- While seated in the driver’s seat, face forward and wait for a few moments.
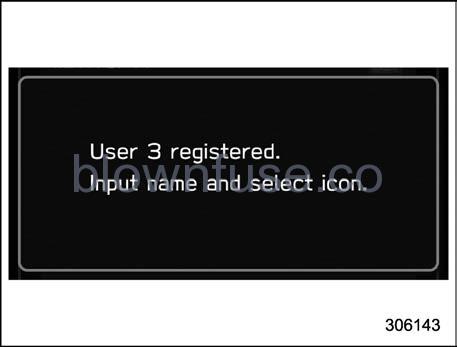 When the screen changes, the registration of the facial scan is completed.
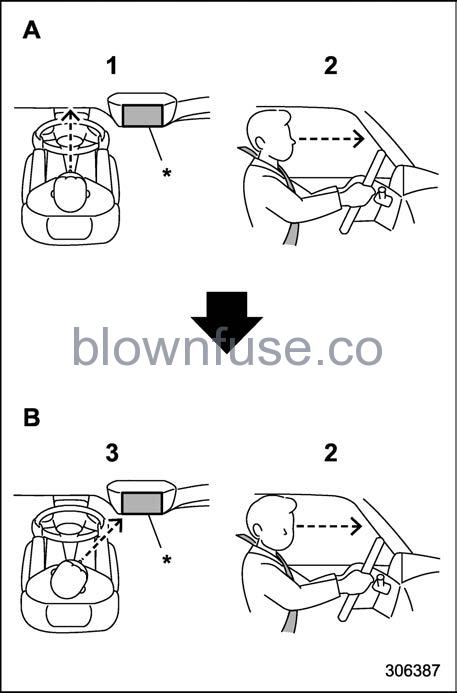
- A) Forward direction
- B) Display direction
- Face forward.
- Do not lower your chin.
- Face the display.
*: Display
NOTE- If user registration cannot be performed, turn your face forward as shown in the illustration, then turn to the display.
- There are some cases where user registration cannot be registered properly. In those cases, refer to “Driver Monitoring System” P408.
- If “Unable to register. Try again.” appears, repeat the procedure beginning from step 5.
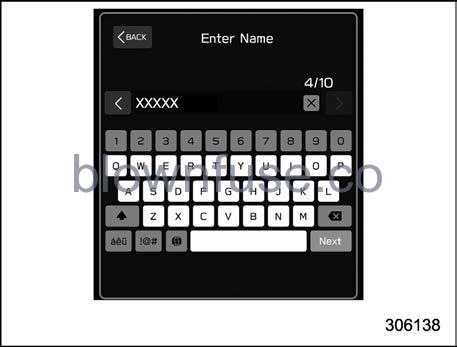
- Enter the name.
- “Next”
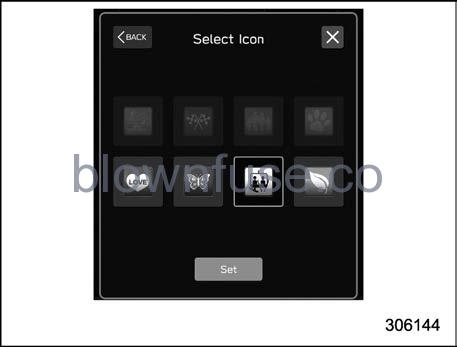
- Select the preferred icon.
- “Set”
NOTE
- An existing user can be overwritten by selecting a registered number. When a user is registered by overwriting, the individual fuel economy data is reset.
- When “User Recognition” is set to OFF, user registration cannot be selected
Update Seat and Mirror Position
- Touch
 (HOME).
  (Settings)
- “Car”
- “Driver Monitoring System”
- “Update Seat and Mirror Position”
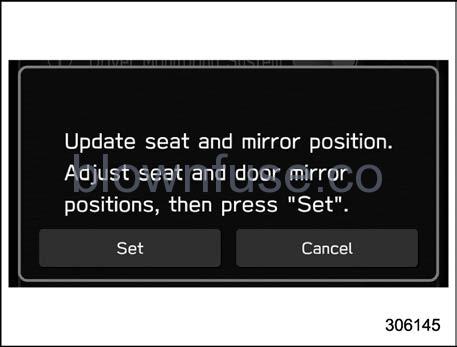
- “Set”
NOTE
- Start the user registration after adjusting the seat position, outside mirror angle, and reverse tilt-down outside mirror angle. If they are adjusted during user registration, it may be disrupted. Refer to “Power Seat” P32 or “Out-side Mirrors” P275.
- If the ignition switch is turned to the “OFF” position before user registration is complete, the information of the adjusted seat position, outside mirror angles, and reverse tilt-down outside mirror angle will not be saved.
Delete Driver Position:
- Touch
 (HOME).
  (Settings)
- “Car”
- “Driver Monitoring System”
- “Delete Driver Position”
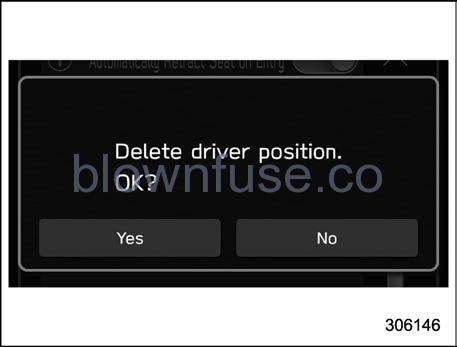
- ? “Yes”
Delete User:
- Touch
 (HOME).
  (Settings)
- “Car”
- “Driver Monitoring System”
- “Delete User”
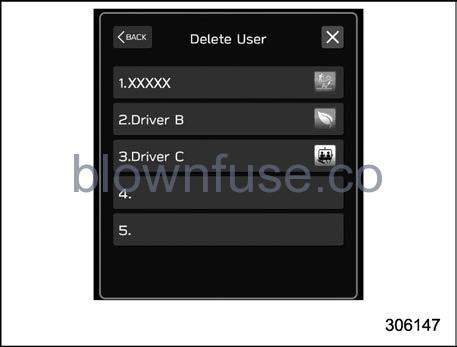
- 6. Select the preferred user from the list.
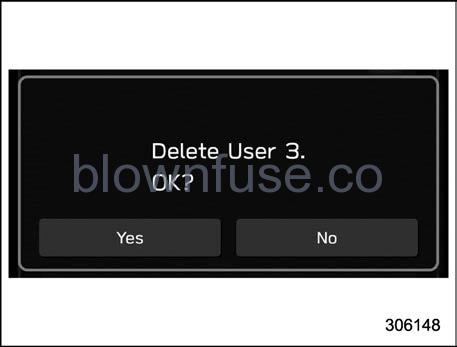
- “Yes”
Delete All Users:
- Touch
 (HOME).
  (Settings)
- “Car”
- “Driver Monitoring System”
- “Delete All Users”
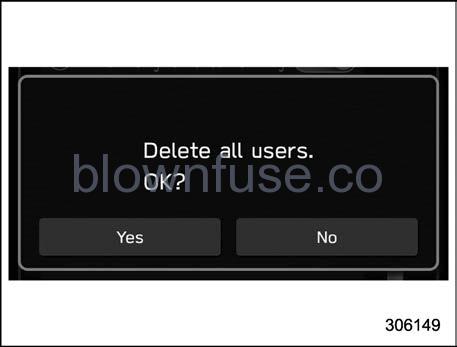
- “Yes”
Car information screen
- Touch
 (HOME) to display the top menu.
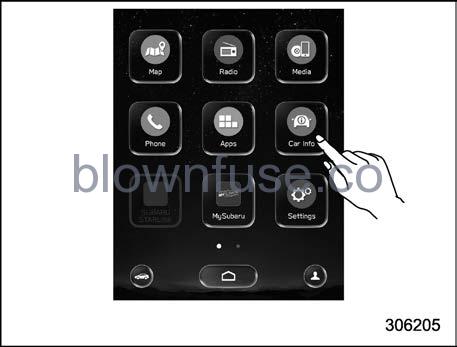
 (Car Info)
Driving Statistics screen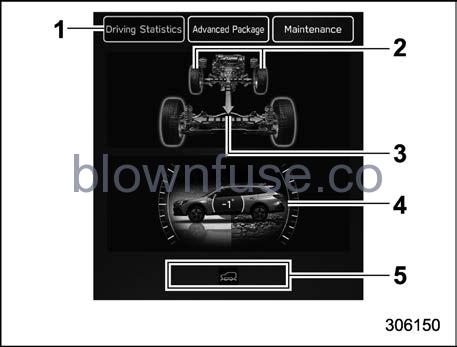 Except for Subaru Outback Wilderness
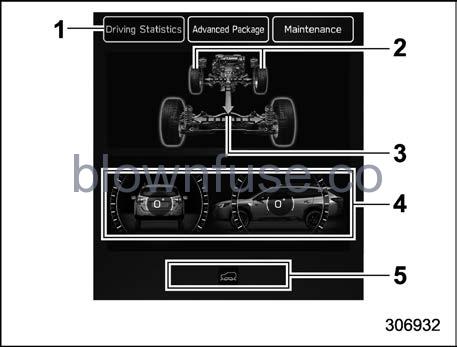 For Subaru Outback Wilderness
- Driving Statistics
- Steering angle
- Running condition
- Vehicle posture
- Telltale screen
This screen displays the driving status of the vehicle and the operation status functions. For functions that are operating, the indicator will illuminate or flash.
NOTE
- The vehicle posture indication may differ from the actual vehicle posture. . For Outback/Subaru Outback Wilderness, when X-MODE has been turned on, the screen of the center information display will be changed to the X-MODE screen.
- The vehicle posture angle varies not only due to the angle of the road surface, but also due to the vehicle tilt caused by the occupants, cargo, and acceleration or deceleration.
Advanced Package screen
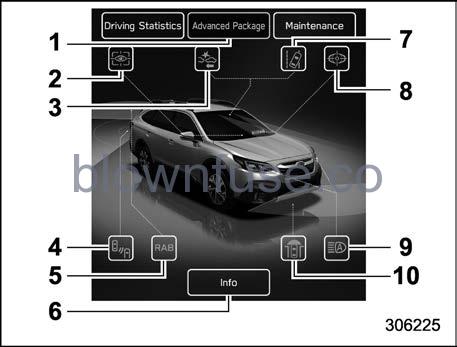
- Advanced Package
- Driver Monitoring System*1
- Pre-Collision Braking
- SD/RCTA*1
- Reverse Automatic Braking (RAB) sys-tem*1
- Information icon
- Lane Departure Warning
- EyeSight Assist Monitor
- High beam assist
- Front view monitor*1
- If equipped
This screen displays the advanced safety functions status of the vehicle.
Touch “Advanced Package” from the 2nd menu in the car info screen.
The advanced safety functions information can be shown on the screen. Touch the information icon on the screen.
NOTE
- Indicators and icons are not displayed for functions that are not equipped to the vehicle.
- The indicators and icons of functions that are not operating are displayed in gray.
Maintenance screen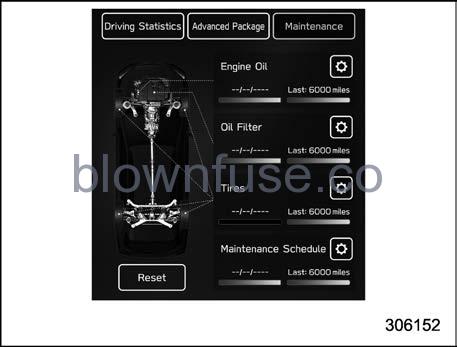
Maintenance reminders can be set.
Engine Oil change reminder:
- Touch “Maintenance” from the 2nd menu in the car info screen.
- (Engine Oil)
- Select “Notification Date” or “Notification Distance” of the reminder.
- “Set”

Oil Filter change reminder:
The setting procedure is the same as the “Engine Oil” reminder, but touch the “Oil Filter” item in step 2.
Tires rotation reminder:
The setting procedure is the same as the “Engine Oil” reminder, but touch the “Tires” item in step 2.
Maintenance Schedule setting:
The setting procedure is the same as the “Engine Oil” reminder, but touch the “Maintenance Schedule” item in step 2.
NOTE
- Touch “Reset” to reset each setting. .
- ouch “Update” to revert to the default value.
Dual 7.0-Inch Display Models (If Equipped)
NOTE
For 11.6-inch display models, refer to “11.6-Inch Display Models” P213.
Main screens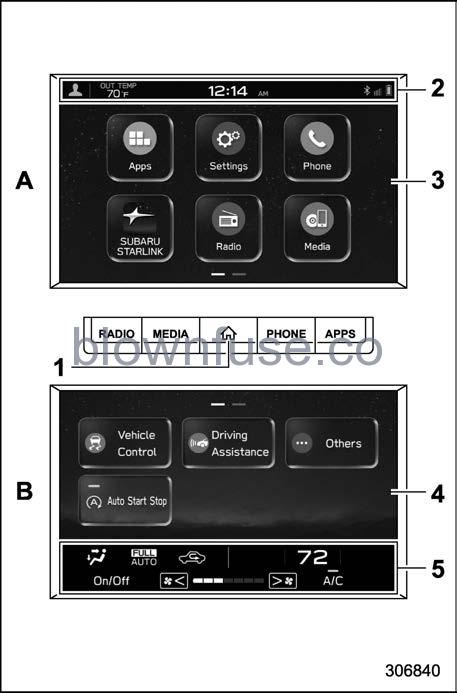
- A) Upper display
- B) Lower display
- HOME button (Refer to “HOME button” P236.)
- Status bar (Refer to “Status bar” P236.)
- Upper main screen (Refer to “Setting of the upper display” P237.)
- Lower main screen (Refer to “Setting of the lower display” P240.)
- Climate control screen (Refer to “Climate control screen” P237.)
While the ignition switch is in the “ACC” or “ON” position, the touch panel will activate.
HOME button
Press![]() (HOME) to display the top menu.
(HOME) to display the top menu.
Status bar
The driver profiles icon, outside temperature and clock are shown on the display.
NOTE
- The outside temperature indicator shows the temperature around the sensor. However, the temperature may not be indicated correctly or the update may be delayed in the following conditions.
- While parking or driving at low speeds
- When the outside temperature changes suddenly (example: when going in and out of an underground parking area or when passing through a tunnel)
- When starting the engine after being parked for a certain period of time
- The temperature unit cannot be changed.
- The clock can be shown in either 12-hour display or 24-hour display. For details about the setting, refer to “Clock” P248.
- Touch the clock on the status bar to display the clock setting screen. Refer to “Clock” P248.
Upper display
For details about items, refer to “Setting of the upper display” P237.
For details about the following menu, refer to the separate navigation/audio Owner’s Manual.
- Radio
- Media
- Phone
- Apps
- SUBARU STARLINK
- Add to Shortcut
Lower display
For details about the setting items, refer to “Setting of the lower display” P240.
If this screen changes to the climate control screen, refer to “Dual 7.0-Inch Display Models” P284.
Climate control screen
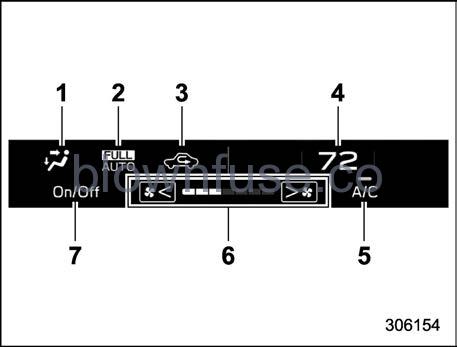
- Airflow mode
- Climate control mode
- Air inlet selection
- Set temperature indicator
- Customizable icon
- Fan speed indicator
- Climate control On/Off button
When operating the climate control system, the main screen switches to the climate control screen. For details about climate control operation, refer to “Climate Control Panel” P283.
Setting of the upper display
In this Owner’s Manual, the settings of the “General” menu will be explained. For details about other items, refer to the separate navigation/audio Owner’s Manual.
General settings
The “General” menu is used to set the display, language and time.
- Press
 (HOME).
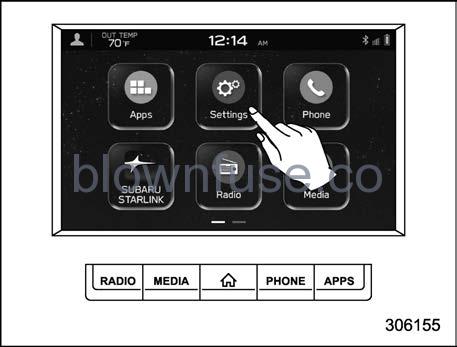
- Touch
 (Settings).
 - “General”
- Select the preferred menu.
The setting adjustments to the following items can be manually changed to meet your personal requirements.
| Item |
Available settings |
Page reference for the vehicle system opera- tion | Page reference for the setting procedure | ||
| 1st menu | 2nd menu | 3rd menu | |||
|
General |
Clock | Time Setting | Sync With Phone/Manual | 248 | 248 |
| Clock Format | 12H/24H | 249 | |||
|
Display |
Display Off | Turn the screen off. | — | 245 | |
| Brightness Dial | ON/OFF | — | 245 | ||
|
Brightness/Contrast |
Set and adjust the brightness and contrast of the screen dis- play and camera display. |
— |
|||
|
Reminder Screen |
Maintenance | ON/OFF | 245 | ||
| Birthday | ON/OFF | 245 | |||
| Anniversary | ON/OFF | 245 | |||
|
Meter Screen |
Gauge Initial Movement | ON/OFF | 175 | 245 | |
| Meter Information Screen | Eco Gauge/OUT TEMP/Clock/ Gas Range | 205 | 245 | ||
| Camera | Rear Camera Delay Control | ON/OFF | 384 | 245 | |
| Steering Angle Lines | ON/OFF | 386 | 245 | ||
- If equipped
- For details about the audio and navigation system, refer to the Owner’s Manual supplement for the audio and navigation system.
NOTE
Touch to display the explanation of the items.
Setting of the lower display
Touch ![]() (Car Settings). Refer to “Vehicle setting icons” P242.
(Car Settings). Refer to “Vehicle setting icons” P242.
This screen displays the driving status of the vehicle and the operation status of the functions. Refer to “Driving Statistics” P246.
Set the timing of the maintenance. Refer to “Maintenance” P247.
Vehicle settings while driving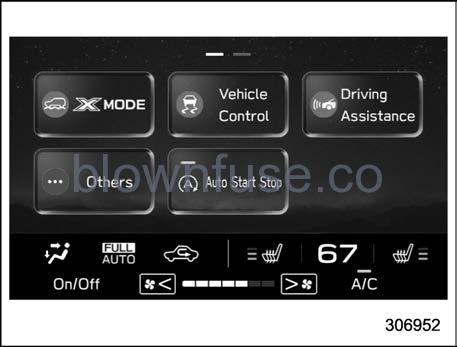
Touch ![]() (X-MODE),
(X-MODE),![]() (Vehicle Control),
(Vehicle Control), ![]() (Driving Assistance),
(Driving Assistance),![]() (Others), or
(Others), or (Auto Start Stop) to display the items that are changeable while driving.
| Item |
Available settings |
Page reference for the vehicle system operation | Page reference for the setting procedure | ||
| 1st menu | 2nd menu | 3rd menu | |||
| X-MODE*1 | — | — | ON/OFF | 365 | 245 |
|
Vehicle Con- trol |
Vehicle Dynamics Control | — | ON/OFF | 363 | 245 |
| Auto Vehicle Hold (AVH) | — | ON/OFF | 372 | 245 | |
| Cruise Control Acceleration Characteristics | — | Lv.1 (Eco)/Lv.2 (Comfort)/Lv.3 (Standard)/Lv.4 (Dynamic) | *2 | — | |
|
Driving As- sistance |
Pre-Collision Braking | — | Setting ON/Setting OFF |
*2 |
— |
| Lane Departure Prevention Function |
— |
All Functions/Lane Departure Prevention Function Only/ Warning Buzzer Only/OFF | |||
| Auto Start Stop | — | — | ON/OFF | 379 | 245 |
|
Others |
Warning Volume | — | Min/Mid/Max | *2 | 245 |
| Units | — | km, km/h, Liter/ Miles, MPH, Gallon | 175 and 203 | 245 | |
| Auto Start Stop | — | ON/OFF | 379 | 245 | |
- For Outback/Subaru Outback Wilderness
- For details about EyeSight system, refer to the Owner’s Manual supplement for the EyeSight system.
Auto Start Stop ON/OFF icon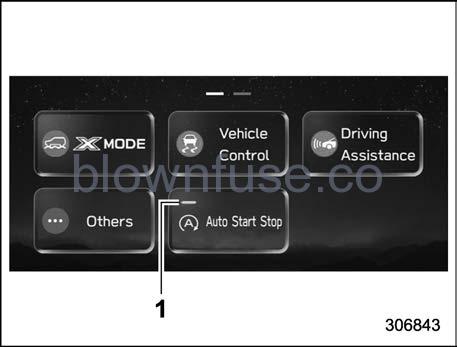
- Auto Start Stop indicator (green)
Touching “  ” deactivates the Auto Start Stop system and turns off the Auto Start Stop indicator (green) on the screen. Touching “
  ” again activates the Auto Start Stop system and turns on the Auto Start Stop indicator (green).
Vehicle setting icons
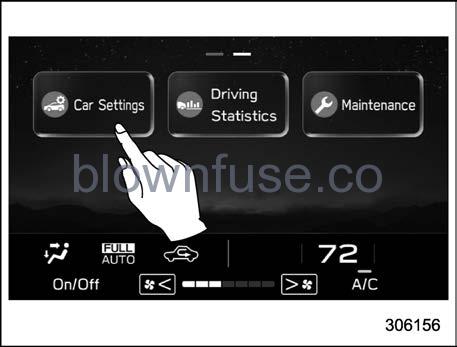
- Touch
 (HOME).
 - Touch
 (Car Settings).
The setting adjustments to the following items can be manually changed to meet your personal requirements.
| Item |
Available settings |
Page reference for the vehicle system opera- tion | Page reference for the setting procedure | ||
| 1st menu | 2nd menu | 3rd menu | |||
|
Car Settings |
EyeSight |
Pre-Collision Braking | Setting ON/Setting OFF | *1 | — |
| Lane Departure Prevention Function | All Functions/Lane Departure Prevention Function Only/ Warning Buzzer Only/OFF |
*1 |
— |
||
| Cruise Control Acceleration Characteristics | Lv.1 (Eco)/Lv.2 (Comfort)/Lv.3 (Standard)/Lv.4 (Dynamic) | *1 | — | ||
| Select Drive on Left/Drive on Right | Right Lane/Left Lane | *1 | — | ||
| Lead Vehicle Acquisition Sound | ON/OFF | *1 | 245 | ||
| Lead Vehicle Moving Monitor | ON/OFF | *1 | 245 | ||
|
EyeSight Assist Monitor |
Red Indicator | ON/OFF |
*1 |
— |
|
| Yellow Indicator | ON/OFF | ||||
| Green Indicator | ON/OFF | ||||
| Keyless Entry System | Hazard Warning Flasher | ON/OFF | 137 | 245 | |
| Defogger | — | 15 minutes/Continuous | 265 | 245 | |
| Interior Light | — | 10 seconds/20 seconds/30 seconds/OFF | 307 | 245 | |
| Item |
Available settings |
Page reference for the vehicle system opera- tion | Page reference for the setting procedure | ||
| 1st menu | 2nd menu | 3rd menu | |||
|
Car Settings |
Auto Light Sensor | Light Sensitivity | Min/Low/Mid/Max | 251 | 245 |
| Wiper Link | ON/OFF | 252 | 245 | ||
|
Welcome Lighting |
Approaching Time Set | 30 seconds/60 seconds/90 seconds/OFF |
252 |
245 | |
| Leaving Time Set | 30 seconds/60 seconds/90 seconds/OFF | 245 | |||
| One-Touch Lane Changer | — | ON/OFF | 261 | 245 | |
|
Auto Door Lock/Unlock |
Auto Door Lock | Vehicle Speed/Shift into or out of PARK/OFF |
141 |
245 | |
| Auto Door Unlock | Ignition OFF/Driver Door Open/ Shift into or out of PARK/OFF | 245 | |||
| Rear Seat Reminder | — | ON/OFF | 58 | 245 | |
| Vehicle Dynamics Control | — | ON/OFF | 363 | 245 | |
| Auto Vehicle Hold (AVH) | — | ON/OFF | 372 | 245 | |
| Auto Start Stop | — | ON/OFF | 379 | 245 | |
| X-MODE*2 | — | ON/OFF | 365 | 245 | |
| Warning Volume | — | Min/Mid/Max | *1 | 245 | |
| Units | — | km, km/h, Liter/ Miles, MPH, Gallon | 175 and 203 | 245 | |
- For details about EyeSight system, refer to the Owner’s Manual supplement for the EyeSight system.
- If equipped
NOTE
Touch to display the explanation of the items.
How to select items on the screen
ON/OFF setting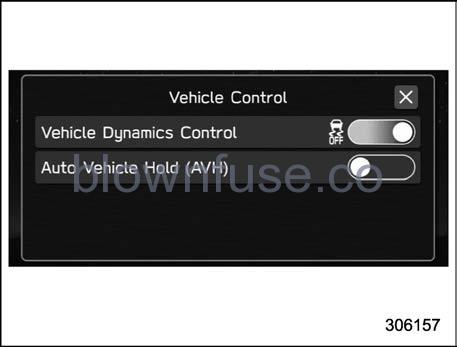
Example
Touch the changing menu and select ON![]() or OFF
or OFF
Selecting
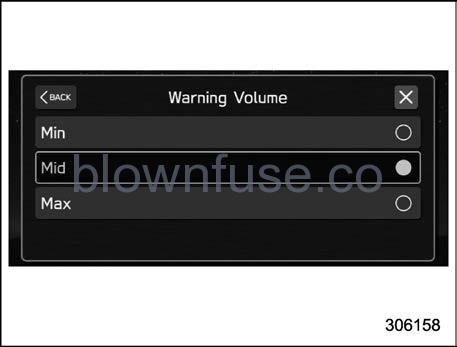 Example
Touch the preferred setting.
How to set items on the screen
Brightness/Contrast
Set and adjust the brightness and contrast of the center information display.
NOTE
“Brightness” can only be adjusted when “Brightness Dial” is off. Refer to “General settings” P237.
- Touch
 (HOME).
  (Settings)
- General”
- “Display”
- “Brightness/Contrast”
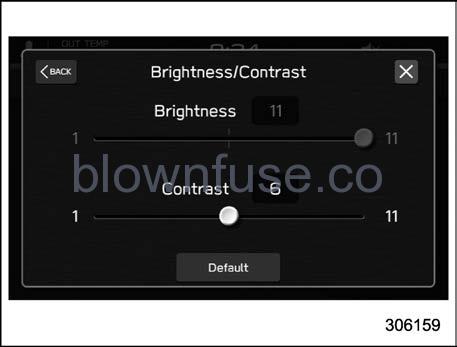
- Drag
 to adjust the brightness and contrast.
Touch “Default” to revert to the factory setting.
Birthday List
If a birthday or anniversary is approaching, a message will be displayed when the ignition switch is turned to the “ON” position. This function can be set to on or off by the “Reminder Screen”. For details, refer to “General settings” P237.
- Touch
 (HOME).
  (Settings)
- General”
- “Birthday List”
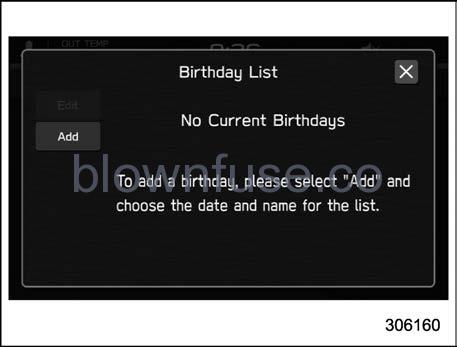
- “Add”
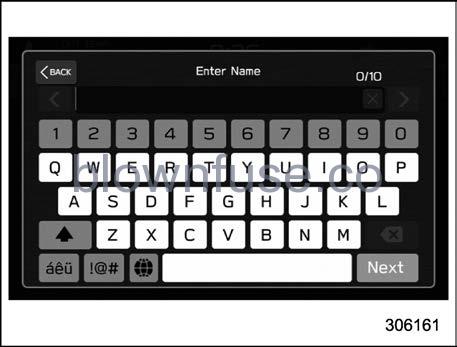
- Enter the name.
- “Next”
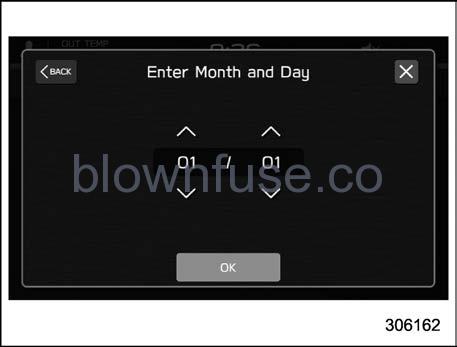
- Enter the date.
- “OK”
NOTE
A maximum of 5 birthdays can be stored.
Anniversary List
The procedure for setting an anniversary is the same as “Birthday List” FP246, except that in step 4 “Anniversary List” is selected.
Driving Statistics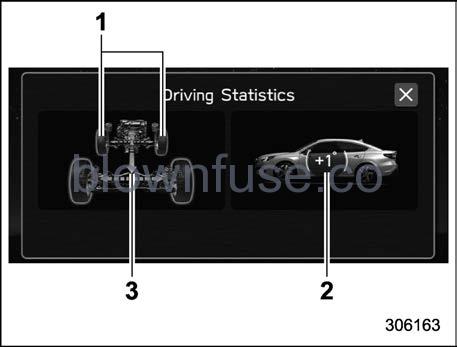
- Steering angle
- Vehicle posture
- Running condition
This screen displays the driving status of the vehicle and the operation status of the functions. For functions that are operating, the indicator will illuminate or flash.
NOTE
- The vehicle posture indication may differ from the actual vehicle posture. . For Outback/Subaru Outback Wilderness, when X-MODE has been turned on, the screen of the center information display will be changed to the X-MODE screen.
- The vehicle posture angle varies not only due to the angle of the road surface, but also due to the vehicle tilt caused by the occupants, cargo, and acceleration or deceleration.
Maintenance
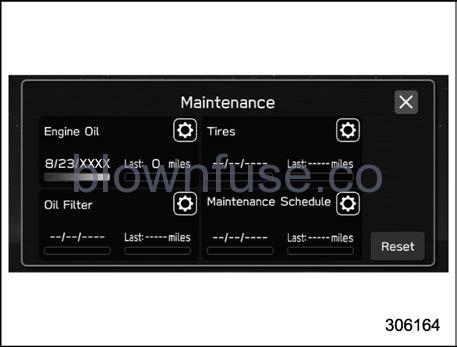
Maintenance reminders can be set.
Engine Oil setting:
- Touch
 (Maintenance).
  (Engine Oil)
- Select “Notification Date” or “Notification Distance” of the reminder.
- “Set”

Oil Filter setting:
The setting procedure is the same as “Engine Oil” setting, but touch the “Oil Filter” item in step 2.
Tires setting:
The setting procedure is the same as “Engine Oil” setting, but touch the “Tires” item in step 2.
Maintenance Schedule setting:
The setting procedure is the same as “Engine Oil” setting, but touch the “Maintenance Schedule” item in step 2.
NOTE
- Touch “Reset” to reset each setting.
- Touch “Update” to revert to the default value.
