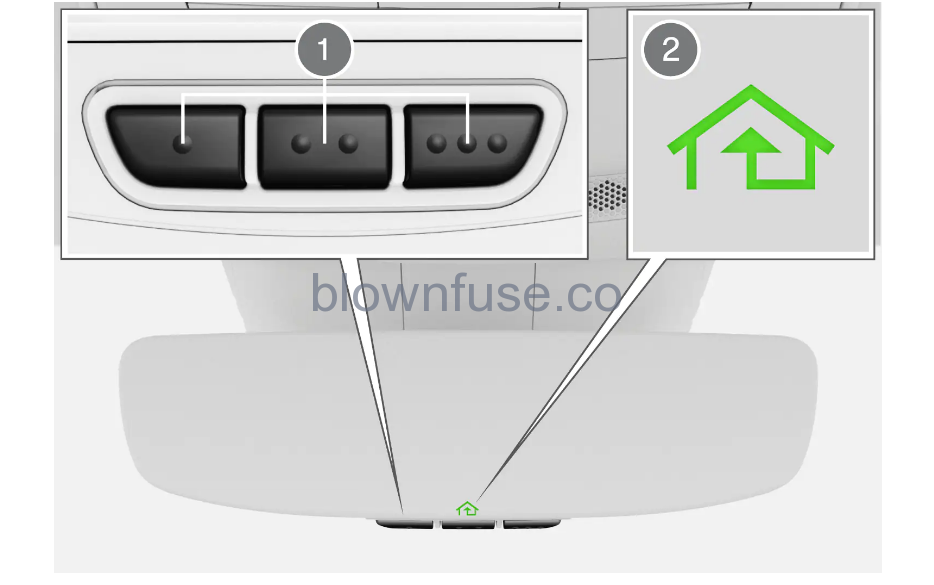

- Programmable buttons
- Indicator light
HomeLink® is integrated in the rearview mirror and consists of three programmable buttons and an indicator light in the mirror.
- Save the original remote controls for future reprogramming (e.g. for use in another vehicle).
- It is also advisable to delete the button programming if the vehicle is sold.
More informationVisit homelink.com or call 1-800-355-3515.
Programming HomeLink®*
While HomeLink® is being programmed, the garage door or gate being programmed may be activated. Make sure that no one is near the door or gate during programming. When programming a garage door opener, it is advised to park outside of the garage.
Programming HomeLink®
- Point the remote control at the HomeLink® button to be programmed and hold it about 2-8 cm (1-3 inches) from the button. Do not obstruct the HomeLink® indicator light.
- Press and hold both the remote control button and the HomeLink® button to be programmed.
- Do not release the buttons until the indicator light has stopped flashing slowly (about once a second) and either flashes quickly (about 10 times a second) or glows steadily.
> If the indicator light glows steadily: Programming is complete.
> Press the programmed button twice to activate.
> If the indicator light flashes quickly: The device being programmed with HomeLink® may have a security function that requires an extra step.
> Try pressing the programmed button twice to see whether the programming works. Otherwise, continue with the following steps.
-
Locate the “training” button on the receiver for the e.g. garage door opener. It is usually located near the antenna bracket on the receiver.
- Press and release the “training” button once.Programming must be completed within 30 seconds after pressing the button.
- Press and release the HomeLink® button to be programmed. Repeat the press/hold/release sequence a second time. For some receivers, the sequence may need to be repeated a third time.
> Programming is complete.
Some remote controls are more effective at programming HomeLink® from a distance of about 15-20 cm (6-12 inches).
Reprogramming individual buttons
- Press and hold the desired button for about 20 seconds.
- When the indicator light on HomeLink® starts flashing slowly, it is possible to program as usual.
If the button you are reprogramming does not program with a new device, it will revert to previously saved programming.
Resetting the HomeLink® buttonsIt is only possible to reset all HomeLink® buttons at once. Individual buttons can only be reprogrammed.
- Press and hold the outer buttons on HomeLink® for about 10 seconds.
> When the indicator light goes from a steady glow to flashing, the buttons have been reset and are ready for reprogramming.
Problems programmingVisit homelink.com or call 1-800-355-3515.
Type approval for HomeLink®*
| Country/Area | Type approval |
|---|---|
| USA and Canada | This device complies with FCC rules part 15 and Industry Canada RSS-210. Operation is subject to the following two conditions: (1) This device may not cause harmful interference, and (2) This device must accept any interference that may be received including interference that may cause undesired operation.
|
| Europe | Gentex Corporation hereby declares that HomeLink® Model UAHL5 complies with the Radio equipment directive 2014/53/EU. Wavelengths within which the radio equipment operates:
Certificate holder address: Gentex Corporation, 600 North Centennial Street, Zeeland MI 49464, USA
|
For more information, see polestar.com/manual
The transmitter has been tested and complies with FCC and IC rules. Changes or modifications not expressly approved by the party responsible for compliance could void the user’s authority to operate the device.
Using HomeLink®*
- Press and hold the programming button.
- The garage door, gate, alarm system, etc. will be activated (this may take several seconds).
- The indicator light will glow steadily or flash when the button has been pressed.
If the button is held down for more than 20 seconds, reprogramming will begin.
The original remote controls can still be used in parallel with HomeLink®.
NOTE
HomeLink® cannot be used if the car is locked and the alarm is armed from the outside.
- If you use HomeLink® to open a garage door or gate, be sure no one is near the gate or door while it is in motion.
- Do not use HomeLink® with any garage door opener that lacks safety stop and reverse features as required by US federal safety standards (this includes any garage door opener model manufactured before April 1, 1982). A garage door that cannot detect an object – signaling the door to stop and reverse – does not meet current U.S. federal safety standards. For more information, contact HomeLink at: homelink.com.


