
2023 Polestar 2 Charging of high-voltage battery
Charging electric vehicles
Charging via charging station (mode 3)
- Pull out the cable from the charging station’s storage socket or take out the vehicle’s charging cable. Note that the ignition must be switched off completely before charging.
- Plug the charging cable into the charging station. If the charging station has a permanent charging cable, proceed to step 3.
Avoid connecting the charging cable when there is a risk of thunder or lightning.
-

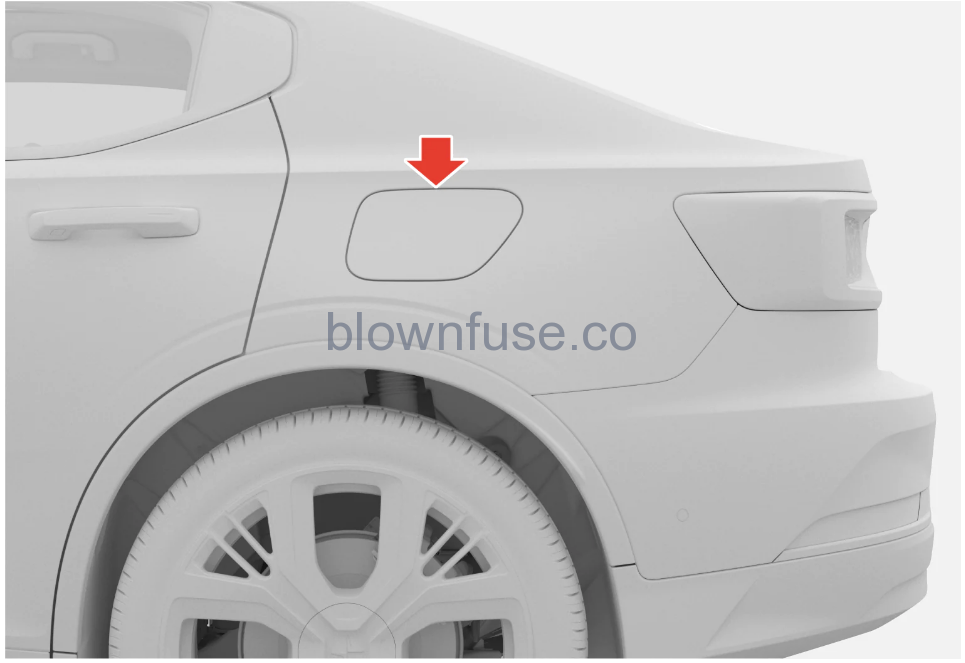
Open the charger door on the left-hand side of the vehicle by pushing in the rear part of the door.
-
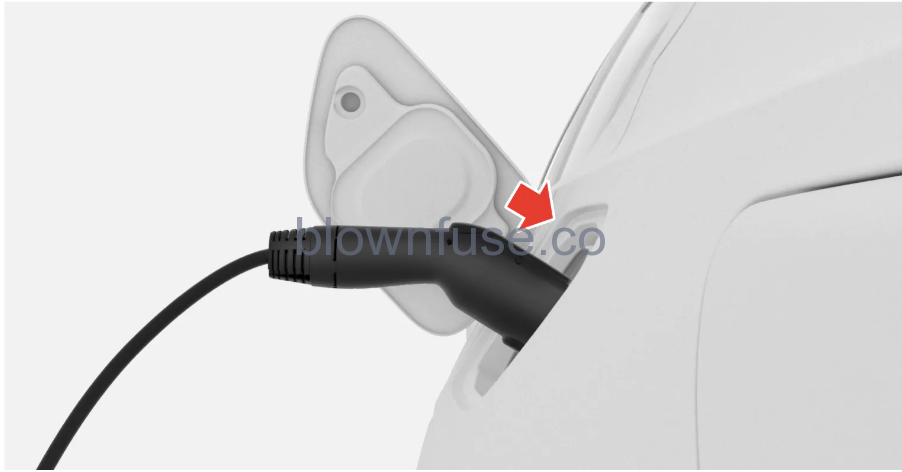
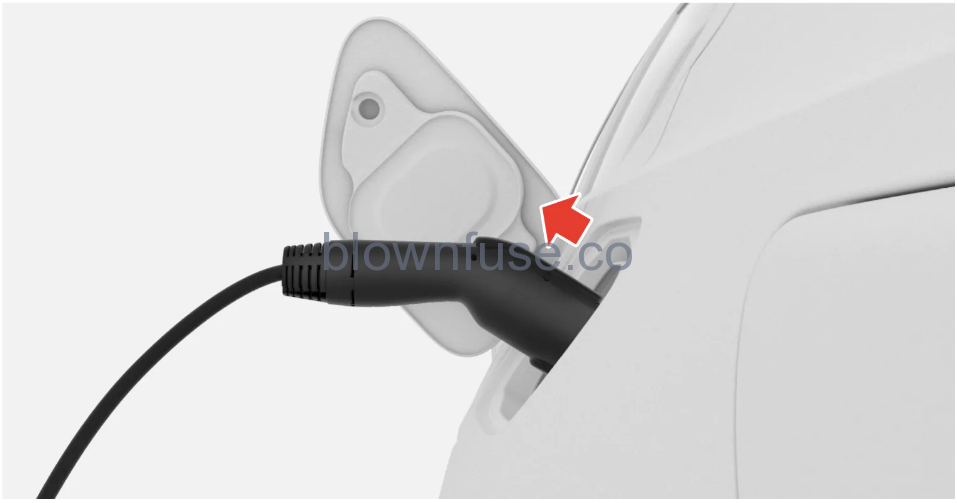
Remove the charging handle’s protective cover and push the charging handle all the way into the charging socket.
To prevent paintwork damage, e.g. in strong winds, position the protective cover of the charging handle so that it does not touch the vehicle.
- The charging cable handle will lock into place and charging will begin within 5 seconds.
> When charging begins, the LED indicator in the charging socket will flash with a green light.
The approximate remaining charging time or the charging status will be displayed in the instrument panel and the center display.
Ensure that the specified amperage in the center display is set to what the charging station is specified to handle.
During charging, condensation from the air conditioning may form under the vehicle. This is because of high voltage battery cooling.
- Children should be supervised when in the vicinity of the charging cable when it is plugged in.
- High voltage is present in your electric meter housing and power distribution service panel. Contact with high voltage can cause death or serious personal injury.
- Do not use the charging cable if it is damaged in any way.A damaged or malfunctioning charging cable may only be repaired by an authorized workshop. Contact Polestar Customer Support for more information.
- Always position the charging cable so that it will not be driven over, stepped on, tripped over or otherwise damaged, or cause personal injury.
- Do not use any adapters between the charging cable and electrical outlet.
- Do not connect one or multiple adapters of any kind between the charging cable and vehicle.
Also, refer to the manufacturer’s instructions for using the charging cable and its components.
Do not wash the vehicle when the charging cable is plugged in or the charger door is open.
- Remove the charging cable from the charging station’s storage socket. Note that the ignition must be switched off completely before charging.
- Open the charger door. Remove the protective hose cover for the charging socket.
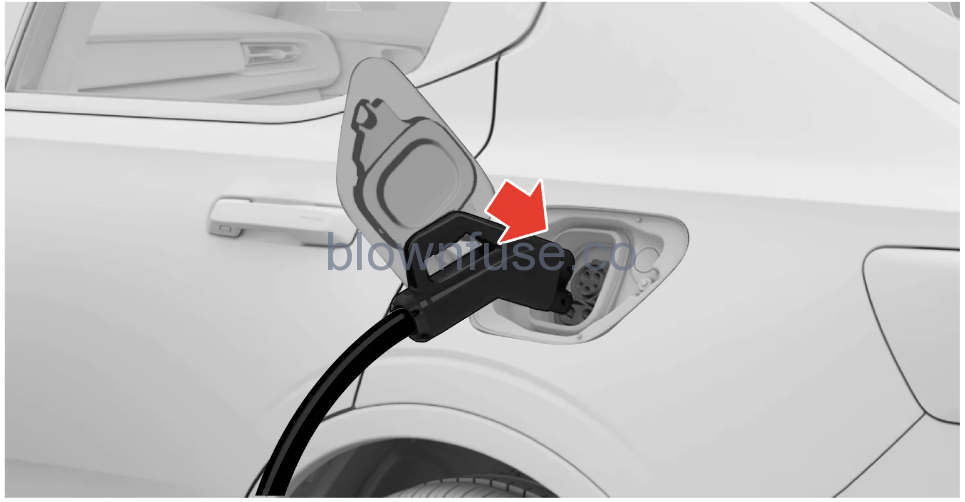
- Grasp the charging cable with both hands and plug the charging cable all the way into the vehicle’s charging socket. Hold the charging handle up for a few seconds. The charging cable automatically locks into the charging socket after a few seconds. Make sure the charging cable locks fully into place so that charging can start.
- Follow the instructions in the charging station’s user interface to authorize the charging. Charging will begin after the charging station completes an insulation test. This may take a minute or so.
> When charging starts, the green LED light in the charging socket will begin to flash. The approximate remaining charging time or the charging status will be displayed in the instrument panel and the center display.
Charging stations supporting CCS are usually clearly marked CCS or Combo.
During charging, water from the air conditioning may condense and drip from underneath the vehicle. This is due to the cooling of the high-voltage batteries.
Charging electric vehicles via wall outlet
The information in this section regards charging via a wall outlet and a mode 2 charging cable.
Polestar recommends a charging cable according to IEC 62196 and IEC 61851 that supports temperature monitoring.
The charging cable is used to charge the vehicle’s high-voltage battery. The charging cable is designed to satisfy Polestar’s safety standard. Use a charging cable recommended by Polestar, thereby guaranteeing its function and safety. Polestar accepts no responsibility for safety or any injury caused by a charging cable that is not recommended by Polestar.
Only use the charging cable provided with your vehicle or a replacement cable recommended by Polestar.
The charging cable and its components must not be rinsed or immersed in water.
- The charging cable must be grounded when in use. It is equipped with a cord with a grounding conductor and a grounding plug. The plug must be inserted into an appropriate outlet that is properly installed and grounded in accordance with all local codes and ordinances and is not damaged in any way.
- Children should be supervised when in the vicinity of the charging cable when it is plugged in.
- High voltage is present in your electric meter housing and power distribution service panel. Contact with high voltage can cause death or serious personal injury.
- Do not use the charging cable if it is damaged in any way.A damaged or malfunctioning charging cable may only be repaired by an authorized workshop. Contact Polestar Customer Support for more information.
- Always position the charging cable so that it will not be driven over, stepped on, tripped over or otherwise damaged, or cause personal injury.
- Disconnect the charger from the wall outlet before cleaning it.
- Never connect the charging cable to an extension cord or a multiple plug socket.
- Do not use any adapters between the charging cable and electrical outlet.
- Do not connect one or multiple adapters of any kind between the charging cable and vehicle.
- Do not use an external timer between the charging cable and electrical outlet.
Also, refer to the manufacturer’s instructions for using the charging cable and its components.
Avoid exposing the charging module and its plug to direct sunlight. In such cases, the overheating protection in the plug could reduce or cut off charging of the high-voltage battery.
Plug the charging cable into a 120/240 V outlet. Open the charger door. Note that the ignition must be switched off completely before charging. Remove the charging handle’s protective cover and push the handle all the way into the vehicle’s charging socket.
The charging cable handle will lock into place and charging will begin within 5 seconds.
Read more about how to start charging in the “Electric vehicle charging” section.
If the power capacity of the wall outlet’s fuse is too low, the fuse could blow while the vehicle is charging. Set the lowest charging amperage in the center display before reconnecting the vehicle for charging. If the problem persists, contact a qualified electrician for further investigation.
- The electric vehicle must only be charged at maximum permitted charging current or lower in accordance with applicable local and national recommendations for charging from wall outlets/plugs.
- The electric vehicle may only be charged from approved grounded wall outlets.
- Avoid visibly worn, defective or damaged electrical outlets since they could lead to fire damage and/or personal injury if used.
Never connect the charging cable if there is a risk of a thunderstorm or there is lightning.
Read more about how to stop charging in the “Stopping electric vehicle charging” section.
Before the charging cable is removed from the vehicle’s charging socket, charging must be stopped by pressing the button next to the charging socket. This must be done even if the vehicle’s doors are already unlocked. If the vehicle is not unlocked, the charging cable or system may be damaged.
- Never disconnect the charging cable from the wall outlet during charging – there is a risk of damaging the wall outlet.
- Always unlock the vehicle so that charging is stopped before the connection to the wall outlet is disconnected.
- Note that the charging cable must be disconnected from the vehicle’s charging socket before it is disconnected from the wall outlet, partly to prevent damage to the system and party to prevent unintentional interruption of charging.
Fuse
Charging an electric vehicle via the wall outlet corresponds to a high load on the fuse.
Charging an electric vehicle requires high amperage. Before starting charging, make sure that the fuse for the wall outlet can handle the amperage specified for the charging cable. Contact a professional if you are uncertain.
There are normally several 120/240 V power consumers in one fuse circuit, which means that more than one power consumer (e.g. lighting, vacuum cleaner, electric drill, etc.) may use the same fuse.
Make sure that the 120/240 V outlet has a power capacity sufficient for charging electric vehicles. If you are uncertain of the capacity, have the outlet checked by a licensed electrician. If you are unsure of the power capacity of the outlet, set the lowest power capacity in the center display.
Reset the fuse for the outlet and select a lower charging current in the center display.
Reset the fuse for the outlet/fuse circuit and select a lower charging current in the center display, or disconnect the other power consumer from the outlet/fuse circuit.
Charging in vehicle’s center display
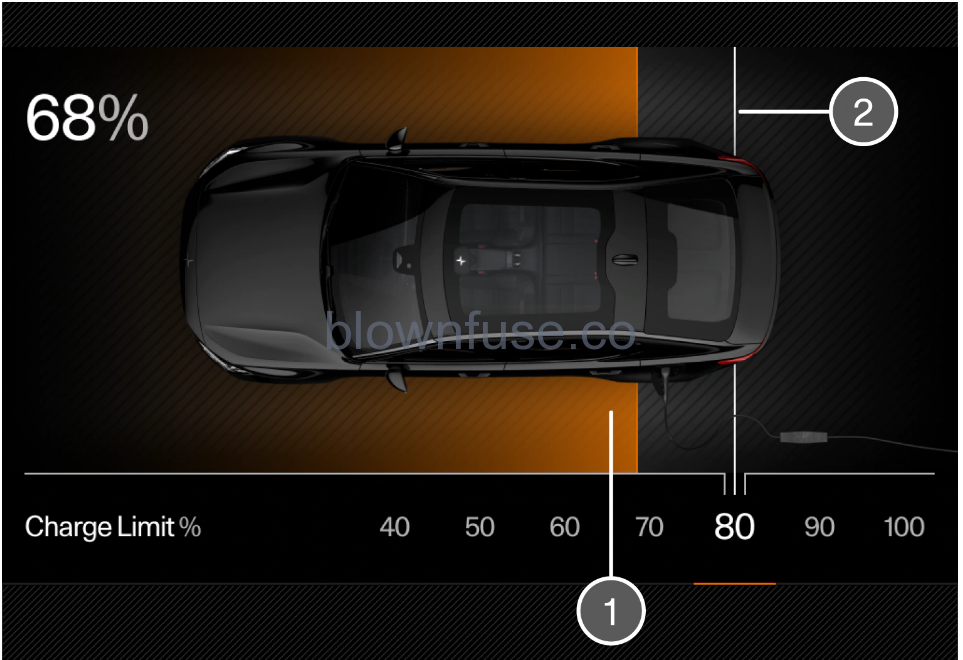
- The battery’s current charge level.
- Swipe to set desired charge level. Charging limit – Swipe to set a charge level at which charging should stop. The set limit remains the same until it is changed again in the center display.
Follow the recommendations for high-voltage battery handling to optimize its lifetime and performance.
Unlocking the charging cable
Tap ![]() on the center display to unlock the charging cable and stop ongoing charging.
on the center display to unlock the charging cable and stop ongoing charging.
It is possible to set the current when AC(Regards charging via charging station (mode 3) and charging via wall outlet (mode 2)) charges. Tap +to increase the current or –to reduce the current.(Set current applies per phase from the AC power source).
The current can be restricted by a charging station or charging cable. It cannot be guaranteed that the vehicle is charged with the current specified if it is higher than what the charging station or charging cable allows.
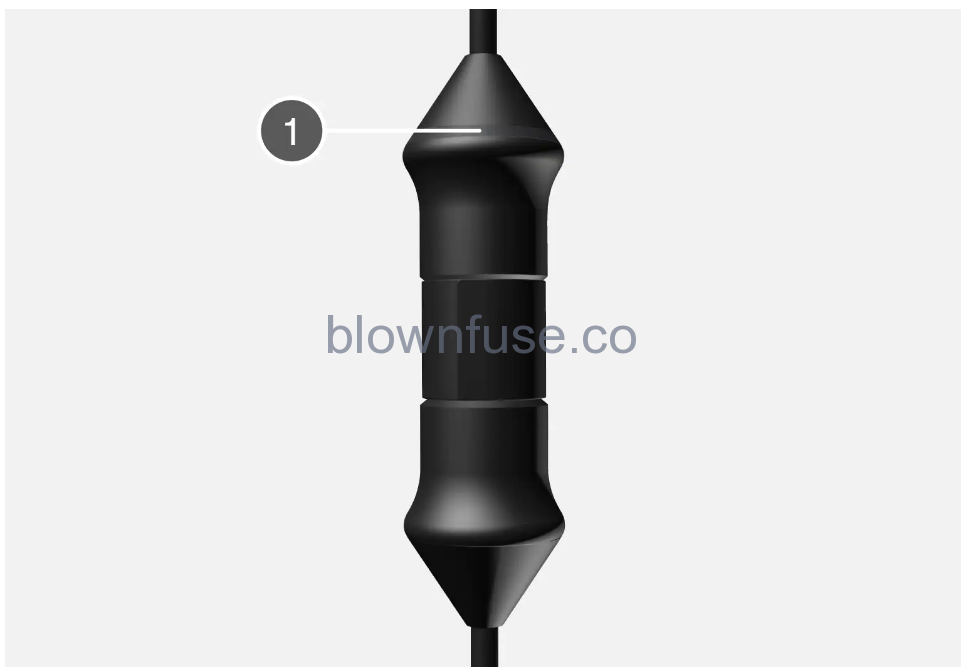
Charging status in the charging cable’s control module
Control module with indicator
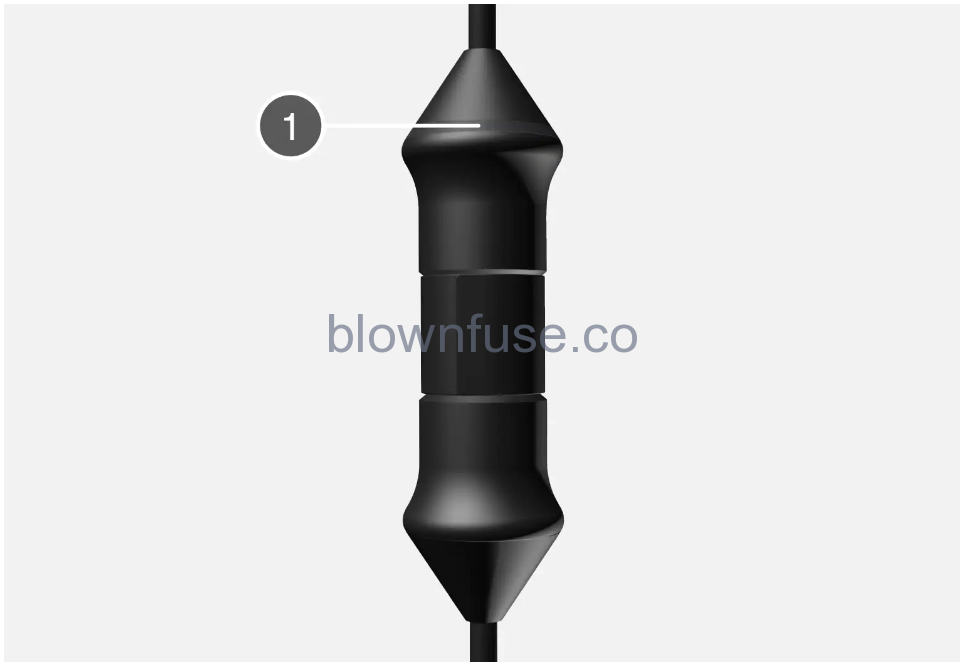
The control module’s LED(LED (Light Emitting Diode) indicator.
| LED indicator |
| LED | Status | Meaning | Recommended action |
|---|---|---|---|
| Off | Charging is not possible. | No power supply to charging cable. |
|
| Steady white light | Charging possible. | The charging cable is ready to be plugged into the vehicle. |
If the LED indicator is white but charging is not possible:
|
| Flashing white light | Charging is in progress. | The vehicle’s electronic system has initiated charging.
Charging is in progress. |
Wait until the vehicle is fully charged. |
| Steady red light | Charging is not possible. | Temporary fault. |
|
| Flashing red light | Charging is not possible. | Critical fault. |
|
Charging status in the instrument panel
| Color | Status | Meaning |
|---|---|---|
| Pulsating green | The instrument panel frame will appear with a green, pulsating light. | Download in progress and an approximate time until the vehicle is fully charged is displayed. |
| Green | The instrument panel frame will appear with a steady green light. | The vehicle is fully charged. |
| Red | The instrument panel frame will appear with a steady red light. | Malfunction. Check the charging cable’s connection to the vehicle’s charging socket and power source.
Then restart charging using the following steps:
|
| Blue | The instrument panel frame will appear with a steady blue light. | Scheduled charging activated. |
| Yellow | The instrument panel frame will appear with a steady yellow light. | Charging is waiting to start or has been paused. |
In addition to charging status, the following is also shown in the instrument panel:
- current amperage and set amperage as well as number of phases.(Current amperage and set amperage applies per phase from the AC power source)
- charging output
- battery percentage
- time until the vehicle is fully charged.
If the instrument panel is not used, it will go dark after a period of time. Activate the display again by opening one of the doors. Read more in the instrument panel section.
Charging status in the vehicle’s charging socket
| LED indicator light’s color | Meaning |
|---|---|
| White | Welcome lighting |
| Flashing yellow | The charging process is being stopped. |
| Yellow |
Wait mode(E.g. after a door has been opened or if the charging cable handle is not locked in place) – waiting for charging to start. |
| Flashing green |
Charging is in progress.(The more slowly the light flashes, the closer the battery is to being fully charged) |
| Green |
Charging completed(The light will go out after a short time) |
| Red | Malfunction. Check the charging cable’s connection to the vehicle’s charging socket and power source.
Then restart charging using the following steps:
|
| Flashing red | The vehicle is locked and does not detect a key when the charging cable is unlocked via the button next to the charging socket. |
| Blue | Scheduled charging activated. |
The charging socket’s LED light indicates the status for charging of the high-voltage battery and not whether the vehicle is drawing power, for example when the climate system is being used. Even if the LED indicates that charging is complete, or that scheduled charging is activated, the vehicle can still draw current from the outlet. To avoid affecting the vehicle’s range, current is first drawn from the outlet and not from the battery to supply any extra vehicle loads (parking heater, etc.).
Charging time
Polestar strongly advises against charging the vehicle with alternating current of 100-120 V in combination with an amperage under 10A.
|
Current (A)(Maximum charging current may vary from market to market) |
Charging output (kW)(The highest charging output the vehicle can achieve is 11 kW) |
Charging time (hours)(From 0-100 %) |
|---|---|---|
| 6 | 1.3 | 72 |
| 10 | 2.2 | 40 |
| 16 | 3.6 | 24 |
| 32 | 7.2 | 12 |
| 48 | 11 | 8 |
| Current (A) |
Charging output (kW)(The highest charging output the vehicle can achieve is 11 kW) |
Charging time (hours) |
|---|---|---|
| 6 | 4 | 22 |
| 10 | 6.8 | 14 |
| 16 | 11 | 8 |
|
Charging output (kW)(Maximum output that the charging station can supply) |
Charging time (minutes)(Applies at 10-80% charging level provided that the battery’s temperature is approx. 35 °C (95 °F)) |
|---|---|
| 50 | 65 |
| 150 | 35 |
To reduce the charging time for rapid charging in cold weather, the battery needs to be preconditioned, which is done by adding a rapid charging station as a destination in Google Maps.
- It may take longer to charge the high voltage battery in cold or hot weather conditions. Some of the charging current is then used to heat/cool the high voltage battery.
- Selecting preconditioning can affect the charging time.
- Rapid charging with up to 150 kW output is possible under favorable conditions for the high-voltage battery and the charging station. Charging output is limited toward the end of rapid charging.
Electric propulsion symbols and messages in the instrument panel
| Symbol | Meaning |
|---|---|
 |
Fault in 12 V battery.
Read the message in the instrument panel. Contact Polestar Customer Support. |
 |
Fault in the drive system.
Read the message in the instrument panel. Contact Polestar Customer Support. |
 |
Temporary fault in driveline.
Read the message in the instrument panel. |
 |
Information about the high-voltage battery’s charge level
Read the message in the instrument panel. |
General information about charging cables
The information in this section only regards charging with mode 3 charging cable or charging station with a permanent charging cable.
The charging cable is used to charge the vehicle’s high-voltage battery. The charging cable is designed to satisfy Polestar’s safety standard. Use a charging cable recommended by Polestar, thereby guaranteeing its function and safety. Polestar accepts no responsibility for safety or any injury caused by a charging cable that is not recommended by Polestar.
Only use the charging cable provided with your vehicle or a replacement cable recommended by Polestar.
Charging with permanent charging cable in accordance with mode 3
(European standard – EN 61851-1)
In certain locations, the charging cable is permanently installed within a charging station connected to an electrical outlet. Therefore, use the charging station’s charging cable and follow the instructions on the charging station.
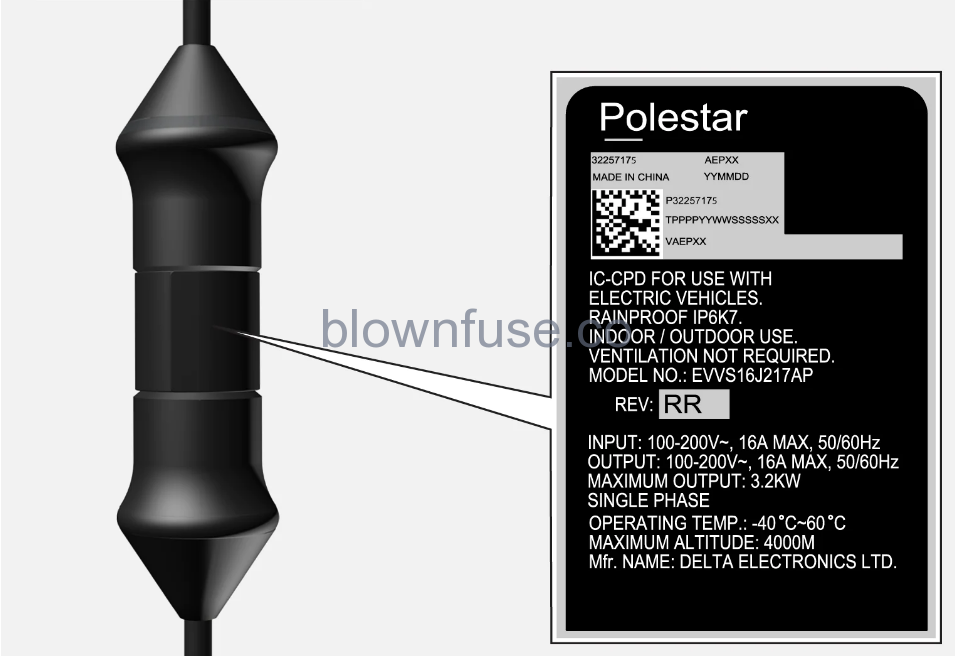
| Specifications, charging cable | |
|---|---|
| Enclosure class
Compliance |
IP67
SAE J1772 |
| Ambient temperature | –32 ºC to 50 ºC (-25 ºF till 122 ºF) |
- Children should be supervised when in the vicinity of the charging cable when it is plugged in.
- High voltage is present in your electric meter housing and power distribution service panel. Contact with high voltage can cause death or serious personal injury.
- Do not use the charging cable if it is damaged in any way.A damaged or malfunctioning charging cable may only be repaired by an authorized workshop. Contact Polestar Customer Support for more information.
- Always position the charging cable so that it will not be driven over, stepped on, tripped over or otherwise damaged, or cause personal injury.
- Do not use any adapters between the charging cable and electrical outlet.
- Do not connect one or multiple adapters of any kind between the charging cable and vehicle.
Also, refer to the manufacturer’s instructions for using the charging cable and its components.
Always interrupt charging first, then disconnect the charging cable – from the vehicle’s charging socket and then from the charging station.
Wipe the charging cable with a clean cloth lightly moistened with water or a mild detergent. Do not use chemicals or solvents.
The charging cable and its components must not be rinsed or immersed in water.
Ground fault breaker in charging cable
The vehicle may only be charged from approved, grounded wall outlets. If the electrical circuit or electrical socket’s capacity is not known, let a licensed electrician inspect the electrical circuit’s capacity. Using a charge level that exceeds the electrical circuit’s or electrical outlet’s capacity may start a fire or damage the electrical circuit.
The charging cable’s internal current breaker helps protect the vehicle’s charging system but cannot ensure that a current overload will never occur.
The control module’s LED indicator.
| LED indicator |
If the control module’s built-in ground fault breaker is tripped, the LED indicator will illuminate with a steady red glow – check the wall outlet. Have the outlet checked by a licensed electrician or try using another wall outlet.
- Check the capacity of the socket.
- Other electronic equipment connected on the same fuse circuit must be disconnected if the total load is exceeded.
- Do not plug in the charging cable if the outlet is damaged, worn or defective.
Stopping charging of the electric vehicle
- Stop charging using the button next to the charging socket.
Before the charging cable is disconnected from the vehicle’s charging socket, charging must be stopped. Not stopping charging before the charging cable is removed can lead to damage to the charging cable or to the system.
- Press the lock button on the charging cable’s handle. The handle will be released/unlocked. Unplug the cable from the vehicle’s charging socket and close the charger door.
- Unplug the charging cable from the charging station or plug the permanent charging cable into the charging station’s storage socket.
Never attempt to remove the charging cable from the vehicle while charging is in progress. Always stop charging first and then unplug the charging cable after the charging socket lock automatically unlocks.
- Stop rapid charging by pressing the button next to the vehicle’s charging socket, by tapping the button in the center display, or via the charging station’s user interface.
> Charging stops and the lock in the charging socket unlocks automatically. This may take a few seconds.
- Unplug the charging cable from the vehicle’s charging socket and close the cover.
- Plug the charging cable into the charging station’s storage socket or hang it back in the designated location.
Unlocking the vehicle during rapid charging
Rapid charging will not normally be interrupted if the vehicle is unlocked. If rapid charging is stopped, it will not resume automatically because the charging station requires reauthorization of charging via the user interface. If rapid charging is stopped, the charging cable will not automatically lock into place again. To restart interrupted rapid charging, remove the charging cable from the vehicle’s charging socket, then plug it in again and follow the instructions in the charging station’s user interface.
If the charging handle cannot be removed after charging is complete, try the following.
- Make sure that the key is within range and that the vehicle is unlocked. Stop charging by doing one of the following:
- by pressing the button next to the charging socket(Not available in all markets)
- via the center display, by tapping
 and then Charge and Unlock cable
 - by following the instructions in the charging station’s user interface.
- Stop charging from the charging station or wall outlet and try step 1 again.
- Charging via charging station: contact the charging station’s customer service for assistance stopping charging.
- Charging via your own charging station: safely disconnect the power supply to your own charging station.
- Charging via wall outlet: disconnect the power supply to the wall outlet safely.
- Move the charging handle slightly from side to side and try step 1 again.
- Lock and unlock the vehicle. Then try step 1 again.
- Lock the vehicle and wait until the LED indicator on the vehicle’s charging socket goes out (this may take up to 7 minutes). Then lock the vehicle and try step 1 again.
If the problem persists, contact Polestar Customer Support.
Temperature monitoring of the charging cable
The temperature in both the control module and the plug is monitored.
If temperature monitoring has automatically reduced the charging current on repeated occasions and changing has been interrupted, the cause of overheating must be investigated and corrected.
If charging is often unintentionally interrupted, both the charging cable and the vehicle’s charging system should be checked. Contact Polestar Customer Support for more information.
Avoid exposing the charging module and its plug to direct sunlight. In such cases, the overheating protection in the plug could reduce or cut off the charging of the high-voltage battery.