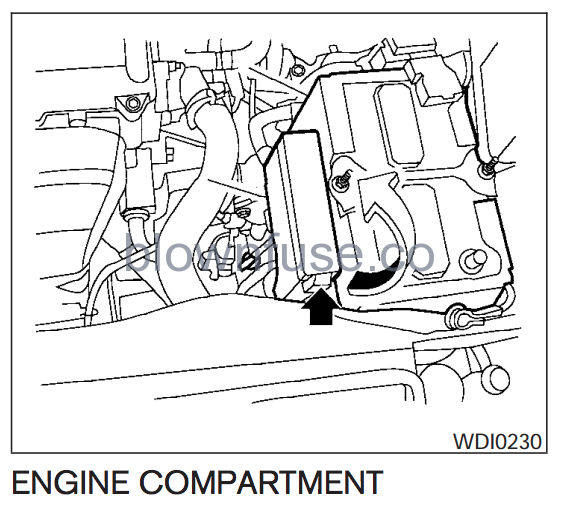
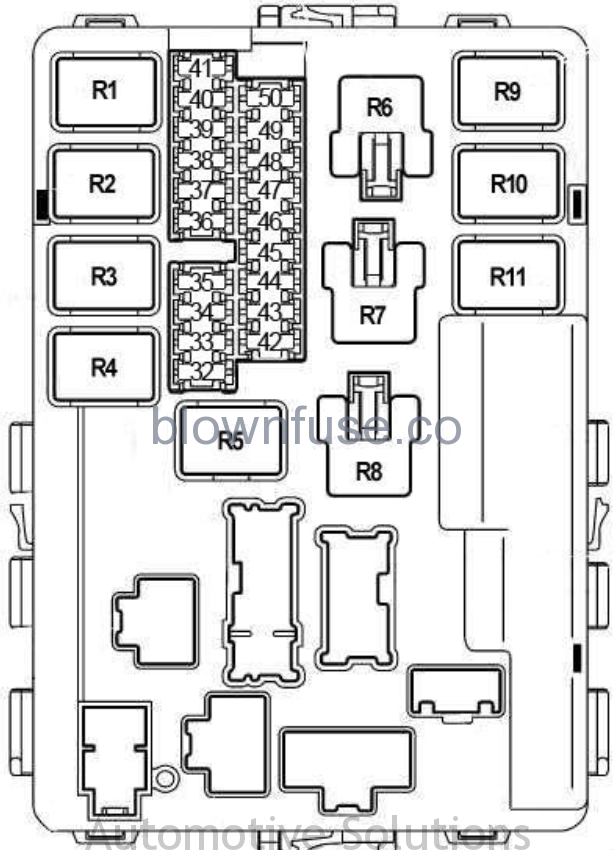
Below is the engine fuse diagram for the Nissan Altima produced in 2003, 2004, 2005, and 2006. The fuse panel is located under the hood at the front of the car, behind the driver’s side headlight. Remove the panel cover to access the fuses. Inside the fuse/relay panel cover, you can find the fuse/relay label describing the name and capacity for each accessory.


| Fuse Number | AMP Rating | Description |
|---|---|---|
| 32 | 20 | Rear Window Defogger Relay |
| 33 | 10 | A/C Relay |
| 34 | 15 | IPDM E/R CPU |
| 35 | 15 | Engine Control Module (ECM), ECM Relay, NATS Antenna Amplifier |
| 36 | 15 | Headlamp Low LH |
| 37 | 20 | Rear Window Defogger Relay |
| 38 | 10 | Headlamp High LH, Daytime Running Lights |
| 39 | 20 | Front Wiper Relay |
| 40 | 10 | Headlamp High RH, Daytime Running Lights |
| 41 | 10 | Tail Lamp Relay (Parking Lamp, License Lamp, Tail Lamp) |
| 42 | 10 | EVAP Canister Purge Volume Control Solenoid Valve, EVAP Canister Vent Control Valve, Intake Valve Timing Control Solenoid Valve (VK35DE), VIAS Control Solenoid Valve (VK35DE) |
| 43 | 15 | Front Fog Lamp Relay |
| 44 | 15 | Throttle Control Motor Relay |
| 45 | 15 | Headlamp Low RH |
| 46 | 15 | Air Fuel Ratio Sensor, Heated Oxygen Sensor |
| 47 | 10 | Washer Motor |
| 48 | 10 | A/T PV Ignition Relay, Revolution Sensor, Turbine Revolution Sensor |
| 49 | 10 | ABS |
| 50 | 15 | Fuel Pump Relay |
| Relay | ||
| R1 | Engine Control Module | |
| R2 | Headlamp High | |
| R3 | Headlamp Low | |
| R4 | Starter | |
| R5 | Ignition | |
| R6 | Cooling Fan (No.1) | |
| R7 | Cooling Fan (No.3) | |
| R8 | Cooling Fan (No.2) | |
| R9 | Throttle Control Motor | |
| R10 | Fuel Pump | |
| R11 | Front Fog Lamp |
1 thought on “Nissan Altima Engine Compartment Fuse Diagram”
Mentions