2022 Kawasaki NINJA 400 ABS Brake Light Switches
Brake Light Switches
Brake Light Switch Inspection
- Turn the ignition switch on.
- The brake light should go on when the front brake is applied.
- If it does not, ask your authorized Kawasaki dealer to inspect the front brake light switch.
- Check the operation of the rear brake light switch by depressing the brake pedal. The brake light should go on after the proper pedal travel.
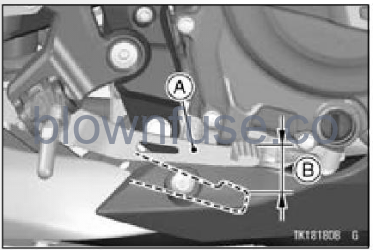 A. Brake Pedal
B. 10 mm (0.39 in.)
If the light does not come on, adjust the rear brake light switch.
Brake Pedal Travel
10 mm (0.39 in.)
Brake Light Switch Adjustment
- Remove the right front footpeg bracket bolts.
- Pull the footpeg bracket a little bit out- ward.
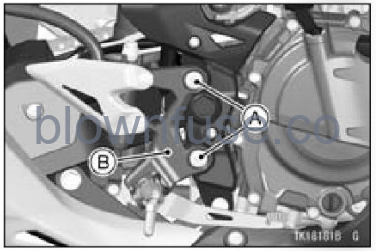 A. Right Front Footpeg Bracket Bolts
B. Right Front Footpeg Bracket
To adjust the rear brake light switch, move the switch up or down by tum- ing the adjusting nut.
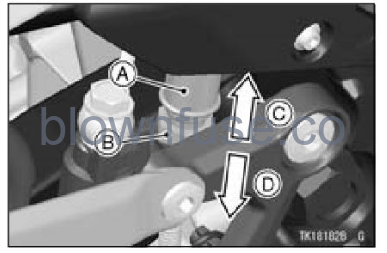 A. Rear Brake Light Switch
B. Adjusting Nut
C. Lights sooner
D. Lights later
NOTICE
To avoid damaging the electrical connections inside the switch, be sure that the switch body does not turn during adjustment.
- Install the right front footpeg bracket.
- Tighten the right front footpeg bracket bolts to the specified torque.
Tightening Torque
Front Footpeg Bracket Bolts: 25 (2.5 kgf•m, 18 ft•lb)
NOTE
lf a torque wrench is not available, this item should be serviced by an authorized Kawasaki dealer.
