2022 Kawasaki KX112 Wheels
Wheels
Tire Air Pressure
- Tire air pressure affects traction, handling, and tire life. Adjust the tire air pressure to suit track conditions and rider preference, but keep it close within the recommended range.
- To check the tire air pressure, remove the air valve cap, and make sure to tighten the cap securely after checking the tire pressure.
- A. Tire Pressure Gauge
- Reduce the tire air pressure to increase the tire tread surface on the ground when riding on a wet, muddy, sandy or slippery track
- Increase the tire air pressure to prevent damage or punctures (though the tires will skid more easily) when riding on a pebbly or hard track.
Air Pressure (when cold)
- Front
- 100 125 kPa (1.02 1.27 kgf/cm,
- 14.5 18.1 psi)100 125 kPa (1.02 1.27 kgf/cm,
- 14.5 18.1 psi)
- Rear
- 100 125 kPa (1.02 1.27 kgf/cm,
- 14.5 18.1 psi)
NOTE
Tire air pressure should be checked when the tires are cold, before you ride the motorcycle.
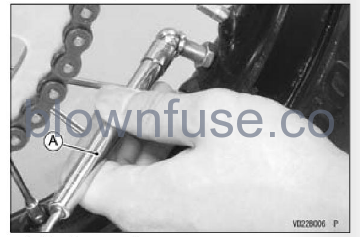
Spokes and Rims
The spokes on both wheels must all be evenly adjusted and not be allowed to loosen. Unevenly tightened or loose spokes will cause the rim to warp, the nipples and spokes to fatigue more quickly, and the spokes to break.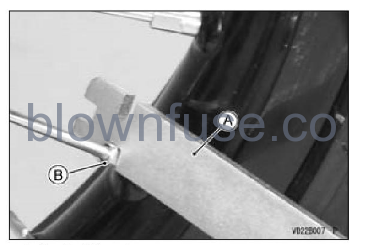
- A. Spoke Wrench
- B. Spoke Nipple
Tighten the spoke nipples to the specified torque.
Tightening Torque
- Spoke Nipples: 4.0 N-m (0.41 kgfm, 35 in-Ib)
Bead Protector
There is a bead protector on the rear wheel. The bead protector prevents the tire and tube from slipping on the rim and damaging the valve stem. Valve stem damage may cause the tube to leak, necessitating tube replacement. In order to keep the tire and tube in position on the rim, inspect the bead protector nut before riding and tighten it if necessary. Tighten the valve stem nut finger tight only.
A. Bead Protector Nut
Rim Runout
- Raise the rear wheel off the ground using a jack cial tool: 57001-1608).
- Set up a dial gauge on the side of the rim and rotate the wheel to measure its axial runout. The difference between the highest and lowest readings is the amount of runout.
- Set up the dial gauge on the inner circumference of the rim and rotate the wheel to measure its radial runout. The difference between the highest and lowest readings is the amount of runout.
- A certain amount of rim warpage (runout) can be corrected by recentering the rim, that is, by loosening some spokes and tightening others to change the position of certain portions of the rim. If the rim is badly bent, however, it should be replaced
NOTE
The welding spot of the rim may show excessive runout. Disregard this when measuring rim runout.
Rim Runout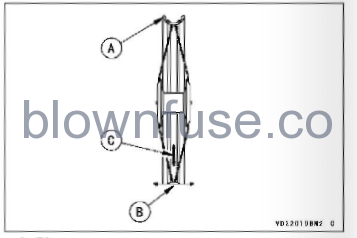
- A. Rim
- B. Axial Runout
- C. Radial Runout
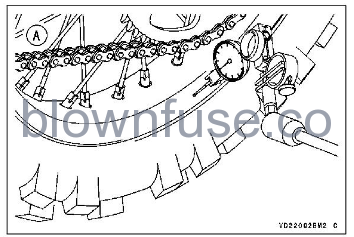
Rim Runout (with tire installed)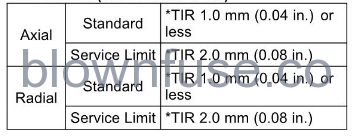
- Total Indicator Reading
- A. Axial Rim Runout Measurement
- A. Radial Rim Runout Measurement