2022 Kawasaki KLX140R L Handlebar
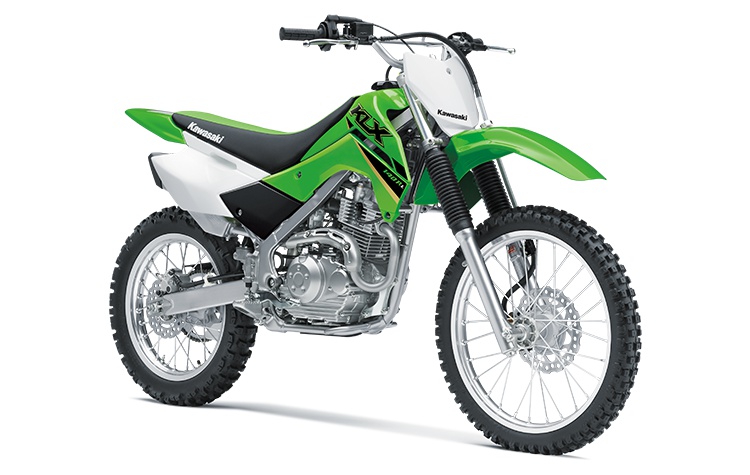
Handlebar
To suit various riding positions, the handlebar can be adjusted by turning the handlebar holders around.
- Remove the number plate (see Choke Knob Adjustment).
- Remove the handlebar clamp bolts, the clamps and the handlebar.
- Check the handlebar for bent or crack.
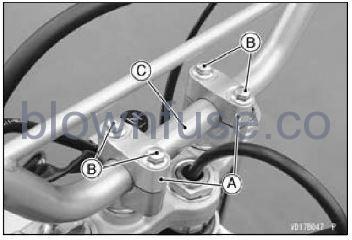
- A. Handlebar Clamps
- B. Handlebar Clamp Bolts
- C. Handlebar
- Loosen the handlebar holder nuts, and turn the handlebar holders 180°.
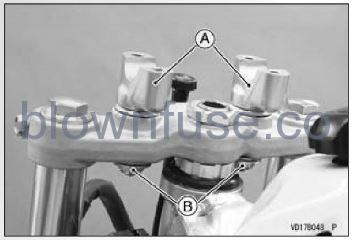 A. Handlebar Holders
- B. Handlebar Holder Nuts
- Put the handlebar on the handlebar holders.
- Install the handlebar clamps.
- Align the gap at the rear with the punch mark on the handlebar.
- Hand tighten the handlebar clamp bolts.
- Tighten the handlebar holder nuts to the specified torque.
Tightening Torque
- Handlebar Holder Nuts: 34 Nm (3.5 kgfm, 25 ft:lb)
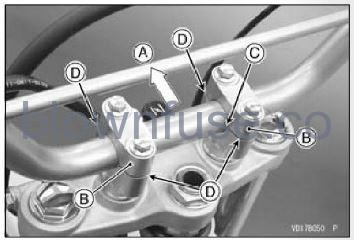
- A. Front
- B. Handlebar Clamps
- C. Punch Mark
- D. Gap
Tighten the front and rear handlebar clamp bolts equally. If the handlebar clamps are correctly in- stalled, there will be even gap on the front and rear side of the clamp after the bolts torqued.
Tightening Torque
- Handlebar Clamp Bolts: 25 Nm (2.5 kgfm, 18 ft:lb)
NOTE
- Tighten the two clamp bolts alternately two times to ensure even tightening torque.
- Check the front brake for the proper brake effect, or no brake drag.
- Reinstall the removed parts.

