2022 Kawasaki KLR650 Brake Light Switches
Brake Light Switches
Brake Light Switch Inspection
- Turn the ignition switch on.
- The brake light should go on when the front brake is applied.
- If it does not, ask your authorized Kawasaki dealer to inspect the front brake light switch.
- Check the operation of the rear brake light switch by depressing the brake pedal. The brake light should go on after the proper pedal travel.
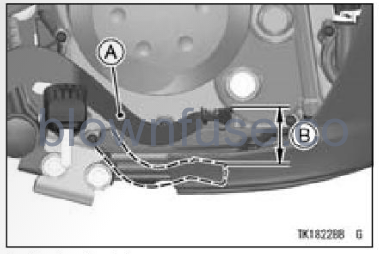 A. Brake Pedal
- B. 10 mm (0.39 in.)
- If the light does not come on, adjust the rear brake light switch.
Brake Pedal Travel
10 mm (0.39 in.)
Brake Light Switch Adjustment
- Remove the bolts, cover and collars.
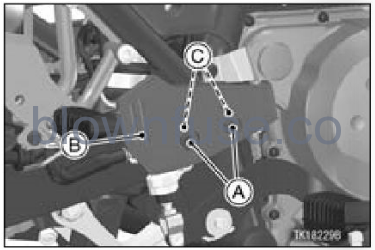 A. Bolts
- B. Cover
- C. Collars
- To adjust the rear brake light switch, move the switch up or down by turning the adjusting nut.
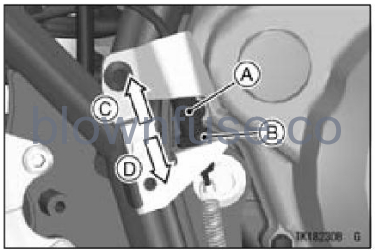 A. Rear Brake Light Switch
- B. Adjusting Nut
- C. Lights sooner
- D. Lights later
NOTICE
To avoid damaging the electrical connections inside the switch, be sure that the switch body does not turn during adjustment.
- Install the collars and cover.
- Tighten the bolts.
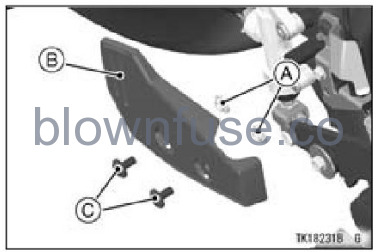
- A. Collars
- B. Cover
- C. Bolts
