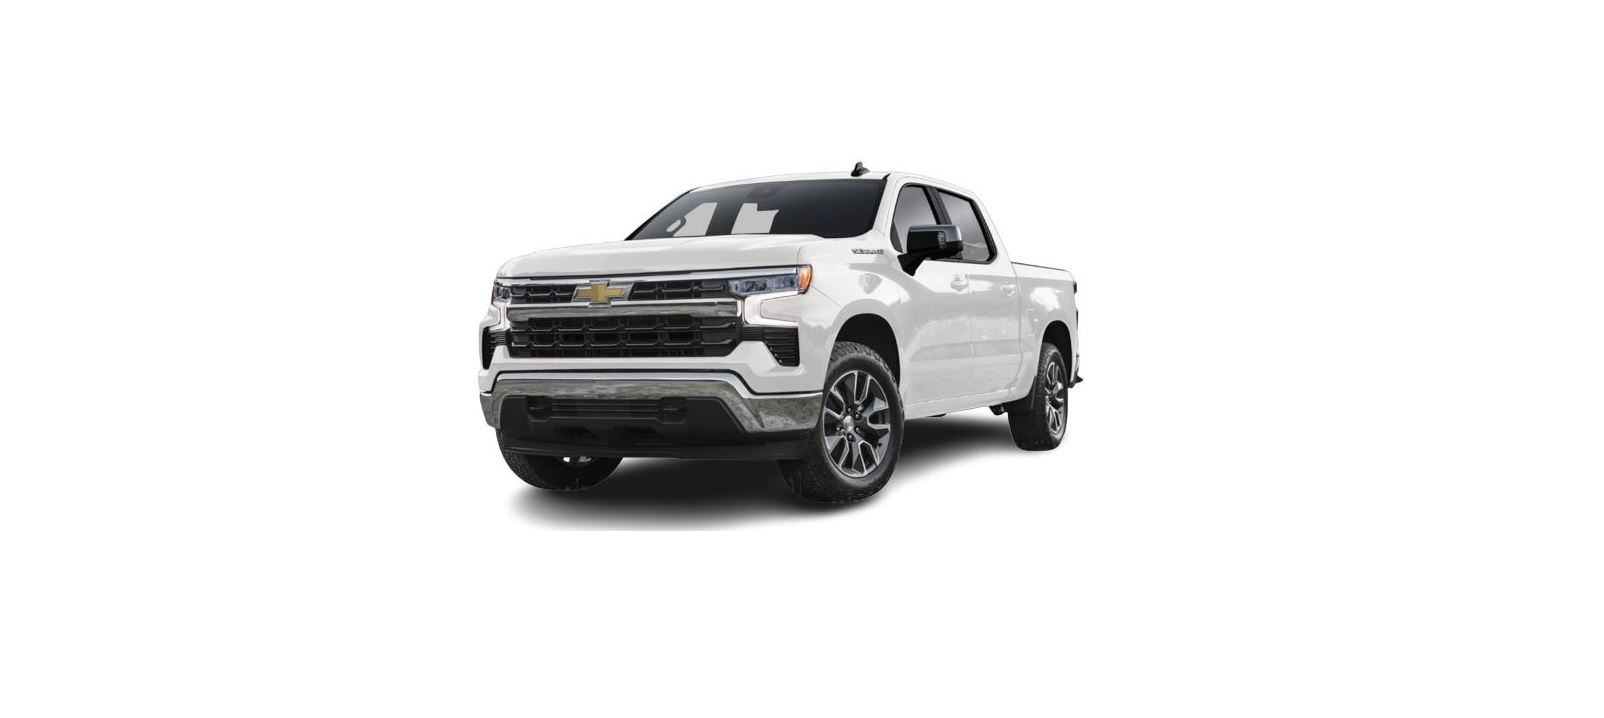
2022 Chevrolet Silverado 1500 Drive Systems User Manual


2022 Chevrolet Silverado 1500 Drive Systems


Four-Wheel Drive
If equipped, a four-wheel drive engages the front axle for extra traction. Read the appropriate section for transfer case operation before using.
Caution
Do not drive on clean, dry pavement in 4 m and 4 n (if equipped) for an extended period of time. These conditions may cause premature wear on the vehicle’s powertrain.
Driving on clean, dry pavement in 4 m or 4 n may:
- Cause a vibration to be felt in the steering system.
- Cause tires to wear faster.
Warning
If equipped with four-wheel drive, the vehicle will be free to roll if the transfer case is in N (Neutral), even when the shift lever is in P (Park). You or someone else could be seriously injured. Be sure the transfer case is in a drive gear — 2 m, 4 m, or 4 n — or set the parking brake before placing the transfer case in N (Neutral). See Shifting Into Park (Mechanical Shifter) 222 or Shifting Into Park (Electronic Shifter) 223.
Caution
Extended high-speed operation in 4 n may damage or shorten the life of the drivetrain.
- An engagement noise and bump is normal when shifting between 4 n and 4 m or N (Neutral), with the engine running.
- Shifting into 4 n will turn Traction Control and StabiliTrak/Electronic Stability Control (ESC) off. See Traction Control/Electronic Stability Control 0 243.
Automatic Transfer Case
Two-Speed Transfer Case
- If equipped, the transfer case controls are used to shift into and out of a four-wheel drive.
- To shift the transfer case, press the desired button. The graphic in the instrument cluster will flash while a shift is in progress.
- The graphic displayed will change to indicate the setting requested.
- When the shift is complete the graphic will stop flashing. The Driver Information Center (DIC) message turns off once the shift is complete. If the transfer case cannot complete a shift request, it will go back to its last chosen setting.
The settings are
- N (Neutral): Use only when the vehicle needs to be towed. See Recreational Vehicle Towing 0 408 or Towing the Vehicle 0 406.
- 2 m (Two-Wheel Drive High): Use for driving on most streets and highways. The front axle is not engaged. This setting provides the best fuel economy.
- AUTO (Automatic Four-Wheel Drive): Use when road surface conditions are variable. When driving in AUTO, the front axle is engaged, and the vehicle’s power is sent to the front and rear wheels automatically based on driving conditions. This setting provides a slightly lower fuel economy than 2 m.
- 4 m (Four-Wheel Drive High): Use this setting when extra traction is needed, such as when driving on snowy or icy roads, when off-roading, or when plowing snow.
- 4 (Four-Wheel Drive Low): This setting engages the front axle and delivers extra torque. Choose 4 n when driving off-road in deep sand, deep mud, or deep snow, and while climbing or descending steep hills. While driving in 4 n, keep vehicle speed below 72 km/h (45 mph).
Shifting into 4 will turn Traction Control and StabiliTrak/ESC off. See Traction Control/ Electronic Stability Control 243.
Shifts between 2m, 4 m, and AUTO
- Any of these shifts can be made at normal driving speed.
- The actual 4×4 shift request is only made after the button is released. The 4×4 graphic will remain to flash until the shift request has been completed. A DIC message displays to indicate that the 4×4 transfer case has been requested to shift to the new desired state.
- Once the 4×4 shift has been completed, the DIC message disappears, the 4×4 graphic stops flashing, and the current setting is indicated.
- When a shift to 2 m is completed successfully while in P (Park), the parking brake will engage. To resume driving, shift the transmission to the desired gear and manually release the parking brake or press the accelerator pedal to begin driving. See Electric Parking Brake 242.
- If equipped, use 4 n, AUTO, or 4 m to provide additional traction when parking on a steep grade with poor traction such as ice, snow, mud, or gravel.
Shifting Into 4
- The ignition must be on and the vehicle must be stopped or moving less than 5 km/h (3 mph) with the transmission in N (Neutral). It is best for the vehicle to be moving 1.6 to 3.2 km/h (1 to 2 mph).
- Press 4 n. The actual 4×4 shift request is only made after the button is released. The 4×4 graphic will remain flashing until the shift request has been completed. A DIC message displays to indicate that the 4×4 transfer case has been requested to shift to the new desired state.
- Once the 4×4 shift has completed, the DIC message disappears, the 4×4 graphic stops flashing and the current setting is indicated.
If the vehicle speed is higher when a shift request occurs, a DIC message displays. Reduce vehicle speed. If the transmission is not in N (Neutral) when a shift request occurs, a DIC message displayed. The vehicle will allow 20 seconds for the shift to occur. After this time, a graphic in the instrument cluster will indicate that the transfer case is in 4 n.
Caution
Shifting the transmission into gear before the requested mode indicator light has stopped flashing could damage the transfer case.
If the transmission is not shifted into N (Neutral) or the vehicle has not slowed to 5 km/h (3 mph) within 20 seconds, the transfer case will remain in its original state. This will be indicated in the instrument cluster. With the vehicle moving less than 5 km/h (3 mph) and the transmission in N (Neutral), attempt the shift again.
Shifting Out of 4
- The vehicle must be stopped or moving less than 5 km/h (3 mph) with the transmission in N (Neutral) and the ignition on. It is best for the vehicle to be moving 1.6 to 3.2 km/h (1 to 2 mph).
- Press 4 m, AUTO, or 2 m. The actual 4×4 shift request is only made after the button is released. The 4×4 graphic will remain to flash until the shift request has been completed. A DIC message displays to indicate the state of the request.
- Once the 4×4 shift has been completed, the DIC message disappears, the 4×4 graphic stops flashing, and the current setting is indicated.
- If the vehicle speed is higher when a shift request occurs, a DIC message displays. Reduce vehicle speed.
If the transmission is not in N (Neutral) when a shift request occurs, DIC messages will display. The vehicle will allow 20 seconds for this shift to occur. After this time, a graphic in the instrument cluster will indicate that the transfer case is in 4
Caution
Shifting the transmission into gear before the requested mode indicator light has stopped flashing could damage the transfer case.
If the transmission is not shifted into N (Neutral) or the vehicle has not slowed to 5 km/h (3 mph) within 20 seconds, the transfer case will remain in its original state. This will be indicated in the instrument cluster With the vehicle moving less than 5 km/h (3 mph), and the transmission in N (Neutral) attempt the shift again.
Shifting Into N (Neutral)
To shift into N (Neutral):
- Start the vehicle.
- Shift the transmission to N (Neutral).
- Shift the transfer case to 2 m.
- Apply the parking brake and/or brake pedal.
- Press 2 m five times in 10 seconds until the N (Neutral) graphic starts flashing in the instrument cluster. When the shift is complete, the graphic stops flashing. If the parking brake and/or brake pedal is not applied within 20 seconds, the transfer case will remain in its original state.
- If the transmission is not shifted into N (Neutral) or the vehicle has not slowed to 5 km/h (3 mph) within 20 seconds, the transfer case will remain in its original state. This will be indicated in the instrument cluster.
Shifting Out of N (Neutral)
To shift out of N (Neutral):
- Start the vehicle.
- Set the parking brake. See Electric Parking Brake 242.
- Shift the transmission to N (Neutral).
- Shift the transfer case to 2 m. Transfer case shifts out of N (Neutral) can only be made into 2 m. When the shift to 2 m is complete, the graphic in the instrument cluster will stop flashing. If the transfer case cannot complete a shift, the graphic will return to the previously selected setting
Single Speed Transfer Case
- If equipped, the transfer case controls are used to shift into and out of a four-wheel drive.
- To shift the transfer case, press the desired button. The graphic in the instrument cluster will flash while a shift is in progress.
- The graphic display will change to indicate the setting requested.
- When the shift is complete the graphic will stop flashing. The DIC message turns off once the shift is complete. If the transfer case cannot complete a shift request, it will go back to its last chosen setting.The settings are:
- 2 m (Two-Wheel Drive High): Use for driving on most streets and highways. The front axle is not engaged. This setting provides the best fuel economy.
- 4 m (Four-Wheel Drive High): Use this setting when extra traction is needed, such as when driving on snowy or icy roads, when off-roading, or when plowing snow.
- AUTO (Automatic Four-Wheel Drive) Use when road surface conditions are variable. When driving in AUTO, the front axle is engaged, and the vehicle’s power is sent to the front and rear wheels automatically based on driving conditions.
- This setting provides a slightly lower fuel economy than 2 m.
- Shifts between 2 m, 4 m, and AUTO Any of these shifts can be made at normal driving speed.
- The actual 4×4 shift request is only made after the button is released. The 4×4 graphic will remain to flash until the shift request has been completed. A DIC message was displayed.
- Once the 4×4 shift has been completed, the DIC message disappears, the 4×4 graphic stops flashing, and the current setting is indicated.
- The actual 4×4 shift request is only made after the button is released. The 4×4 graphic will remain to flash until the shift request has been completed.
- A DIC message was displayed. Once the 4×4 shift has been completed, the DIC message disappears, the 4×4 graphic stops flashing, and the current setting is indicated.
Recent Posts
VW Jetta Engine Fuse Box Diagram
Access the comprehensive 2010-2018 VW Jetta Passenger Fuse Box Diagram to troubleshoot electrical issues effectively.…
VW Jetta Passenger Fuse Box Diagram
Explore the comprehensive VW Jetta Passenger Fuse Box Diagram to troubleshoot electrical issues effectively. Understand…
2023 Ford F-150 Lightning Fuse Box Diagram
Under Hood Fuse Box Location Remove the front luggage compartment cover. Under Hood Fuse Box…
2022 Kawasaki NINJA H2 SX SE Brake Lever Adjuster Owner’s Manual
2022 Kawasaki NINJA H2 SX SE Brake Lever Adjuster Owner's Manual NOTICE Only adjust the front…
2023 Land Rover Range Rover Evoque Exiting The Vehicle Owners Manual
2023 Land Rover Range Rover Evoque Exiting The Vehicle SINGLE LOCKING WARNING Before exiting the…
2023 Land Rover Range Rover Evoque Front Seats Owners Manual
2023 Land Rover Range Rover Evoque Front Seats FRONT SEAT SAFETY Make sure to read…


