2022 XC90 Volvo Head-up-Display

Head-up display
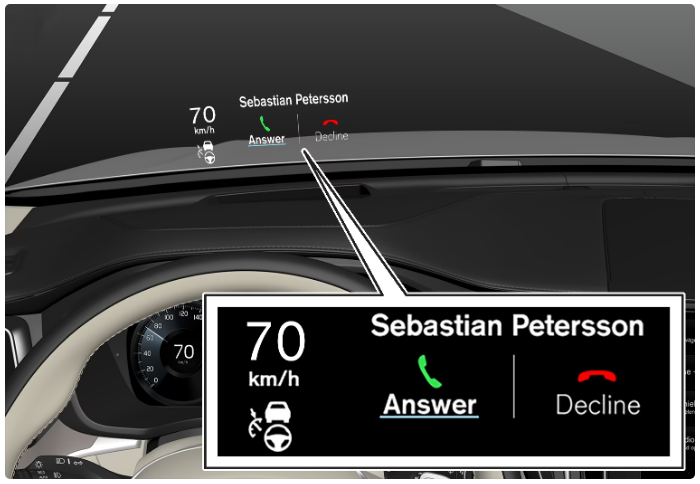 The head-up display shows warnings and information relating to speed, cruise control functions, navigation, etc. in the driver’s field of vision. Road Sign Information and incoming phone calls can also be shown on the head-up display.
- use of polarising sunglasses
- a driving position which means that the driver is not sitting centered in the seat
- objects on the display unit’s cover glass
- unfavorable light conditions.
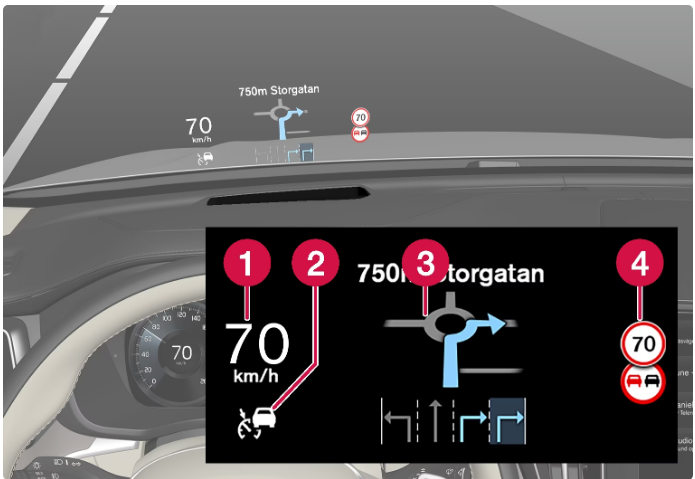 Examples of what can be shown in the display.
- Speed
- Cruise control
- Navigation
- Road signs
City Safety in the head-up display
In the event of a collision warning, the information in the head-up display is replaced by the warning symbol for City Safety. This graphic is illuminated even if the head-up display is switched off.
 The warning symbol for City Safety flashes in order to attract the driver’s attention if there is a risk of collision.
Symbols in the head-up display
A number of symbols can be shown temporarily in the head-up display.
| Symbol | Specification |
|---|---|
 |
Warning symbol – read the warning message in the driver display. |
 |
Information symbol – read the message in the driver display. |
 |
The snowflake symbol illuminates the event of a risk of icy conditions. |
Activating and deactivating the head-up display
- The head-up display can be activated and deactivated when the car has been started.
- Activate/deactivate the function in the center display’s function view.

- Press the Head-up Display button.
- The head-up display is activated/deactivated.
Settings for head-up display
Settings can be defined when the car has been started and a projected image is shown on the windscreen.
Selecting display options
- Select which functions are to be shown in the head-up display.
- Tap on Settings in the center display’s top view.
- Press .
Select one or more functions:
- Show Navigation
- Show Road Sign Information
- Show Driver Support
- Show Phone
The setting is saved as a personal setting in the driver profile.
Adjusting brightness and vertical position

- Press the Head-up Display Adjustments button in the center display function view.
- Adjust the brightness and vertical position of the projected image in the driver’s field of vision using the steering wheel’s right-hand keypad.
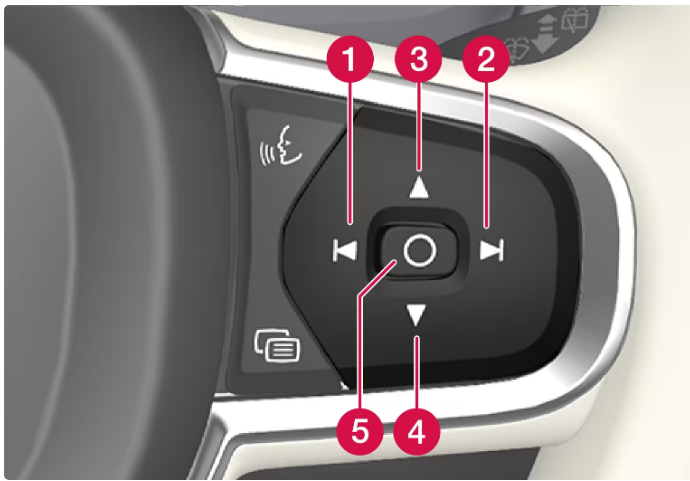
- Reducing the brightness
- Increasing the brightness
- Raising the position
- Lowering the position
- Confirm
- The brightness of the graphics is automatically adapted to their background light conditions.
- The brightness is also affected by the adjustment of the brightness in the car’s other displays.
- The height position can be stored in the memory function for the power front seat using the keypad in the driver’s door.
Calibrate the horizontal position
- The head-up display’s horizontal position may need to be calibrated if the windscreen or display unit is replaced.
- Calibration means that the projected image is rotated clockwise or anticlockwise.
- Tap on Settings in the center display’s top view.
- Select .
- Calibrate the image’s horizontal position with the steering wheel’s right keypad.
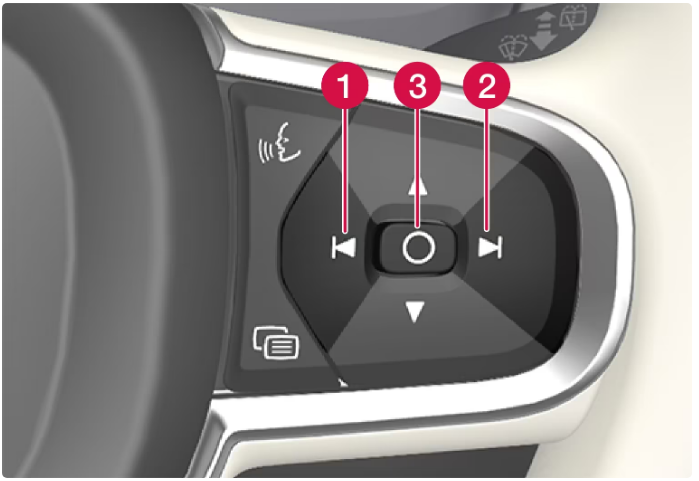
- Rotate anticlockwise
- Rotate clockwise
- Confirm
Cleaning the Head-up display
- Gently wipe the display’s cover glass with a clean and dry microfibre cloth.
- If necessary, lightly moisten the microfibre cloth.
- Never use strong stain removers.
- A special cleaning agent available from Volvo dealers can be used for more difficult cleaning.
Using a stored position for the seat, door mirrors, and head-up display
Using a stored setting
A stored setting can be used with the front door either open or closed:
Open front door
Press one of the memory buttons 1 – 3 with a brief touch. The power seat, door mirrors, and head-up display move and then stop at the positions stored in the selected memory button.
Closed front door
Hold one of the memory buttons 1 – 3 depressed until the seat, door mirrors, and head-up display stop in the positions that are stored in the selected memory button.
If the memory button is released, the movement of the seat, door mirrors, and head-up display will be stopped.
- Because the driver’s seat can be adjusted with the ignition off, children should never be left unattended in the vehicle.
- Movement of the seat can be STOPPED at any time by pressing any button on the power seat control panel.
- Do not adjust the seat while driving.
- Make sure there is nothing under the seats when they are being adjusted.
Storing position for seat, door mirrors, and head-up display
Store three different positions for the power seat, the door mirrors, and the head-up display using the memory buttons. The buttons are located on the inside of one of the front doors or both.
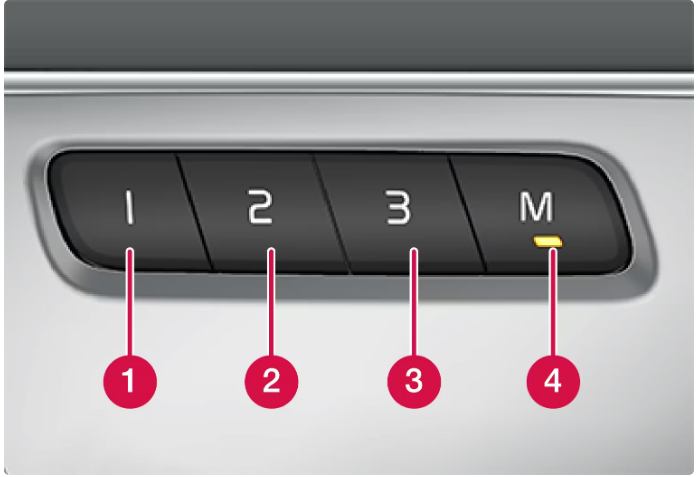
- Memory button.
- Memory button.
- Memory button.
- Button M for storing settings.
Storing a position
- Adjust the seat, door mirrors, and head-up display to the desired position.
- Press and hold the M button depressed. The light indicator in the button illuminates.
- Within three seconds, press and hold the 1, 2, or 3 buttons.
- When the position has been stored in the selected memory button, an acoustic signal can be heard and the light indicator in the M button extinguishes.
- If none of the memory buttons is depressed within three seconds then the M button extinguishes and no storing takes place.
- The seat, the door mirrors, or the head-up display must be readjusted before a new memory can be set.
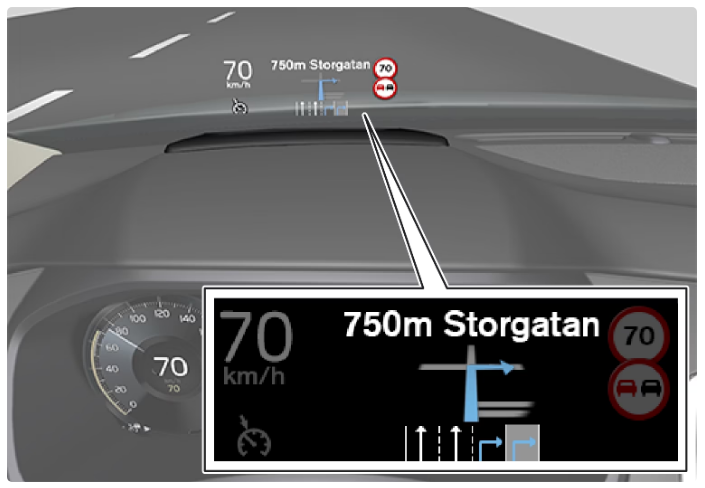 The navigation system on the windscreen.
- The driver can receive guidance and information from the navigation system in the head-up display at the bottom of the windscreen.
- Whether or not the navigation system should be shown in the head-up display can be set, as well as the position of the information field.