2023 Volvo V60 Head-up display
Head-up display
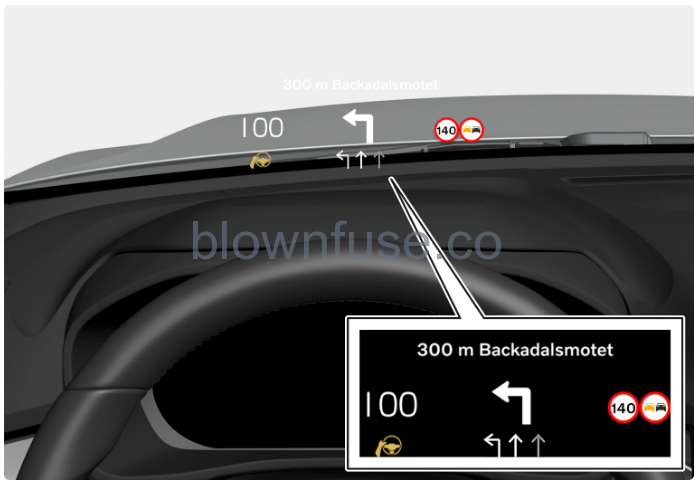 The head-up display projects information from the driver display onto the windscreen in front of the driver. The information can only be seen from the driver’s position.
Examples of information that can be shown:
- cruise control
- speed
- navigation
- telephone call
- traffic sign information
- warnings
Activating and deactivating the head-up display
- Press

- Select Controls.
- Under Displays, activate or deactivate the Head-up display.
Note
The driver’s ability to see the information in the head-up display is impaired by the following
- use of polarising sunglasses
- a driving position which means that the driver is not sitting centered in the seat
- objects on the display unit’s cover glass
- unfavorable light conditions.
Important
The display unit from which the information is projected is located in the instrument panel. To avoid damage to the display unit’s cover glass – do not store any objects on the cover glass and make sure that no objects fall down onto it.
Note
Certain visual defects may cause headaches and a feeling of stress during the use of the head-up display.
Settings for head-up display
System settings
Settings can be defined when the car has started and a projected image is shown on the windscreen.
- Press

- Select Controls.
- Select the setting to be adjusted under Displays.
Click on the setting to be adjusted.
You can use the steering wheel’s right-hand keypad to adjust position or brightness.
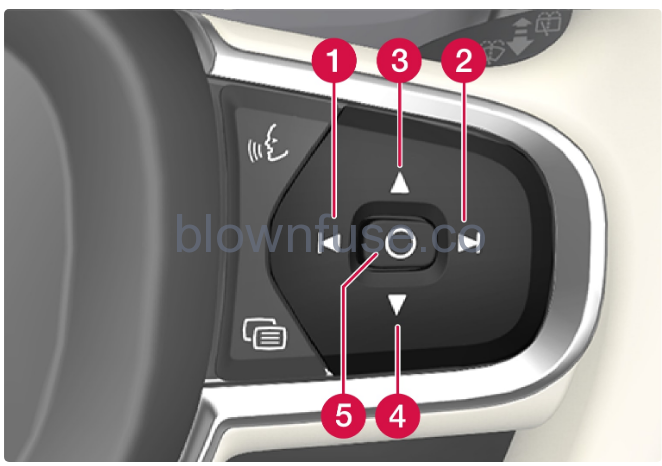
- Reducing the brightness
- Increasing the brightness
- Raising the position
- Lowering the position
- Confirm
Rotation
The display may need to be rotated when replacing the windscreen or display unit.
Click on the setting to be adjusted.
You can use the steering wheel’s right-hand keypad to rotate the display.
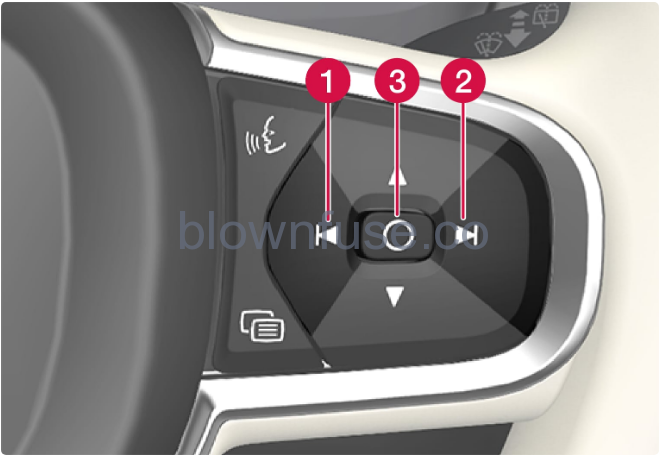
- Rotate anticlockwise
- Rotate clockwise
- Confirm
Cleaning the Head-up display
Never use strong stain removers. A special cleaning agent available from Volvo dealers can be used for more difficult cleaning.
Using a stored position for a seat, door mirrors, and head-up display
Using a stored setting
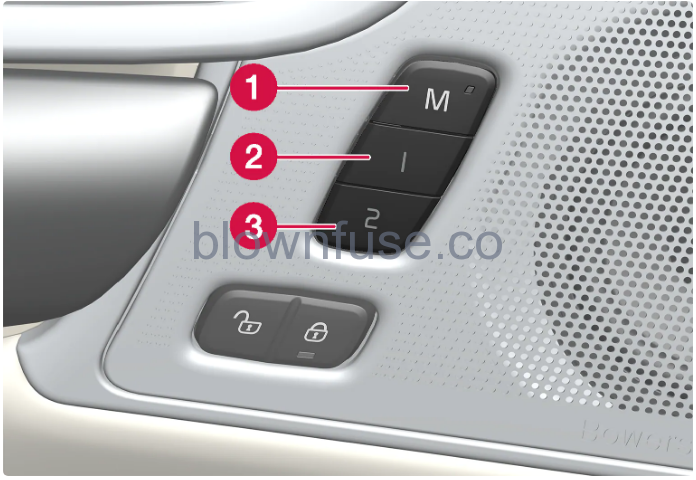 A stored setting can be used with the front door either open or closed:
Open front door
Depress one of the memory buttons 1 (2) or 2 (3) with a short press. Power seat, door mirrors, and head-up display move and then stop at the positions stored in the selected memory button.
Closed front door
Hold one of the memory buttons 1 (2) or 2 (3) depressed until the seat, door mirrors, and head-up display stop in the positions that are stored in the selected memory button.
If the memory button is released, the movement of the seat, door mirrors, and head-up display will be stopped.
Warning
- Because the driver’s seat can be adjusted with the ignition off, children should never be left unattended in the vehicle.
- Movement of the seat can be STOPPED at any time by pressing any button on the power seat control panel.
- Do not adjust the seat while driving.
- Make sure there is nothing under the seats when they are being adjusted.
Note
The stored positions are saved in the active profile.
Storing position for a seat, door mirrors, and head-up display
Store two different positions for the power seat, the door mirrors, and the head-up display using the memory buttons. The buttons are located on the inside of one of the front doors or both.
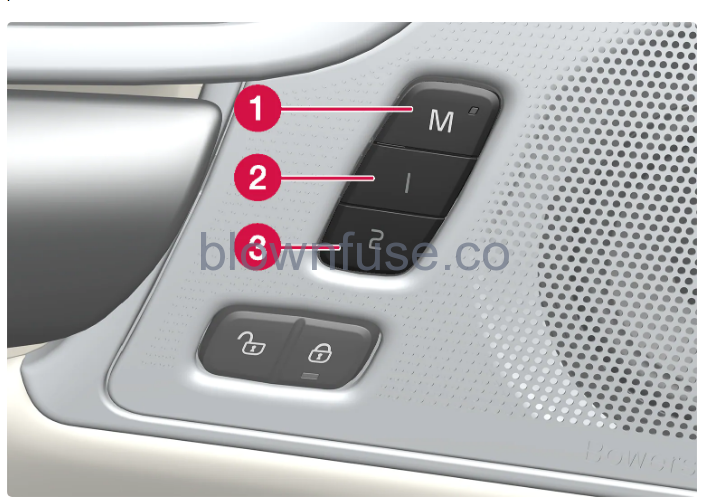
- Button M for storing settings.
- Memory button.
- Memory button.
Storing a position
- Adjust the seat, door mirrors, and head-up display to the desired position.
- Press and hold the M button depressed. The light indicator in the button illuminates.
- Within three seconds, press and hold the 1 or 2 buttons.
When the position has been stored in the selected memory button, an acoustic signal can be heard and the light indicator in the M button extinguishes.
If none of the memory buttons is depressed within three seconds then the M button extinguishes and no storing takes place.
The seat, the door mirrors, or the head-up display must be readjusted before a new memory can be set.
Note
The stored positions are saved in the active profile.
